Category: Homemaking

  • Laundry Soap Evolvement

    My whole relationship with laundry soap has been one of evolvement. Yep, I evolve in what is important and what is not to where finally I arrive at just the right place. I have “arrived” at my current laundry soap status for over 2 yrs and I think I am sticking with it.

    Over 6 yrs ago, I went chemical free in our home to minimize any chemicals and to abolish potential health issues associated with toxins in cleaning supplies. The change in the health of one of our children was so major that he was released from a pulmonologist within the month of going chemical free with cleaners in the home. Basic cleaners in the home evolved to many areas in the home. Where I am today is on a soap box talking laundry detergent and cleaning simplicity and safety with children: Nowex Ultra Power Plus Laundry Detergent, Norwex Enviro Cloths and a basic spray: 50/50 water and vinager spray with Tea Tree oil as my fragrance of choice and the natural properties of disinfection. Growing up I was trained that a bathroom smelling like “pine” meant clean, so I trained myself to smell Tea Tree and have the same satisfaction.  Plus it insures that my kids really did clean the toilet!

    Over the last six years I have left couponing for laundry soap.

    I have made several homemade solutions.

    And I have tried most everything with a “natural, dye free, no fragrance” label

    I was never hugely ” Wow’d” to the point where I felt I arrived.

    I “arrived” by a friendly twisting of the arm by a friend. She knew I had a front loader washer and that with Norwex you can get 120 loads out of a $20.99 bag of Ultra Power Plus Laundry detergent. Yes, even with a top loader, you can get 120 loads~ just add a magnet ball.  So to get her to stop twisting my arm, I bought a bag….. and folks, I’ve never looked back! Our clothes are clean, they smell fresh, and I save a bundle by using 1tsp of soap per load.

    Using Ultra Power Plus Laundry Detergent by Norwex does several things for me: Satisfies me with the stain remover properties, the cleanliness and smell, hits a right price point at $ .17/ load as compared to $ .20-$ .35/load, AND it is biodegradable with no fillers so it is safe for our wetland septic system. Oh- did I say it doesn’t have synthetic fragrances which are one of the top toxins(ponder your dryer sheets, laundry soap, cleaners, etc.) in the home?


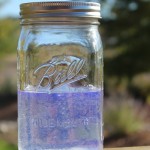
    See the comparison. I spoke to a group of ladies a few months ago in regard to going chemical free and training your children to clean safely. This visual alone blows me away as it is almost  30 days old. The “Clear” is Norwex Ultra Power PLus, the “cloudy one” is a major market brand that claims being “free” with dyes and fragrances, but nothing about fillers, and the “blue, cloudy one” is again a major market brand with other items added for the sport enthusiast. I know which one I am picking!

    Happy Laundry Days, Kathy


    If you need arm twisting let me know! Otherwise check out some of the current specials:


  • Homemade Bone Broth


    Recipe for homemade Turkey Broth


    Ingredients

    • bones of 1 whole turkey
    • gizzards and neck from turkey (optional but more nutritious)
    • Turkey feet, peeled and talons removed (optional, but if you get past the less than pleasant appearance, they are loaded with gelatin!)
    • 1 large onion, coarsely chopped
    • 2 carrots peeled, coarsely chopped
    • 2-3 stalks of celery, coarsely chopped
    • scraps of miscellaneous vegetables like carrot tops, leeks, parsley, ends of other vegetables (reduces waste and adds nutrition)
    • 2-4 garlic cloves
    • 1 tablespoon whole black peppercorns
    • 2-3 bay leafs
    • 2 T apple cider vinegar


    Instructions

    1. Separate bones into several pieces and place all remaining ingredients in large stock pot, Dutch oven or slow cooker.
    2. Fill with cold filtered water.  This is important; starting with cold water is essential.  As the water warms up, the fibers start to release all their flavors and let’s face it, it is all about the flavor, right!  The vinegar will help impart the vitamins and minerals.
    3. Set on medium-high and bring to a low boil.  Remove any scum that forms on the surface (this scum will take away from all that flavor).
    4. Cover and reduce to a low simmer for 6-24 hours.  Longer equals more flavor and nutrition.
    5. Let cool and strain with fine mesh strainer.  Compost the vegetable scraps, the bones can be frozen and used again later.
    6. Refrigerate and remove any hardened fat on top.  You know if have a good batch if it congeals like Jello!  Use in 3 days or put in pint or quart jars, bags, containers and freeze, then use for future recipes.
    7. Sea salt to taste afterwards.


    Benefits of homemade bone broth

    Before our culture became the fast food nation that buys everything boneless and in a neat package, people got their meat from a butcher who sold it to them on the bone.  Our thrifty ancestors used every part of the animal and especially the bones.  In some villages, the bone would be passed from house to house every night to be put into the family’s soup pot until it was used up.  People would make broth and stock out of the bones to use to make other meals or to flavor their whole grains.

    Chicken broth using chicken feet

    Meat and fish stocks are used traditionally in almost every culture in the world.  However, they have almost entirely disappeared from our modern American family kitchen as all of our food has become so processed and “fast.”  This is really a shame because it is so delicious, very easy to make and has incredible health benefits.

    Bone broth is very easy to make.  It takes time to cook it, but you can make a lot of it at one time and freeze it for use as a base for soups, stews and whole grains; or just consume it by itself for a quick and healthy snack or meal.

    The main components of bone broth are cartilage, bone marrow, amino acids, collagen and gelatin, and minerals. Cartilage is formed from collagen and elastin proteins and contains glycosaminoglycans (GAGs), chondroitin sulfate, keratin sulfate and hyaluronic acid.  It can be used to treat arthritis, degenerative joint disease, inflammatory bowel disease and will boost your immune system.

    You have probably heard of the supplement Glucosamine Chondroitin.  Lots of people take it to alleviate joint pain.  Usually the pill is made up of about three of the most common types of glucosamines.  However, there are over 100 kinds that exist in natural cartilage and when you make bone broth, these are released and you get the extra benefits of these (especially when you use knuckles, feet and ribs to make your broth).

    Bone marrow is an important source of immune support factors and nutrition in the bone broth.  There is research that suggests that it boosts immunity and reduces inflammation; so there may be something to the legend of Grandma’s cure-all chicken soup, after all!

    Chicken (or Turkey) feet make great bone broth

    Glycine and Proline are amino acids that are present in traditionally-made bone broth.  Glycine is an amino acid that is essential for the production of other amino acids.  Proline is an amino acid that is used in the structure of collagen (essential for firm skin, ladies!) as well as for bones, ligaments, skin and cartilage.

    Collagen makes up about 25% of the protein in the body.  There are fifteen types of it.  It is the same as gelatin.  Gelatin usually refers to extracted collagen.  Collagen is what it is called when in the bodily form.  Most processed commercial gelatin is made from animal skin and contains MSG.  But homemade bone broth has a much more nutritious (and delicious!) gelatin that has lots of different minerals and amino acids.

    The biggest benefits from collagen and gelatin are its soft tissue and wound healing properties.  It also aids in healing cartilage and bones.  Basically, what’s inside and around the bones heals our bones and tissues.

    Cooking the bones releases the nutrients into the broth

    You have probably also heard how our modern foods are insufficient in minerals due to our depleted soils.  Never fear!  Real bone broth is here!  Bone broth is an excellent source of calcium and phosphorus.  It also contains magnesium, sodium, fluoride, sulfate and potassium.  So, no need to run out and buy those expensive bottles of trace minerals if you are consuming your traditional bone broth.


    This article is contributed by Hans Taub, a life long friend of the Urban Homemaker who is currently pursuing his Nutritional Therapist Certification with the Nutritional Therapy Association; a holistic nutrition program promoting a diet of nutrient-dense whole foods that are properly prepared.


  • Pumpkin Spiced Latte: for Free!

    I have figured out the best way to keep my house picked up and to have the occasional “Pumpkin Spiced Latte”- for free! A friend just emailed out that the wonderful fall spiced latte is back in town!


    Well then, I must explain, so you, Ms Urban Homemaker, may enjoy one too!

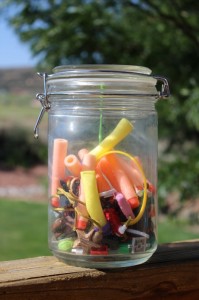
    The Jar: Plain, Simple, and brimming with items with a $.25/ea bounty on their heads.

    At the end of most days or at least an hour or so after the first and only warning I might give to the collection of nick-knack toys here and there on the floor, I go hunting! I pick up handfuls of little toys that are my eye sore or end up in my sweeping pile- OR the very toys I step on barefoot in the dark no less and I place said items into the jar.
    The jar collects many wonderful items! They gleam from the glass! They call to their owners who long ago forgot to put them in their place! The guilty party in this house happens to be a trio of 8 yr olds who can and do forget to pick up after themselves.

    Fast forward days or weeks later and a bit of the jar catches their eyes. They know the jar can’t be opened without ransom. So the prized, long, lost item is found and the $.25 ransom is paid. Often I get generous (especially when I know a Nerf gun fight is being prepped for) and hold a 5 for $1 sale. Oh my boys love this; I made, literally $5.75 last week.

    Bottom line: Yes, I occasionally reward my efforts and my cleaner home with the occasional well desired Pumpkin Spiced Latte, but it also is a nice way to return the cash back to the kids by offering them to work a chore for money. That money can and does go around and around, but man, I hold out for the latte.. especially now that I heard they are back in town and I have a long night ahead.

    ~I will warn.. The ransom payment is often painful for the guilty, so ransom cash flow happens not too often, but when it does, may you enjoy!

    Kathy


  • Potato Tradition

    Every 2nd week of a new school year we find ourselves mourning the almost gone summer months.

    Every 2nd week of a new school year it is time to break the mold and HARVEST POTATOES!

    I love harvesting potatoes and you know my kids do too. Their motivation and attitude quickly changes and we find ourselves in the almost sleeping garden full of produce which needs preserving and picking.  My little ones left their desks with Language Arts complete only to be told to head to the garden.

    What For?

    For a potato adventure!  ~ and Science for the day!

    As we dug through the dirt I tried impressing upon them the slang phrase “pay-load!” But in their sweet way I heard shouts of “Hay-load! Hay-load!” every time I forked up a clump of dirt only to find a “pay-load” of potatoes!

    I can’t say whole heartedly that I am looking forward to the next season, but boy! ~ this is truly a tradition that is in its 3rd year. It really is in the
    little things that memories are made and looked forward to the next time.


    So the next time:  Let’s just say that this particular son has prepared the soil for a winter harvest and he has already asked me to pick up a bale of straw. I just think we might get behind that idea and make another tradition: Winter Potato Harvest.


    For Now, enjoy your harvest & hope it is a potato harvest!


    Kathy


  • So What’s in Your Mattress?

    Did you know the typical mattress gains 10 –20 pounds over its life because your home contains millions of dust mites and their fecal matter live in mattresses, furniture, carpet, and children’s stuffed toys?  Not a very pleasant topic but there is an easy, safe solution to a nasty household problem.

    Here’s the scoop:

    Dust mites are microscopic. About 50 of them can fit on the head of a pin. They  feast on the fungus that grows from dead skin cells and animal dander.

    On average, one dust mite produces 20 fecal pellets daily. These droppings are the most  common cause of dust-related allergies and asthma.

    Dust mites product 200 times it’s body weight in excrement during their normal life span. They can live without food for up to a year.

    The average life cycle for a male house dust mite is 10 to 19  days and a female house dust mite can last up to 10 weeks, laying 60 to 100 eggs in the last 5 weeks of her life. In her average life span, she will produce approximately 2,000 fecal particles.

    Their favorite breeding spots are:
    • Beds
    • Vehicle seats
    • Pillows
    • Pet beds
    • Comforters
    • Sofas
    • Stuffed toys
    • Anywhere organic material collects
    • Upholstery

    Mattresses and upholstery  are warm, often moist, cozy, easy to burrow into environments filled with the dust mites  choice of food…dead skin cells.  Unfortunately dead skin cells do not readily vacuum away or launder well on upholstered furniture, mattresses, pillows etc.

    The fecal matter of dust mites is lighter than air and becomes airborne when disturbed by activity like fluffing pillows and tossing and turning during the night and especially disturb those prone to allergies and asthma.

    I think you will pleased to know that Norwex Mattress Cleaner is a natural product which contains non-pathogenic microorganisms that are the active ingredients.  These microorganisms do not cause disease but instead they are good bacteria and they work to “eat up” all the accumulated dander, dead dust mites, and dust mite fecal matter that has accumulated in the mattresses, pillows, upholstery, etc. and convert it into carbon dioxide and water

    This spray leaves no residue.  Some people who have used this product have reported the elimination of snoring, reduction in the severity and frequency of asthma, eczema, bronchitis, rhinitis, morning sneezes, itchy eyes and blocked nasal passages and even improved sleep!

    The Mattress Cleaner Spray only needs to be used quarterly (more often if you have severe allergies).  Use approximately 5 sprays for a twin mattress, 8 sprays for a double, 12 sprays for a queen/king size bed, 1-2 for a pillow, 2 sprays for stuffed animal and 5 sprays on fabric upholstered sofas.

    What a simple, healthy solution to a nasty topic.  Try it today!

  • Busy Mom Bread Making Solution #2

    It is 93 degrees in beautiful western Colorado and I have no bread to feed 3 hungry children. Did I say I was busy? Yes, adding work into my normally busy day has made me rethink a few things.  So, might I share a few solutions for such a time as this?

    • Solution #1- buy store bought. Ugh I feel like a failure to do so…. ( go with Solution #2)
    • Solution #2- make your own!
      • Use what you have! I have an old bread machine. Time to let it work while I work!
      • Get a new recipe and try it!
      • Utilize the Sun Oven– keep the kitchen cool! Keep Mama cool! Have Sun Oven pay for itself! – all pluses!


    Homemaker Help

    I have a dear friend Chris, who has a wonderful, delightful, young adult daughter, Heather. Heather shared a bread recipe that we devoured in less than a minute after it came out of the oven the last time I was at their ranch. I noticed they have their “old” bread maker work for them with the quick dough prep while they run their Rocky Mountain Christian Filmmaker’s Camp,  www.ChristianFilmmakersCamp.com.  So I followed suit since I didn’t want to go with solution #1. I went with using what I had and feeling good for doing so.

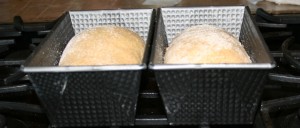
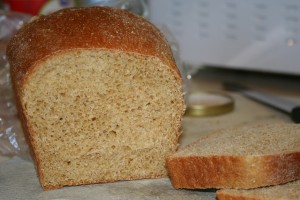
    I put the recipe into my bread machine as stated below and I ran errands. As I walked into the house with arms full of groceries, etc. the timer went off and I was able to take the dough, punch it down and put it into 2- 8″ bread pans. I proceeded to preheat the Sun Oven while I put groceries away and in 10 min or so the dough was at the height recommended by Sun Oven. I spritzed the bread tops with water ( to get a brown top), put the loaves into the Sun Oven and went back to fixing lunch, etc. 40ish minutes later- fresh bread! I made this recipe yesterday in a very hot kitchen (due to my oven being on)  on a 90 degree day and made a resolution right then and there to bake in the Sun Oven for the summer.

    Heather’s Bread Recipe

    by Heather Lawrence, Co-Chef, Main- Baker, Tasty Sweet Maker of the Rocky Mountain Christian Filmmaker’s Camp.  Thank you !!!

    • 3/4 c warm milk, buttermilk, kefir (Kathy used powdered milk : see note of being busy above!)
    • 1/2 c warm water
    • 2 eggs
    • 4 c wheat flour  (can use part white, part wheat flour) (Kathy used our Hard White Wheat)
    • 2 Tbsp olive oil
    • 2 Tbsp honey (approximately – I don’t measure this, but I don’t use all that much)
    • 2 tsp salt
    • 2 Tbsp Vital Wheat Gluten
    • 2 tsp yeast
    For the Sun Oven: Dough must be up to 1/2″ from top of bread pan.

    Put ingredients in bread maker in order listed on dough cycle. At the end of the 90 minutes, shape into two 1 lb loaves, let rise until double (approximately 45 minutes), then bake at 350 for 25-30 minutes.

    If you are using a Sun Oven.. Allow only to rise to 1/2″ of the top of the bread pan- @10 min. Then into the Sun Oven for roughly 40-60min. My Sun Oven today ran at 300 degrees. Other days I would just watch it as it can be 375 degrees and of course would bake that bread ASAP! So adjust to where you are! Nice thing is Sun Ovens don’t burn!

    I bet this recipe will do well in a mixer too! Give it a try!- but if you have an old bread maker, make it work while you work when you need a little extra help! For the record- This bread is so YUMMY! Perfect for sandwiches.

    Optional Helpers: Dough Enhancer, Bread Bags, Bosch Mixer , Grain Mills

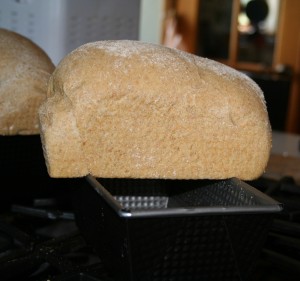
    Breads will have a lighter color in the Sun Oven.
    Same recipe, same pan, baked in kitchen oven.


  • Solar Cooking Tips from a Pro

    Written by Marilyn

    My friends Tara Miller and Sam Brown have compiled numerous practical tips including a Five-Day Kitchen Diary to make cooking in the Global Sun Oven successful and fun.  Sun Ovens are the perfect way to keep a kitchen cool while reducing energy consumption during the hottest days of summer.

    Ed Note: They have been cooking most of their food in their Global Sun Oven year- around for 20 years even here in the coldest part of a Colorado winter.  They enthusiastically recommend Solar Cooking to everyone and practice what they preach as they own four sun ovens and have traveled to Peru to teach natives how to cook in it.

    What can you cook in a solar oven?
    A solar oven allows you to prepare a wide variety of high quality foods including vegetables, soups, stews, beans, desserts, breads, cakes, meats and more.

    Getting Started Basics:

    • Use black or dark cooking pots or cast iron.
    • Brush oil on fresh meat to assist with browning.
    • Soak dried beans, lentils, or grains in water overnight.
    • When cooking dry foods such as rice, use slightly less water than usual.
    • To cook vegetables: Preheat your dark pot that has a cover and use a small amount of water, about 1/3 cup. This accelerates the cooking process and also preserves vitamins. A covered pot keeps the moisture and heat in the pot.
    • For soups and stews:  Don’t put too much in one pot. It’s better to use two smaller pots.
    • Plan on a little more time to cook than for conventional stove top or oven baking.
    • Use a sunny, south facing location. Plan for a convenient shelter nearby such as a deck.
    • Prop the oven toward the sun so the sunlight strikes the glass at 90 degrees and adjust the oven toward the sun every 30 to 45 minutes for maximum temperature.
    • Best cooking hours are 10:00 am to 3:00 pm. but longer in the summer.
    • A folded towel placed over the glass when the food is done will hold food warm for a couple of hours.

    Baking Tips:  Baking normally will take longer than baking in a conventional oven.  For cornbread, preheat a cast iron skillet or baking pan for a crispy crust. For cakes, yeast breads or baked potatoes, wait for a clear day so you can keep the heat high and consistent.  Quick breads have been most reliable for me.  Yeast breads baked in smaller, darker colored baking pans bake best in the Sun Oven. These are a favorite bread pan.

    Stove Top Cooking Tips: Start the liquids heating up in the cooker ahead of time, or bring water or other liquids to a boil on a conventional stove top and then put the pot in the cooker. Also, preheat the cooking pot; the lid, and the rocks to keep the heat up.

    Lower temperature or simmering Tips: Adjust the Sun Oven slightly away from the direct sun. Simmering can happen even if the day is slightly overcast.


    Cooking while you’re away from home: Put your food (say a pot of seasoned, pre-soaked beans) in the well-propped cooker, adjusted for noon. Enjoy the satisfaction of coming home to a solar cooked meal ready to serve.

    Quick and Easy Ideas for a busy day:  Bake extra potatoes for frying later, cook chunks of squash, whole chicken, burritos, frozen foods, and precooked entrees.

    Diary From a Northern Hemisphere Kitchen by Tara Miller

    WEDNESDAY:

    Roast chicken in solar cooker. Dust a little paprika on top so the chicken isn’t so white. This will enhance the color to the surface of the meat. Place potatoes and carrots or other vegetables alongside the chicken for the last 20 minutes or so.  Refrigerate or freeze select meat (such as the breast meat). We ate with our fingers and feasted on the chicken, saving the bones and skin for soup stock.

    THURSDAY:

    Boil leftover chicken bones several hours or more to make stock. Adjust cooker regularly to keep it simmering.

    Lunch: Cold, diced chicken breast salad or sandwiches from yesterday’s leftovers.

    Supper: Chicken Soup: In the late afternoon,: strain and discard the bones, skim fat (Refrigerate or freeze part of broth for future use). Return about a quart of the broth to the cooker and add 1/4 cup barley, cook at least an hour. About 45 minutes before supper time add other vegetables: onion, garlic, carrots, green beans; later, add chopped chard. Season at the last minute with garden sage, thyme, salt.

    FRIDAY:

    Lunch: leftover soup, either cold or warmed in cooker.

    Midafternoon: Start the rice: bring 4 cups salted water to a boil in an oversized kettle  (the extra space will serve as a steamer later) in the solar cooker, add 2 cups brown rice. Position in slightly advanced to sun perfect position* and rice will cook with no further attention.

    Supper: When the rice is nearly done place quick cooking vegetables such as edible pea pods and chopped greens to steam on top of the rice and cover. To serve: Skim vegetables off the top of the rice and season creatively: Try garlic, olive oil and basil, or chutney, or plum sauce or whatever you have on hand.

    SATURDAY (This is a busy day diary and presumes the use of more than one cooker.)

    Early:     Set cookers in position facing where the sun will first strike.  Place an empty cast iron kettle with cover in one cooker to preheat for potatoes later.

    Breakfast: Leftover rice from the bottom of yesterday’s kettle. Fix it the way you eat your breakfast oatmeal or cold cereal with cream or yogurt, butter, maple syrup, brown sugar, nuts, dried fruits etc.

    Midmorning: Scrub potatoes and place in hot, preheated kettle or cast iron pot. Position in slightly advanced to sun perfect position* and potatoes will cook with no further attention.


    Lunch: Remove the hot baked potatoes. Leave kettle in cooker, readjust the solar cooker for full sun power. Eat baked potato bar with your favorite toppings such as bacon bits, shredded cheese, butter, chives, etc. Cool the rest of the potatoes and refrigerate. Leftover potatoes will be used either grated for breakfast hashbrowns and eggs, or made into potato salad later in the week.

    Throw corn on the cob in the kettle. This was tough corn, so I husked it and left the cooker at sun perfect position* so it would cook for about 45 minutes. Other options for afternoon cooking in that preheated kettle: whole beets, or  soup.

    * Sun-perfect position has the glass tilted exactly perpendicular to the angle of incoming sun light and with the shadow symmetrical behind the cooker. “Advanced” to sun perfect position has that shadow set so that “sun-perfect position” will come in about 20 minutes. My Sun Oven will bake at peak temperatures for 45 minutes to an hour with no further adjustments starting from this advanced position.

    SUNDAY

    Our little cherry tree has one final picking of sour red pie cherries. We preserved some of them by canning in the solar cooker.   Canning in a solar cooker is considered an advanced skill recommended for experienced solar oven enthusiasts only.  So I have not included the instructions.  If you want more information, please email me at marilyn@urbanhomemaker.com

    Cherry Cobbler

    Place four cups of juicy cherries in the bottom of black enamel 8 x 12 baking pan. For a festive touch, save out a handful to decorate the top.

    Stir into cherries either 2 tablespoons corn starch or 2 tablespoons quick cooking tapioca. If using tapioca, let it sit for at least 15 minutes.

    Mix crispy crust by:

    Cream together 1/2 cup butter with 3/4 cup brown sugar

    Sift together in a small bowl:

    1 cup flour

    1/4 teaspoon baking soda

    1/4 teaspoon baking powder

    1/4 teaspoon salt

    Mix flour mixtures with the butter/sugar mixture, then add:

    1 cup oatmeal


    Stir well and spread over the top of the cherries. Just for fun make a little drawing on top of the crust with the saved cherries. Consider that the dark color of the cherries may encourage more efficient absorption of solar radiation.

    Optional version is to put the entire crust UNDER the cherries. Be sure to soak the tapioca in the cherry juice at least 15 minutes:  Use 1 1/2 Tablespoons quick-cooking tapioca for each 1/2 cup juice.

    Best of all, Have Fun with your Global Sun Oven!
  • Coconut Oil is Queen Among Saturated Fats

    Since I have had several inquiries, recently, I wanted to explain how I use coconut oil, the benefits of using coconut oil in everyday cooking and baking, and a few reader testimonials.

    I first discovered that Coconut Oil is a healthy fat about five years ago when I read Eat Fat Lose Fat by Sally Fallon Morrel, President of Weston A Price Foundation, and Dr Mary Enig, International Expert on the Biochemstry of Food and Fat.

    Here are some ways I use coconut oil in baking:

    Melt it and measure it like regular oil.  The melting point for coconut oil is 76 degrees.

    If you use it in salad dressing – mix it with olive oil, at least half and half since it wants to be a solid – don’t refrigerate it – it will get really solid.

    I use it to saute veggies of all kinds.

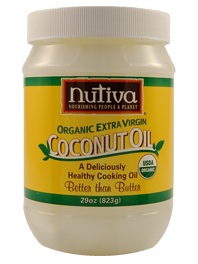
    I especially like to use Coconut oil  in baked goods – bread – muffins-pancakes-brownies- Marilyn’s Famous Whole Wheat Bread, etc.  I have found when I use Coconut Oil in homemade bread it does not mold readily when stored at room temperature for many days.

    I also use it as a skin lotion for chapped lips and dry, cracked places on my feet because it is pure and natural and very effective. You will  get the benefits of coconut oil through your skin when applied topically.

    I transitioned into using the Extra Virgin Coconut Oil because my family commented that the taste and flavor of the foods I had prepared  were so much better when I used Coconut Oil.   Eventually it just became a habit as I used it more and more.

    Check out how and why others are using coconut oil.

    Sally Fallon Morrel says that “coconut is queen” among saturated fats because:
    • Coconut Contains Abundant Medium-Chain Fatty Acids – medium chain fatty acids digest more easily than long chain fatty acids so it is an excellent choice for people having digestive difficulties with fats.
    • Coconut Oil Contains Significant amounts of Lauric Acid – Lauric Acid, also found in mother’s milk, has proven antiviral, antibacterial, and antifungal properties.  This substance helps  stimulate the immune system and helps your body fight off viruses, bacteria and other pathogens, and protect you from other diseases.  Lauric acid is highly beneficial and is only found in coconut oil, palm kernel oil, and in a small percentage of butterfat.
    • Coconut Oil is Synergistic with Essential Fatty Acids – Although popular media would want you to think all saturated fats are bad, that is not true.  When our bodies consume saturated fats t it reduces the body’s need for essential fatty acids – both the omega-3 and omega –6’s.

    Healthy Popcorn
    1. Use 2-3 Tbsp organic virgin coconut oil into your pre-heated stove top popcorn popper (I use an old beat up 4 qt pressure cooker) using high heat.
    2. Drop 3-4 kernels into the melting oil.  When those kernels pop add the rest of your popcorn.
    3. Add 1/2 to 3/4 Cup popcorn depending on the size of your cooker  (If you use organic popcorn it probably won’t be GMO)
    4. After popping the corn, remove the pot from the heat, pour the corn into a large mixing bowl or popcorn bowl.
    5. Drizzle about 2-3 Tbsp melted butter over the popped corn and sprinkle with Real Salt or sea salt to taste. Mix  the butter and salt around well  and serve.

    Don’t feel guilty about using plenty of healthy fats!  They offer satiety, and keep you from snacking on unhealthy junk as well as many other health benefits.

  • Summer Tradition- Granola Bars

    “What’s that recipe for granola bars?” – my hair stylist asked me. (She’s the best!) 

    Ok I’ll share! Enjoy…. I make these for most camping trips (whether camper camping or backpacking.) We eat them during the summer and it has become a summer tradition of sorts. I love that my family expects them and I am pleased to make them.

    Kathy’s Granola Bars– for 1- 9×13 (Pyrex is preferable)

    Ingredients:

    1/3 C oil- Coconut or olive is yummy

    ¾ C Brown Sugar

    2 T Honey

    1 tsp. vanilla

    2 Eggs

    1 C Flour (mill it fresh if you can! whole wheat, 6 grain works!)

    1 tsp. Cinnamon

    ½ tsp. Baking Powder

    ¼ tsp. salt

    1 ½ C 9 grain rolled (oats work well too!)

    2 C Crisp Rice Cereal

    1 C Chocolate Chips, chopped nuts, dried fruit, or seeds (or any combination you like) *pumpkin seeds and chocolate chips are YUM!


    In a large mixing bowl, combine the oil, brown sugar, honey, vanilla and eggs. Add flour, cinnamon, baking powder and salt. Mix well. Stir in rolled grain or oats, cereal, and nuts, fruits, or chocolate chips. Spray treat or wipe oil into a 9×13 glass pan. Press mixture evenly into the bottom of pan.

    For Chewy bars: Bake 350 for 25 min.. THEN TAKE OUT!

    For Crunchy Bars: Bake at 300 for 40-50 min and top is brown.

    Cool bars completely. Cut bars into 16 pieces.  These may be frozen.

    Nutritional Info: roughly 230 calories, 10g fat, 29g Carbohydrates.. I am a Diabetic so carbs are important to know!

  • Shanty? Fort? Survival shelter?- Complete Brilliance!!!

    This last Monday my kids were free! Yes, our homeschool year is complete and I, Kathy, am working hard on the Urban Homemaker! So freedom abounds for the Marsh Trio who are full fledged 2nd grade graduates!

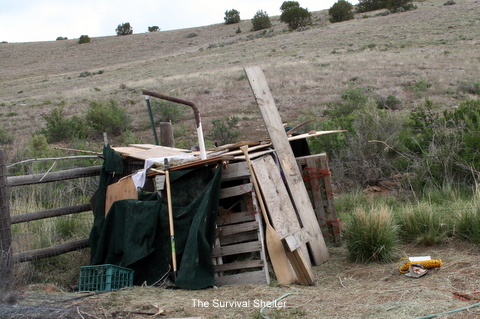
    This week has been full of rain, but that is not a deterrent for the kids. They set out and asked if they could build a fort. My response was “Yes!” A few days go by and the kids present their creation to us, but as I walk up to it I ask myself, “Is it a shanty? A fort? A survival shelter?” and then it dawns on me!

    It is complete and utter brilliance!

    One might want me to explain my definition of brilliance…… I am thrilled to!

    • This shelter was built by 2 brothers and 1 sister in full team work compliance from morning till night. It was their creation. This is where you would have found our children all this week, all day long.
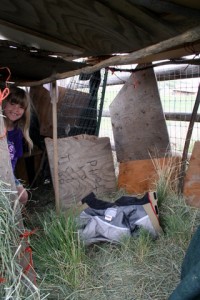
    • Jamie used some of her strengths for decorating the interior. Yes, the brothers did help!

    • They picked up and used every scrap piece of wood, hay baling string, scrap hay, horse toys to make it.
    • They used what was in their minds and built it. They could articulate all the whys and the why nots. They used survival strategies, science, math, history and plain old life skills to make this plan a reality.
    • The structure has a name and a theme: survival. The kids are reading, bird watching, and realized what is around them is a blessing and it was made plain to them.
    • They formed an outreach. The neighbor boys meet them after they are done with school and their fort was started a few days ago.  The relationship building, imagination and thrill are so fun for all.

    • Lastly, these 8 yr olds showed daily faith! They were determined, mindful, and weren’t in a rush. The fort is still not complete and I hope this whole summer it never is.

    I am so blessed and amazed by my children and their actions. They are such a help and a blessing to both their Dad and me. When Wayne and I walked out to have the first tour of the survival fort- I was blown away. I had no idea that what we taught them all through the year was fully regurgitated with a simple building structure. This freedom experienced will be a true memory maker for them- again a privilege and a blessing. This is one memory we will treasure from our rocking chairs!

    So may you be amazed at what freedom can ignite! It may look like a shanty, but upon a closer look it just might be BRILLIANCE!!