Category: General

  • Summer Tradition- Granola Bars

    “What’s that recipe for granola bars?” – my hair stylist asked me. (She’s the best!) 

    Ok I’ll share! Enjoy…. I make these for most camping trips (whether camper camping or backpacking.) We eat them during the summer and it has become a summer tradition of sorts. I love that my family expects them and I am pleased to make them.

    Kathy’s Granola Bars– for 1- 9×13 (Pyrex is preferable)

    Ingredients:

    1/3 C oil- Coconut or olive is yummy

    ¾ C Brown Sugar

    2 T Honey

    1 tsp. vanilla

    2 Eggs

    1 C Flour (mill it fresh if you can! whole wheat, 6 grain works!)

    1 tsp. Cinnamon

    ½ tsp. Baking Powder

    ¼ tsp. salt

    1 ½ C 9 grain rolled (oats work well too!)

    2 C Crisp Rice Cereal

    1 C Chocolate Chips, chopped nuts, dried fruit, or seeds (or any combination you like) *pumpkin seeds and chocolate chips are YUM!


    In a large mixing bowl, combine the oil, brown sugar, honey, vanilla and eggs. Add flour, cinnamon, baking powder and salt. Mix well. Stir in rolled grain or oats, cereal, and nuts, fruits, or chocolate chips. Spray treat or wipe oil into a 9×13 glass pan. Press mixture evenly into the bottom of pan.

    For Chewy bars: Bake 350 for 25 min.. THEN TAKE OUT!

    For Crunchy Bars: Bake at 300 for 40-50 min and top is brown.

    Cool bars completely. Cut bars into 16 pieces.  These may be frozen.

    Nutritional Info: roughly 230 calories, 10g fat, 29g Carbohydrates.. I am a Diabetic so carbs are important to know!

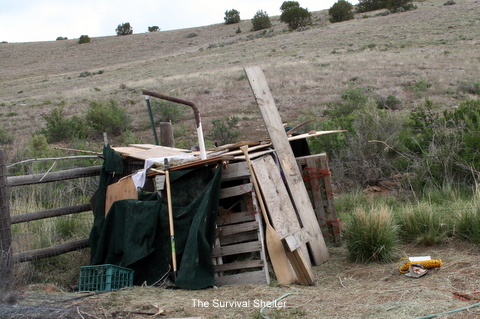
  • Shanty? Fort? Survival shelter?- Complete Brilliance!!!

    This last Monday my kids were free! Yes, our homeschool year is complete and I, Kathy, am working hard on the Urban Homemaker! So freedom abounds for the Marsh Trio who are full fledged 2nd grade graduates!

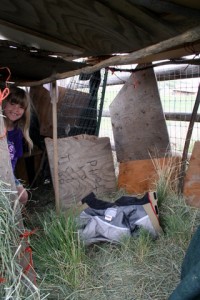
    This week has been full of rain, but that is not a deterrent for the kids. They set out and asked if they could build a fort. My response was “Yes!” A few days go by and the kids present their creation to us, but as I walk up to it I ask myself, “Is it a shanty? A fort? A survival shelter?” and then it dawns on me!

    It is complete and utter brilliance!

    One might want me to explain my definition of brilliance…… I am thrilled to!

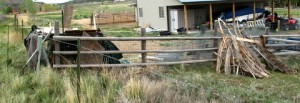
    • This shelter was built by 2 brothers and 1 sister in full team work compliance from morning till night. It was their creation. This is where you would have found our children all this week, all day long.
    • Jamie used some of her strengths for decorating the interior. Yes, the brothers did help!

    • They picked up and used every scrap piece of wood, hay baling string, scrap hay, horse toys to make it.
    • They used what was in their minds and built it. They could articulate all the whys and the why nots. They used survival strategies, science, math, history and plain old life skills to make this plan a reality.
    • The structure has a name and a theme: survival. The kids are reading, bird watching, and realized what is around them is a blessing and it was made plain to them.
    • They formed an outreach. The neighbor boys meet them after they are done with school and their fort was started a few days ago.  The relationship building, imagination and thrill are so fun for all.

    • Lastly, these 8 yr olds showed daily faith! They were determined, mindful, and weren’t in a rush. The fort is still not complete and I hope this whole summer it never is.

    I am so blessed and amazed by my children and their actions. They are such a help and a blessing to both their Dad and me. When Wayne and I walked out to have the first tour of the survival fort- I was blown away. I had no idea that what we taught them all through the year was fully regurgitated with a simple building structure. This freedom experienced will be a true memory maker for them- again a privilege and a blessing. This is one memory we will treasure from our rocking chairs!

    So may you be amazed at what freedom can ignite! It may look like a shanty, but upon a closer look it just might be BRILLIANCE!!

  • Cleaning Without Chemicals – 8 Key Considerations

    I just received this testimonial about the all-purpose Norwex Enviro Cleaning Cloth:

    The other day my grandson was making “pancakes” out of  silly putty at the kitchen counter. The moment I turned my back I found him making pancakes on the Living Room carpet! I was horrified at the mess on my new rug, but I didn’t panic.

    His poor little eyes almost popped out when he couldn’t get the putty up from the carpet!  I tried to remove the putty with a paper towel and another cloth towel with no success.  It just ground in more.

    Then, I got my Norwex Microfiber Enviro cloth and rubbed it across the  putty and instantly the putty came up out of the carpet and into the cloth!!  Joan H.  (reprinted by permission)

    Don’t you love happy, simple endings to potential cleaning disasters?

    Recently, I was in Florida to take care of my 89 year old father who was suffering from a life threatening and potentially contagious ailment and I was very concerned about hygiene and sanitation for his apartment and to protect me from getting sick.

    Fortunately, when I got there, I had my Norwex Enviro Cloth with me so I could start cleaning his apartment, bathroom, and kitchen.  I have to say it gave me a lot of peace of mind to know I could clean effectively without a lot of bleach while I was waiting to see if he was going to recover.  (He is now doing much better.)

    Considerations:
    • There have been over 80,000 new chemicals introduced into our environment since 1950 and only about one third of them have been tested to be safe.
    • The medical field has been seeing an increase in medical problems especially asthma and other respiratory problems which are thought to be caused by chemicals in our homes, homes that are built tighter, and hence, chemical residues are being breathed. Asthma diagnoses have increased 600 % since 1980.
    • The three top toxic products in our homes are fabric softeners/dryer sheets, oven cleaner, and drain cleaner.
    • Kathy Marsh (the new owner of The Urban Homemaker) and I were talking about this and she mentioned to me that her son was released from his pulmonologist and nebulizing treatments after she went to chemical free cleaning six years ago.
    • Homemaker Sammye Wright wrote:  ““I never felt my floors were really clean until I used the Norwex Mop System. I have found it is faster, and my floors stay cleaner, for longer times. Honestly, mopping is more fun and a lot easier and I have four little boys and a husband and clay soil surrounding my home! Mopping is no longer a chore for me.”
    • About 15-20 years ago, researchers in Norway found that microfiber products were an effective alternative to traditional chemical antibacterial products because they removed 99.9% of the surface bacteria.
    • Norwex Microfiber products were originally used exclusively in hospitals because they didn’t contribute to an ever escalating set of resistant bacteria.
    • Commercial floor care products, no matter how safe or non-toxic they may be, all leave sticky residues on the floor that work like a magnet to attract dirt. A product that doesn’t leave these residues will naturally make it easier to care for your floors.

    Norwex Microfiber products do not disinfect surfaces but REMOVE bacteria from smooth surfaces (including floors) and prevent the transfer of germs to your hands while cleaning and eliminate cross contamination.

    Norwex microfiber products contain a patented silver agent that prevents and kills bacteria growth, is safe to use, inhibits odor development and does not affect the  performance of the microfiber.

    My favorite Norwex chemical–free cleaning products are the Enviro Cloth, Window Cloth, and the Superior Mop System.  These three items will clean your whole house including the bathroom, toilet, shower, sinks, windows, refrigerator, counters, computer screens, flooring, and much, much more.

    All Norwex orders placed between now and May 31, 2011 will qualify for FREE SHIPPING!

  • Which Ranch Dressing Tastes Best?

    At our last Mentoring Moms, I did a blind taste test with three different versions of Ranch Dressing.  I’ve noticed the commercial, bottled Ranch Dressing is getting prohibitively expensive and I hate the soy oil and MSG in it, so I decided to stop being lazy and make my own.

    Our blind taste test included the following three choices.

    1. Hidden Valley Ranch Dressing in the bottle (including all the bad, unpronounceable ingredients and MSG)

    2. Kroger Ranch Dip Mix with Sour cream

    3. Homemade Ranch Dressing

    Can you guess which choice was the winner for taste?  I’ll confess I thought number one, the commercial Ranch would be the winner hands down.  I was astounded and surprised that the ladies chose, by an overwhelming majority, the Homemade Ranch Dressing.

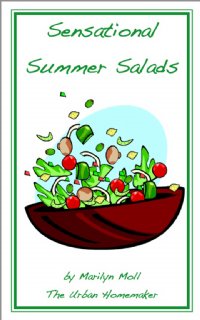
    Here is the recipe for Ranch Dressing taken from Sensational Summer Salads ebook.


    Homemade Ranch Dressing

    Mix in a blender the following ingredients until smooth:

    3/4 cup mayonnaise

    3/4 cup sour cream or cultured buttermilk*

    1 tsp garlic powder

    1 tsp dill weed

    1 Tbsp finely chopped onion

    1 Tbsp parsley

    1/2 tsp salt

    1/4 tsp pepper

    You can thin this dressing with buttermilk or milk to the desired consistency.  Authentic Ranch Dressing uses buttermilk.  Another option is to use 1 –2 Tbsp buttermilk powder and get the same effect.   Refrigerate.

    *I use sour cream for making a Ranch Dip and I use buttermilk for making the dressing.

    Sensational Summer Salads includes a wide assortment of recipes including vegetable salads, fruit salads, pasta salads, grain salads, and main dish salads so you can easily prepare a complete meal with little or no cooking during the long, hot, dog days of summer.


  • Local Foods to Local Markets

    Do you LOVE Farmer’s Markets and participate in your local market as a producer or a consumer?

    Today I want to talk about ways you can help promote and support your local agricultural economy especially in Colorado.  If passed, Colorado would join nearly 20 other states (plus 5 pending!) who already support cottage industry food production.

    A bill recently introduced in the Colorado Senate would increase consumer access to local fresh and value-added agricultural products by permitting home and community kitchens to easily register to legally produce and sell low-risk foods.

    The goal is to encourage local farmers and small producers as entrepreneurs to spur economic development in Colorado communities.

    Provisions in the bill include:
    • It will allow consumers to purchase these products made with quality ingredients grown by their neighbors and other local farmers.
    • It will benefit our communities by keeping money circulating close to home.
    • It will encourage Coloradans to purchase nutritious food in their communities
    • It will allow local growers to be more profitable by utilizing products left over after market day, seconds, and surplus production
    • It will help local communities achieve self-sufficiency and sustainability
    • It will reduce the number of miles food is transported from farm to fork
    In Colorado and in other states it is now it’s up to us.  We must contact our Senators and Congressman  by phone or email—letters will not arrive in time.
    I would love to hear from those of you in other states who have successfully passed or benefited from similar legislation.
    In Colorado:

    1)  Contact all members of the Senate Agriculture Committee  to voice your support.  Please thank Senator Schwartz in Colorado, the Ag Committee Chair, for crafting/sponsoring this bill.

    2)  The Senate Ag Committee will hear this bill in Denver Thursday, April 28th at 1:30 PM.  If you can testify let Senator Schwartz know.  (Contact info in her email attached below.)  If you want to carpool from the Western Slope, please let me know as well.

  • Child’s Play

    Ed Note This article is written by my daughter Laura, a new mother and originally was posted to her blog:   thecoblecolumner. I wish I had been as resourceful as Laura when I was a young mother.  I hope this encourages young moms to enjoy their babies, because babies grow up very quickly!   Reprinted by permission.

    Now that I am no longer working at my job, and I am home with my baby, I find myself wondering “what do I do with a baby?”.  Of course, I know to change his diaper, feed him, give him naps, all the basics.  But other than that, what do you do with a baby?  Job is just about sick of his Exersaucer and there are only so many games of peekaboo that we can play….

    So I went to the library.  The library is my answer to many of life’s problems.  Or rather Amazon is my answer.  I use Amazon to find a book to answer my questions, but then I go to the library (because I’m too poor to buy the book…shhhh…don’t tell Amazon!).  Anyway, I found two books at the library that inspired me on ways to interact with Job, as well as ways to keep him occupied for when I really do to “get something done”!

    The first book is Slow and Steady Get Me Ready by June R. Oberlander.  This book has one educational activity for each week of baby’s life from birth through age 5.  The activities require items that can be pretty much found around your house.  For example, a few weeks ago the activity of the week was to learn about drumming and rhythm.  The instructions were to set two or three different objects in front of the baby (I used a ceramic bowl, a tin pan, and a box), and then put a stick of some sort (I used a wooden spoon) in the baby’s hand with your hand over the baby’s hand.  Practice drumming out a 1-2, 1-2 beat on the various surfaces.  The baby can hear various sounds and feel the vibrations from the different objects being drummed upon as well as be introduced to rhythm.

    The hope is that, by repeating this activity for a few minutes each day, by the end of the week, baby can beat on the surface on his own, possibly even at a 1-2 beat.  Job learned to beat on the box, but only for a few beats and then he preferred to suck on the wooden spoon.  Nonetheless, it was an interesting activity to keep us both engaged for a while.  The book is full of weekly activities to do with your child for just a few minutes each day.

    The other book I checked out at the library was Your Child At Play-Birth to One Year by Marilyn Segal.  This book is packed with interesting and engaging activities to do with your child, or for your child to do on his own.  The book is divided into 12 sections, one for each month.  Some of the activities in the seven month section are “Light Switch Play” (When you put baby down for a nap, allow him to turn off the light and say “light’s out”), “Reflections” (set a mirror, in a safe way, in front of baby and let him interact with his mirror image), and “Yogurt Paint” (dap a little bit of yogurt in front of baby and let him play with the yogurt.  Job had a blast with this one, smearing it around on the table and then sucking on his fingers.).

    There are tons of other activities in the seven month section, as well as in all the other sections.  This books is full of fun ideas to keep baby engaged. The author has a book for age 1, age 2, and age 3-5.  I haven’t looked at these books so I don’t know if they are any good, but I love the first one in the series so hopefully the following books are just as good.

    I found a third book in a bookstore that I found quite worth while called The Complete Daily Curriculum by Pam Schiller and Pat Phipps.  The book is for older kids, so Job is not ready for the activities yet, but he will be soon!  This book is geared for kids age 3-6 and it is written from the perspective of a preschool teacher teaching a whole classroom.  But nearly all of the activities can be used with your own child at home.  The book is very easily laid out, with the first part of the book devoted to themes, such as “The Color Red” or “Teddy Bears”.

    There are six different activities as well as book suggestions to correspond with each theme.  For example, for the theme of “Forest Animals” there are six activities including an art activity to paint a picture of a forest, a dramatic play activity to make stick puppets of various animals (you can use an included pattern), and a game activity to play Forest Animal Concentration (also using an included pattern).  The second half of the book is filled with patterns, games ideas, and songs and rhymes.  While you may not be sitting down with your son or daughter and doing an organized preschool, this book is a great resource to look through for simple ideas to keep your child busy with new and different activities.

    By the way, all of these books are available on Amazon for really cheap prices if you buy a used copy.  I know because…well…I purchased them for myself (and Brandon is eating Mac N’ Cheese for the third time this week), or rather I should say I purchased them for Job;-)

    I know that it is easy to get stuck in a rut, giving your child the same activity over and over again.  But with these three books, or at least the first two for Job’s age, hopefully I can mix things up a bit, stimulate his mind, and give Job and I some fun ways to interact together!  Hope these are helpful to you as well.

    If you have some ways that you interact with your child or some fun ideas to keep your child entertained for a while, please feel free to post them in the comments!  I love new and fresh ideas.  Thanks!

    You can email Laura:   daybyday366@gmail.com
  • Spring Holidays Call for Old World Breads


    Would you like a change from your daily whole grain bread?  Spring holidays call for old world breads.

    Challah is the traditional Jewish Sabbath bread, (except during Passover), it has no season but is particularly appropriate for a spring brunch, because its egg-rich dough will easily work into the traditional braid.  Try serving it with a delicious chicken salad, with mixed salad greens and maybe even some fresh strawberries.

    Hot Cross Buns are another seasonal favorite.

    Remember the children’s nursery rhyme that goes as follows?

    Hot cross buns! Hot cross buns!
    One a penny two a penny – Hot cross buns
    If you have no daughters, give them to your sons
    One a penny two a penny – Hot cross buns

    Hot cross buns were sold in the street to the cry of “Hot cross buns!” around the period in English history dating back to the seventeenth and eighteenth century.

    A hot cross bun is a type of sweet spiced bun made with currants and leavened with yeast. It has a cross on the top which might be made in a variety of ways. Using confectioner’s frosting, is the most common way.

    According to one source, hot cross buns are traditionally eaten on Good Friday, with the cross standing as a symbol of Christ and the resurrection. Have fun with the children and enjoy the process of being together in the kitchen.

    Challah Recipe:

    2 TB Saf yeast
    3/4 cup warm water
    3/4 cup milk
    1/4 cup butter
    2 Tbsp honey
    2 tsp salt
    4 1/2 to 5 cups bread flour or 1/2 whole wheat and 1/2 bread flour
    2 whole eggs
    1 egg yolk (reserved for glaze)
    1 TB poppy seeds

    Mix 3/4 cup warm water, 2 eggs and yeast in mixer bowl. Stir in 2 cups flour, beat well, and allow the mixture to sponge (bubble up) for about 15 minutes or more. Meanwhile, heat milk, butter, honey, until the butter melts. Cool to lukewarm. Add these ingredients to the “sponge”, add the salt, and stir in enough of the remaining flour to make a soft dough. Knead until the dough is smooth, and elastic but not dry; about 7 -10 minutes. Shape the dough into a ball.

    Place the dough ball into a greased bowl. Turn once to grease the top. Cover with plastic wrap and let rise in warm place until doubled in bulk, about one hour. A finger pressed into the dough will leave an imprint when the dough has risen enough. Punch the dough down, divide into thirds. Roll each third into an 18-inch strand. Line up the three stands one inch apart on a large, greased baking sheet. Braid loosely, beginning in center and working toward ends. Pinch ends together and tuck under.

    Cover and let rise until double, about 30 minutes. Brush with egg yolk that has been beaten with one TB of water and sprinkle poppy seeds over the egg wash. Bake in a pre-heated 375 degree oven 35-45 minutes.This recipe makes one large braid or two small braids. Recipe can be doubled of tripled if you have a heavy duty mixer. This recipe can also be prepared as is, in a bread machine on the dough cycle and then shaped by hand.


  • Making Bone Broth Video Demonstration


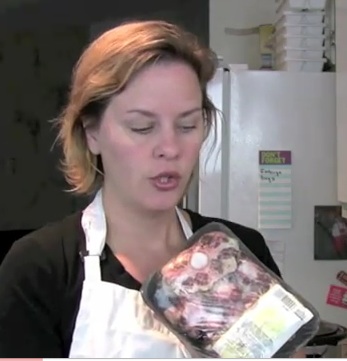
    Today I’m going to talk about the time-tested process of making bone broths in your  kitchen to restore your health.

    Today’s busy lifestyles, wide use of antibiotics and nutrient deficient foods have pre-disposed many children and young adults to unhealthy gut health resulting in sinus problems, gluten intolerance, chronic fatigue, arthritis,  allergies, and other degenerative conditions.  Having said that, I remind you I’m not a doctor but I speak based on my own experience and that of others.

    You can easily master the art of making your own bone broths or stocks from leftover chicken, beef, or fish bones.  Add chopped carrot, celery, and onion.  Simmer for 24–72 hours.

    Bone broths are very nourishing to the intestines because they are full of natural gelatin that coats and soothes the gut and contain high amounts of calcium, magnesium, and other  trace minerals.  View the video for details.  The broths can be made into gravy, soups and stews, or even used as a tonic – type drink.  They are delicious, and thick when properly made.

    For free information, including an emailed list of things you can do to get started with better health, as well as tips, recipes and resources,  click on the
    Reversing Food Allergies On -Line Cooking Class Link .

    The 12 week class includes over 50 video demonstrations, and over 200 recipes.  Class registration goes through April 4 at the discounted price, classes start April 6.  Save $20 with coupon Code HEAL which is good through April 1.  Remember, registration is for life-time access to the materials.  Class schedule is as follows:

    • Lesson 1: Overview & Basics
    • Lesson 2: Detoxifying
    • Lesson 3: Making Stock
    • Lesson 4: Fermented Foods
    • Lesson 5: Soups & Stews
    • Lesson 6: Breakfasts
    • Lesson 7: Lunches
    • Lesson 8: Dinners – Poultry & Pork
    • Lesson 9: Dinners – Beef & Lamb
    • Lesson 10: Dinners – Seafood
    • Lesson 11: Appetizers, Snacks & Side Dishes
    • Lesson 12: Desserts

    Bonus Video:  How to Make Ghee – Free of allergens such as milk solids and lactose and safe for dairy intolerant individuals.

    Register for the 12 Week Reversing Food Allergies Class Here.

    Disclaimer: While I can’t guarantee your food allergies will be reversed by mastering the art of traditional cooking methods, I do believe your health will be improved.

    Disclosure: http://cmp.ly/5

  • New Give-Away – Shower Filter

    Multi-Pure Shower Filter – $59.95 Retail Value

    This Give-Away is now closed.  The winner is #29 Debbie.  Please email me at marilyn@urbanhomemaker.com to claim your prize.

    I  have been talking about the health benefits of drinking pure filtered water for nearly 20 years.   Most municipal water sources contain chlorine or chloramines, inorganic pesticides/herbicides, and, worst of all, tri-halomethanes, also known as chlorine disinfection by-products which are known carcinogens.

    But sometimes I forget that more harmful chlorine, an inorganic substance that chemically bonds to your skin and hair,  enters the body through one average shower than through drinking  8 or more glasses of unfiltered water.  YIKES, this is not healthy over the long term for kidneys or liver – our only body de-toxification organs that are not easily replaced!

    Not only that, chlorine wreaks havoc on hair, skin, and scalp causing dry, itchy skin.  When I started filtering my shower water years ago, my need to apply regular moisturizers after each shower vanished.  I was quite surprised at the difference in my skin in a very short period of time.

    The Multi-Pure shower filter reduces chlorine with a specially formulated KDF filter.  If you want to protect small children taking baths from chlorine consider the Crystal Bath Experience – bath balls remove chlorine for about a year of baths.

    There are up to five ways to enter the contest!

    You get one contest entry for each of the following steps you take and you post that you did it in  the comments section of this blog page below:

    1.  Post this article to your Facebook page and tell me you did so in the comments section below.

    2.  Post this article to your Twitter page and tell me you did so in the comments section below.

    3.  Sign up for receiving The Urban Homemaker blog posts by email above, and tell me you did so below in the comments.

    4.  Mention this contest in your blog posting and link back to this page and post your blog link in the comments section below.

    5.  Sign up to receive The Urban Homemaker Enewsletter and confirm your subscription, and tell me you did so below in the comments.

    Please tell your friends! This contest will end March 30.

  • Solutions to Higher Gas and Higher Food Costs

    Remember the old adage:  Use it up, wear it out, make it do, or do without!

    With the current employment conditions, skyrocketing fuel and food costs,  we all need hundreds of practical ideas and steps to reduce budget  strain and save money.

    My friends at Living On A Dime have made a great offer available to my readers for St Patrick’s Day Week only! (Ends March 25)

    This special savings offer Includes the following 15 ebook package!

    • Grocery Shopping On A Budget e-book
    • Money Saving Meats e-book
    • Saving On Cleaning Supplies e-book
    • Eating Healthy On A Budget e-booklet
    • Is Eating Out Eating You Up? e-book
    • 224 Meals In A Hurry e-book
    • Grocery Savings e-book
    • Menus That Make Cents e-book
    • Plan Ahead Leftovers e-book
    • Quick Dinners e-book
    • Menus On A Dime e-book
    • Kids Recipes e-book
    • Crockpot Recipes e-book
    • Quick And Easy Cooking e-book
    • Blue Ribbon Recipes e-book

    Get your grocery budget under control today! For more information  on this exciting offer, visit Living on a Dime.

    My ebook Value Meals for Busy Moms focuses on main dishes made from economical grains, beans and eggs.  You may download this book today as my gift to you as The Urban Homemaker celebrates 20 years in business!