Category: General

  • Urban Homemaker ~ How are you Managing?

    I will be the first to admit that I am over stretched in what I do and accomplish in a day. Yes, I do plenty that is good and right, but what I want is where my Lord wants me to be.  Over the last several weeks I have heard the same things that are from the mouths of my peers, other Urban Homemakers,  just like me- probably just like you too?

    We have “10 things”<please insert your own list, but it may look like this: work, feed, clean, canning!, garden work, bill paying, dog washing, piano lessons, meeting off-site, laundry, dishwasher, etc> that we think need to be done in the course of 10 minutes. Seriously, that sounds fabricated and not rational. Thats the point.. My driving-ness (if that is a word, but you get me?) fabricated the need for those 10 things to be done in the next 10 min. and it isn’t rational! Heavens! I am my own worst enemy and this is the well worn path to tearing me apart.  Let me interject that there are a ton of fun and wonderful things happening, yet He has my attention in the area of “needing improvement” and I am persevering to get this right.  All those things that seem so important can just stay where they are! I mean they are there even when I forget about them! Heck, they might even be there to mold and shape me into the woman I am meant to be.  Hope so! Such the process isn’t it?

    Here are 2 quotes that I have heard in the last few weeks that have STUCK! and they keep STICKING..

    1. The Volunteer Lady who met us at the JEFFCO Action Center in Lakewood, CO. said “Never come here thinking you will accomplish all that needs accomplishing. The work never ends. There is always more to be done.”

    2. From a dear, sweet friend of mine: paraphrased somehwat: “I want to “mother” instead of “manage” – and I’ve been managing instead of mothering.”

    Quote 1 & 2 both have changed my thinking. It is a mindset challenge for me. I can do all the tending I physically do, but the mindset behind that seems like it has to be done NOW rather than seeing it for what it is- it is an endurance walk in life. The “work” will always present themselves, and tasks will continue.. If I “attempt” to finish all those things with the mindset of finishing and nothing else, I find myself MANAGING. When I manage I get crabby, tired, fried.. or please insert your own yuck feeling/action of choice here. Of course, if I am in that mode of managing how can I possibly “mother” in the way I should?

     

    Don't look too far off from today- that other grass to be cut is for another day!

    This morning Hubby and I set out to take an hour or so off and be together. Instead of managing another (HA!) task we did an 11 mile bike ride and breakfast in town. It was glorious! As we came down the hill towards home I saw the photo illustration of my whole theme here.. So have a gander at the pretty cut grass and lines. Think of yourself as the tractor and everything that needs to be done (the grass) and just do the few lines you set out to do. Know that you may not accomplish everything in 1 day, but it may be ongoing(see grass surrounding cut grass). Also notice the tractor is turned off and not moving. Yes- there is a purpose in that too! Other things besides the grass need to be done instead of cutting, i.e. bike riding with Hubby. The grass will grow and it will be cut. I am thankful for the neat rows that I can see, but be careful not to look beyond too far as the field goes on and on and that is for another day!

    May you be encouraged to have a different mindset and may you whole heartedly Mother rather than Manage!

    Kathy



  • Whole Grain Crackers… Garlic too!

    I had a bit of a personal challenge this morning.  I said to myself, “If I can make pretty darn tasty bread, then I should be able to make crackers!” So here is my morning journey…

    I started with this Wheat Cracker recipe from www.AllRecipes.com and made my changes:

    Plain Whole Grain Crackers:

    1 3/4 C  7 Grain freshly milled

    1 1/2 C unbleached white flour

    3/4 tsp Real Salt (Coming soon to Urban Homemaker)

    1 C Water

    1/3 C Olive Oil

    Sea Salt for topping

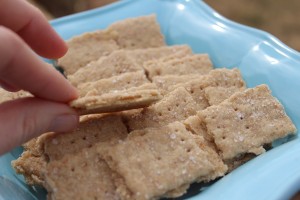
    Into the Bosch outfitted with Cookie Paddles and then the setting to 1 as I poured the liquids into the dry ingredients. By the time I set my measuring cup down the ingredients were mixed. Roll this amount of dough onto parchment for 3-4 cookie sheets. 2 cookie sheets worth will give you a thicker, softer- less crispy cracker. 3-4 sheets will be the thinness required for the cracker to be cheese spread worthy! Both thicknesses were incredible in taste and are currently being devoured!

    Helpful Note: Roll dough onto parchment paper. Makes transferring to a sheet and prepping for the next round~ easy! I used 2 types of rollers a Wood Pastry/Pizza Roller and I used a standard 13″ rolling pin.

    Once rolled out I scored the dough with a pizza cutter, knife, or whatever tool you want. Each cracker was stabbed with a fork.

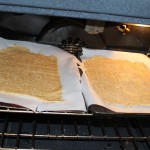
    Into the oven 350 degrees for 18-20 min until browned. Watch it! Depending on your type of oven, convection or not, and how the temp is~ just watch so it doesn’t burn.


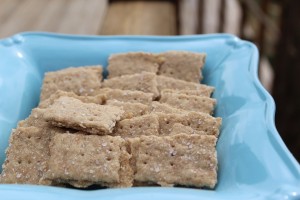
    The end result was beautiful. This is the plain variation with a thicker roll out. I spread the dough on 2 sheets and got a breadier, yet slightly crispy cracker. It is delightful and the salt on top is perfect!

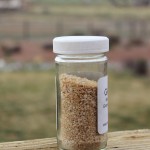
    Step 2.. Make a second batch and this time load it with 1- 1 1/2 T of garlic granules or powder and parmesan cheese (1/2C). I used Organic Garlic Granules from www.StrawHatFarms.com . They grow and process several varieties of garlic on the certified organic farm right in Montrose, CO. Chet and Karen Byler are friends of ours and I love their garlic! I bought the glass containers of garlic powder and granules and then refill in bulk. Please see their website for shipping details.

    ** Note: if adding extras like a parmesan cheese add about 1T water more to keep the dough moist.

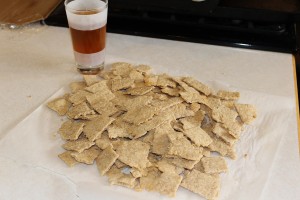
    Here is the second batch: Garlic, Parmesan Cheese 7 Grain Crackers. They were rolled thinner than my plain batch and covered 3 cookie sheets. There is a crisp and they are completely addicting when eaten with a cheese spread. I took this photo of them cooling so you can see how much in in 1 recipe when using 3 sheets. This was comparable to emptying 2 boxes of store bought crackers.

    There you have it.. My personal cracker challenge and thumbs up across the board of family members.  I love that I know what went into our crackers and that nothing unpronounceable was in my ingredient list.

    Till the Next Challenge, Kathy

  • Plastic Eggs, Little Kids and an Object Lesson


    I came up with this idea with a little help after hiding little plastic eggs in our backyard Saturday night while the house was sleeping. It has never been warm or dry enough to do a little hunt in years past and since my “Littles” are getting older, I wanted them to have this experience.

    I am one blessed Mama to have 3 young children to know and confess a relationship with Jesus. He being raised from the dead is right where our faith starts! I want them to understand so they can live in that relationship their whole lives. To have them know and understand early in life is AWESOME!

    I’ll get back to Easter morning, my children are waking, the coffee pot is brewing, and I open the blinds to find our little “Dixieland” dog carting around a yellow plastic Easter egg. The slider opens, I say “drop it,” ~ she does. The yard is covered with about 5-6 eggs and their contents. I manage to put back all but 3 emptied eggs.

    The hunt begins, then it hit me. ~ Children don’t forget the empty eggs!”

    In my mind they represent the empty tomb! There are 3, an opportunity for all 3 of my children. I hope and pray they will pick them up.

    I hear “They aren’t valuable Mom,” “Nothing of value is in them Mom,” “We’ll get them later Mom.” I reminded them a few times and then said no more.

    So I run inside and collect three $1 bills and wait.  ~ “So did any of you get the empty eggs?” “No”, but then the light bulb goes on in one of our son’s face. He knows!!! Then our daughter~ she knows!  And then the other son. He knows too! YES!

    They acknowledged they all missed a “valuable” opportunityto collect something (an empty dog licked egg) that was the most valuable!  That empty egg represented an opportunity to see the message of the Risen Christ; our best gift! The reason we believe.  They also missed the $1 that each empty egg represented.  They also understood that I asked a few times and then stopped asking.

    No one got the dollars that glorious Easter morn, the empty eggs were picked up, yet they still got “it.” They got that the most valuable was maybe the least desired or not shiny. They got that the empty eggs could represent a narrow gate and only a few get them. ~ Remember they stood there with baskets filled with several intact eggs (the wide gate).   They got it as they played hide the eggs and left 1 or 2 open so an opportunity missed could be found!

    So if the dog ever gets your eggs have this idea for a teachable moment! It is exactly why there is an Easter to celebrate in the first place!

    Happy Easter folks! Kathy


  • Flaking with “The Bosch”

    I am a FLAKER! and proud of it…

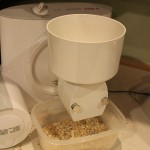
    Yes, even the Urban Homemaker buys already flaked oats and 7/9-grains.. Until tonight, that is! One of my New Year’s goals was to “flake” or “roll” or to simply “flatten the heck out of a whole grain!”  So tonight, as I prepared a granola recipe out of Breakfasts for Busy Moms, I considered taking a hammer to each piece of grain, but then realized there is an easier way…  So out came the Flaker for the Bosch and I flaked my 9 grain whole grain for the recipe! I am so impressed with myself  and the Bosch Universal as it handled itself perfectly on it’s side and flaked it’s heart out to give our family optimal nutrition and excitement for a Sunday night.

    The Bosch is tipped to it’s side with resting pads built onto the unit. The Flaker attachment connects and a lever is flipped as a locking mechanism. When I flaked, I put the Bosch on a “1” setting. Just pour the grain in. The directions do not indicate that the unit be on to flake, but out of habit with the Wondermill I followed that routine.

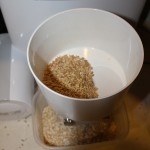
    Few minutes later I had actually “FLAKED!” I ended up flaking 14 C of rolled 9 grain and steel cut oats into flat little flakes. Granola went into the oven, and rolled steel cut oats and about a cup of 9-grain whole grain was set aside for breakfast tomorrow. Please note: I “flaked” steel cut oats because that is what I had. This flaker does not “steel cut” them- it just “rolled” them into flakes. The oats after flaking resembled a beautiful Amish Oatmeal. For us, I added flaked 9 grain to add variety to our hot cereal. It all looks GOOD!

    This is the end result. This is steel cut oats & a scant cup of 9-grain.

    BEAUTIFUL

    Flaked Oats, flaked whole grains can be utiltized in a variety of ways in all the ways you would think to use “oatmeal.” Hot cereals:just adjust water/liquid as necessary. Rolled oats to water is 1:2-3, 9-grain is 1:4, Barley 1:3, etc.

    Also- this is just one way to “flake.” I intend to try other tools of the trade, but maybe if you flake with one of them, you could note your experience on our website in the review section on the specific part? Here is a link to the page with a few on them. The Flaker attachment for the Bosch is in the Bosch catagory under the main unit where all the attachments are!

    Here’s to being a Flaker! Happy Flaking- Kathy, a Happy Urban Homemaker

  • Tips for Saving Heirloom Seeds


    Choose Standard or Heirloom Varieties That Are Not Cross-Pollinated By Nearby Plants

    Think beans, tomatoes, lettuce, and peppers. Known heirloom varieties are easy to save.


    Harvest from the Best Plants

    Choose disease-free plants that look like they have the most flavorful vegetables or beautiful flowers.


    Be Mature

    Harvest mature seed. This may mean that the fruit is beyond the eating stage. Fruit that is good for eating may not be good for seed saving. Let the fruit ripen (or over ripen) on the vine. Signs of maturity: flowers are faded and dry; pod plants like beans are brown and dry. Seeds are cream colored or have browned.


    Dry Method Drying

    Beans, carrots, corn, herbs, onions, peas and most flower seeds can be prepared using the dry method. Allow the seed to mature and dry as long as possible on the plant. Complete by spreading on a screen in a single layer in a dry, well-ventilated area until dry.


    Wet Method Drying

    Use the wet method for seeds contained in fleshy fruits like cucumber, melons, squash and tomatoes. Scoop the mass of pulp and seeds from the fruit or lightly crush fruits and put into a bucket or jar with warm water for 2-4 days, stirring daily. This process separates the good seed from the bad and eliminates any viruses. Look for the good seeds on the bottom of the jar. Discard the rest of the floating and non-seed material. Spread the good seed on a screen or paper towel to dry.


    Storing

    Store in a jar or paper bag in a cool, dry place and use the following season.


    For a complete selection of Heirloom and Organic garden seeds visit www.UrbanHomemaker.com


  • Brie Cheese Crowning Glory

    We needed to celebrate! Not sure why, but the Brie Cheese Crowning Glory is reason enough…. and it is GOOOD!

    This little yummy is especially fun around a holiday. I serve it as an accompaniment to a brunch, later afternoon snack and of course, if there are any guests this is a delight to serve. Certainly it can also be served when you need a little celebrating for no apparent reason.

    Brie Cheese Crowning Glory

    1 Brie Cheese Round- peel rind off

    1 C dried apples cut into small pieces

    1/4 C dried cranberries

    1/4 C chopped pecans or almonds

    1/3-1/2C Caramel dip

    Crackers

    Mix all ingredients with the exception of the brie & crackers. Mound on top of the brie. Serve with crackers and little cutting knives.

    Enjoy~ Kathy

  • Laundry Soap Evolvement

    My whole relationship with laundry soap has been one of evolvement. Yep, I evolve in what is important and what is not to where finally I arrive at just the right place. I have “arrived” at my current laundry soap status for over 2 yrs and I think I am sticking with it.

    Over 6 yrs ago, I went chemical free in our home to minimize any chemicals and to abolish potential health issues associated with toxins in cleaning supplies. The change in the health of one of our children was so major that he was released from a pulmonologist within the month of going chemical free with cleaners in the home. Basic cleaners in the home evolved to many areas in the home. Where I am today is on a soap box talking laundry detergent and cleaning simplicity and safety with children: Nowex Ultra Power Plus Laundry Detergent, Norwex Enviro Cloths and a basic spray: 50/50 water and vinager spray with Tea Tree oil as my fragrance of choice and the natural properties of disinfection. Growing up I was trained that a bathroom smelling like “pine” meant clean, so I trained myself to smell Tea Tree and have the same satisfaction.  Plus it insures that my kids really did clean the toilet!

    Over the last six years I have left couponing for laundry soap.

    I have made several homemade solutions.

    And I have tried most everything with a “natural, dye free, no fragrance” label

    I was never hugely ” Wow’d” to the point where I felt I arrived.

    I “arrived” by a friendly twisting of the arm by a friend. She knew I had a front loader washer and that with Norwex you can get 120 loads out of a $20.99 bag of Ultra Power Plus Laundry detergent. Yes, even with a top loader, you can get 120 loads~ just add a magnet ball.  So to get her to stop twisting my arm, I bought a bag….. and folks, I’ve never looked back! Our clothes are clean, they smell fresh, and I save a bundle by using 1tsp of soap per load.

    Using Ultra Power Plus Laundry Detergent by Norwex does several things for me: Satisfies me with the stain remover properties, the cleanliness and smell, hits a right price point at $ .17/ load as compared to $ .20-$ .35/load, AND it is biodegradable with no fillers so it is safe for our wetland septic system. Oh- did I say it doesn’t have synthetic fragrances which are one of the top toxins(ponder your dryer sheets, laundry soap, cleaners, etc.) in the home?


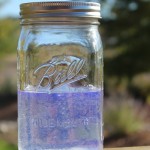
    See the comparison. I spoke to a group of ladies a few months ago in regard to going chemical free and training your children to clean safely. This visual alone blows me away as it is almost  30 days old. The “Clear” is Norwex Ultra Power PLus, the “cloudy one” is a major market brand that claims being “free” with dyes and fragrances, but nothing about fillers, and the “blue, cloudy one” is again a major market brand with other items added for the sport enthusiast. I know which one I am picking!

    Happy Laundry Days, Kathy


    If you need arm twisting let me know! Otherwise check out some of the current specials:


  • Make Your Own Whole Grain Pancake Mix

    Store the final mix in n airtight container or freeze


    The original recipe inspiration came from Make A Mix by Karine Eliason. This basic mix can stand alone or be varied in a number of ways. Make this mix and put it into a container to store in the freezer; this will help keep it fresh. You can half this recipe to go smaller; with 5 people in our family we refill our pancake mix container 2-3 times per month.


    Ingredients

    • 16 C freshly ground Hard White Wheat (see variations below)
    • 4 C Powdered Milk (you can use Buttermilk powder too)
    • 1 C Sugar
    • 16 tsp baking powder
    • 8 tsp baking soda
    • 4 tsp salt
    Mix all dry ingredients together


    Directions

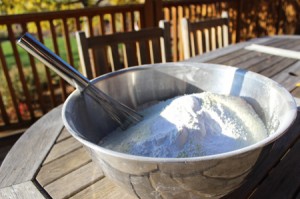
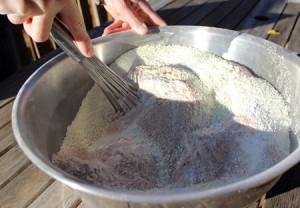
    Mix all dry ingredients together until thoroughly blended. Store in an airtight container.


    Custom Mix Variations

    This is the best part! Our whole grain pancake mix is very forgiving and amazingly versatile. Pancakes are one of the oldest forms of quick breads, and as such the ingredients are so simple that failure is really quite difficult.

    We love to customize our homemade pancake mix with custom flour mixtures. Mix any variation: Hard Red Wheat, Hard White Wheat, and Soft White Wheat. Barley only, Barley with Hard White. Rye and Hard White, Kamut, 9-grain, Oats, Spelt, or all the above! Grind and mix any whole grain variation that sounds yummy or interesting to you. Even if you use a grain that is low gluten; it’s no matter because pancake batters are forgiving when using low gluten grain!

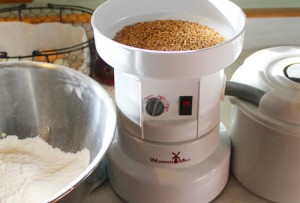
    Use a grain mill like the Wondermill or Nutrimill for fresh flour

    If short on time or grains, use what you have in whole or part. There really are very few rules when it comes to pancakes. For those coming off of store bought mixes, yes it is ok to put in partial amounts of unbleached flour until the family doesn’t realize they are 100% whole wheat/whole grain! Just keep slipping in more and more of those healthy whole grains during the transition process.


    Basic Pancake Batter

    • 1 egg
    • 2 T Olive or Coconut oil (the Olive Oil adds a unique hint that really compliments the flavor)
    • 1-2 tsp pure Vanilla extract
    • 1.5 – 2 C of you homemade Pancake Mix
    • 1 C water (Add more for thinner pancakes and less for thicker; we tend to like our pancakes a little thinner)

    Directions

    Add egg, oil, vanilla and Pancake mix to bowl. Add any additional mix-in or stir in (see below) before adding water. Add water and stir with a whisk until blended to desired consistency. Cook on a preheated griddle using coconut oil or olive oil; medium heat works best for thorough cooking to eliminate doughy spots in the middle.

    Serve hot with 100% real Maple Syrup. We like to substitute the syrup with homemade jam as a nice change of pace or a combination of jam and yogurt (a real treat from our point of view).

    Variations

    Here are some popular variations to spice up your basic Pancake Batter:

    • Mix in Applesauce,  pumkin, pureed Bananas or peanut butter
    • Add a splash of lemon or orange juice for a light zesty flavor
    • Include ground Flax, Almonds, or crushed Pecans
    • Add Cinnamon or nutmeg
    • Mix in fresh Blueberries, Chocolate Chips, or Yogurt (gives nice texture)
  • Jalapeno Ranch Whole Wheat Bread Recipe

    Ingredients

    Hand Method: (yields 2 loaves)

    • 1/3 cup honey
    • 1/3 cup oil
    • 2 1/2 cups warm water (110°F)
    • 1 1/2 Tbsp SAF Instant Yeast
    • 2 1/2 tsp salt
    • 6 – 7 cups fresh whole wheat flour (room temperature)
    • 1 1/2 Tbsp Dough Enhancer, optional
    • 1/3 cup Vital Wheat Gluten, optional
    • 1/2 Cup grated sharp cheddar cheese (you can experiment with any number of cheeses)
    • 2 Tbsp ranch salad dressing mix
    • 2 chopped fresh jalapeno peppers (seeds removed)

    Large Mixer Method: Yields 4-6 loaves

    • 2/3 cup honey
    • 2/3 cup oil
    • 6 cups warm water (110°F)
    • 3 Tbsp SAF Instant Yeast
    • 1 1/2 – 2 Tbsp salt
    • 14 – 18 cups fresh whole wheat flour (room temperature)
    • 2 Tbsp Dough Enhancer, optional
    • 2/3 cup Vital Gluten, optional
    • 1 Cup grated sharp cheddar cheese (you can experiment with any number of cheeses)
    • 4 Tbsp ranch salad dressing mix
    • 4 chopped fresh jalapeno peppers (seeds removed)


    Directions

    Hand Method

    Combine the warm water, yeast, and 2 cups of fresh whole wheat flour in a large mixing bowl. Allow to sponge for 15 minutes. Add the honey, oil, dough enhancer, salt, ranch salad dressing mix, chopped jalapenos and 4-5 cups additional flour until the dough begins to clean the sides of the mixing bowl. This is true whether you are mixing by hand with a wooden spoon or using a dough hook attachment with an electric mixer.

    Mix the cheese in near the end of the kneading process and distribute as desired. Some people like clumps of melted cheese and others prefer the cheese evenly distributed throughout the dough. Knead the dough by hand 7-10 minutes or until it is very smooth, elastic and small bubbles or blisters appear beneath the surface of the dough. When hand kneading, oil your kneading surface and your hands with 1-2 tsp of oil to help reduce stickiness to avoid adding too much flour.

    Form the dough into 2 loaves and place into greased bread pans. Allow the dough to rise in a slightly warmed oven (85-100°F) or other warm place until doubled in size, about 30-60 minutes.

    Bake the loaves for 25-30 minutes at 350°F. Preheating the oven is not necessary. Bread is done when the top, sides, and bottom are nicely browned in color, or 180°F to 200°F is reached on an instant-read thermometer. Over baked is better than under baked.


    Large Mixer Method

    Combine the honey, oil, warm water, yeast, dough enhancer, and 2 cups of the whole wheat flour in the mixing bowl; sponge for 15 minutes. Add the salt, ranch salad dressing mix, chopped jalapenos and 14-18 cups additional flour, 1 cup at a time, while the mixer is running until the dough is stiff and cleans the sides of the mixing bowl.

    Mix the cheese in near the end of the kneading process and distribute as desired. Some people like clumps of melted cheese and others prefer the cheese evenly distributed throughout the dough. Knead the dough for 6 minutes on speed #1 (or low speed) to develop the gluten if you are using fresh flour. Allow the dough to rise until doubled, about 30-60 minutes. This first rising is optional if you are in a hurry.

    Form the dough into four to six loaves and place into greased bread pans. Allow the bread dough to rise in a slightly warmed oven (85-100°F) or other warm place until doubled in size (about 30-60 minutes).

    Bake loaves for 25-30 minutes in a 350°F oven. Bread is done when the top, sides, and bottom are nicely browned in color, or 180°F to 200°F is reached on an instant-read thermometer.


    Another good recipe for Jalapeno Bread can be found here.


  • An Urban Homemaker’s Breakfast: Part II

    One of my homemaking goals is to use what I have and enjoy the process of finding the recipes which are now becoming traditions.  Breakfast is also a favorite mealtime and I have recipes that I am asked to share over and over again. These items may use a same basic ingredient at times, but when you buy in whole grain bulk embrace it!


    Special Pancake- aka German Pancake, Puff Pancake:

    This recipe is often requested and I make it for guests or just on Saturday mornings when I have more time. I have everything to make this and by the time the oven preheats the batter is ready to go and once again I have used one of my favorite kitchen tools: The Vita-Mix Blender. For small batches of flour, I can quickly mill the soft white wheat for this recipe in the dry blade container and then switch to the wet blender container and mix my batter!

    We triple this recipe as our family of 5 will eat it! I use a Superstone: Deep Dish Baker and a 9×13.

    Preheat oven at 425. Spray pan with olive oil, smear bottom of Deep Dish Baker with 1 T coconut oil or butter.

    Into blender:

    3/4 C milk

    3 eggs

    1/4 tsp salt

    1/2 tsp vanilla

    2 T sugar

    1/2 C freshly milled soft white wheat ( or 1/4 C white flour & 1/4C  hard red or white wheat) (Lighter the flour , lighter the rise of the pancake. More whole wheat the denser the pancake, but just as yummy!)

    Mix till blended, pour, then bake! This recipe serving will fill a pancake pan. Double it or triple it and use bakeware sizing which is appropriate, i.e. 9×13= doubling, deep dish baker=single, both= triple!!!

    Favorite toppings include- but not aren’t limited to: syrup, lemon juice and powdered sugar, vanilla yogurt and fresh berries, jam of any variety. Yogurt with jam is our favorite!

    There is more!

    On the go?- Make it ahead! or heck, surprise everyone and take it camping already made! I made this dish for 10 of my closest triplet mom friends who came for a girls’ “Mother’s Escape” Weekend, i.e no kids, no husbands, just us girls! and it was a hit. I take it often to brunches with an empty bowl to take home. It is yummy..

    Cold Porridge!

    I make this for visitors with a blender muffin and fresh fruit! You make this recipe the night before guests or for a camping trip. It is welcomed all through the day!

    1 C oatmeal- ( can sub 7 grain flakes)

    3/4 C milk

    1/4 C nuts of choice (almonds, pecans, hazelnuts, seeds: pumpkin!)

    1/4 C sugar

    1 large GREEN apple (unpeeled coarsely grated)

    1/3 C raisins or currants (optional)

    2 T lemon juice

    1/2 C plain yogurt or vanilla

    Mix into a pretty batter bowl , cover and refrigerate over night. Garnishes: fresh whipped cream, honey, nuts, muesli, and fruits. This makes 4 large helpings. I double this for when guests are present.


    May you enjoy-    Kathy