Category: Frugality

  • My Favorite Christmas Cookies

    I was invited to two cookie exchanges this year.  I normally don’t go to the cookie exchanges because of past experiences when I had to take home store bought cookies to replace my hours of hard work.  These exchanges worked a little differently, we could pick and choose from the choices up to the number of dozens of cookies I brought.

    Since I only brought 3 dozen cookies this wasn’t too hard to do, and I got to take home a nice assortment of homemade goodies.

    OK, I admit it, I used real sugar for these instead of the healthier version.  Once a year I think it is fine to use the real thing.  Sucanat in the snowballs, I think adds too much flavor and masks the delicious pecan/butter flavor of this cookie.

    Pictured above are my all time 3 favorite Christmas Cookie Recipes that I always make because I like them.  They don’t look so festive but they are yummy and usually disappear quickly at Holiday Open Houses and other Christmas parties.

    To join the Christmas Cookie Recipe Contest -Share this  page link with your Facebook and Twitter friends.  When you have done that and post your favorite recipe (please don’t post recipes from other websites – just your own family favorite)  in the comments section below you will have a chance to win an Enviro Cloth – $14.50.  There will be five randomly chosen winners.

    BUTTER NUT SNOWBALLS
    (I have had this recipe for nearly 30 years!)

    1 Cup butter, softened
    1/2 cup sugar
    2 tsp. vanilla
    1/2 tsp salt
    2 cups all-purpose flour (I use kamut flour)
    2 cups finely chopped walnuts or pecans ( I use pecans) (more of a coarse flour consistency)
    Confectioner’s Sugar

    Cream butter, sugar, and vanilla until fluffy. Add the flour, salt, and blend well. Add in the finely chopped nuts. Shape into 1 inch balls. Bake 325 degrees F for 30 minutes. Do not brown! Roll in confectioner’s sugar while still warm and place on cooling racks.


    DATE BARS
    These are excellent, yummy, festive, delicious

    2 1/2 Cups dates, cut up
    1/4 Cup sugar or Sucanat
    1 1/2 Cup water
    1/2 Cup chopped walnuts (opt)
    1 1/4 cups whole grain flour
    1/2 tsp salt
    1 tsp baking soda
    1 1/2 cups rolled oats
    1 cup brown sugar  or Sucanat
    1/2 cup butter, softened
    1 TB water

    Combine dates, sugar and 1 1/2 cups water in saucepan. Cook, stirring frequently, until like thick jam. Cool. Stir in nuts, if desired. Meanwhile, sift together flour, salt and soda into mixing bowl, stir in oats and sugar. Cut in butter until mixture is crumbly. Sprinkle 1 TB water over oat mixture; mix lightly. Pat about 2/3 of crumb mixture into greased 13 X 9 X 2 pan. Spread with date mixture. Cover with remaining crumb mixture, pat lightly. Bake at 350 degrees F for 35 to 40 minutes or until lightly browned. Cool; cut into bars. Makes about 40 bars.

    Double Chocolate Mint Treasures


    3/4 c. butter
    1/2 c. brown sugar or Sucanat
    1/2 c. sugar
    1 egg
    1 tsp. vanilla
    1 tsp. peppermint extract
    1 1/2 cups whole grain flour
    1/2 c. baking cocoa
    1 tsp. baking soda
    1/4 tsp. salt
    1 c. chocolate chips

    Cream together butter and sugars. Add egg, vanilla and peppermint extract. Combine dry ingredients in a bowl. Add to wet ingredients and then stir in chocolate chips. Bake at 350 for 10 minutes on greased cookie sheet.


    PEANUT BLOSSOMS (not pictured)
    This recipe is fun to make with your children. They love to place the candy kiss in the middle of the cookie after they are baked.

    1 3/4 cups all-purpose or whole grain flour
    1 tsp. baking soda
    1/2 tsp. salt
    1/2 cup sugar or Sucanat
    1/2 cup firmly packed brown sugar or Sucanat
    1/2 cup softened butter
    1/2 cup creamy peanut butter
    1 egg
    2 TB milk
    1 tsp. vanilla extract
    48 milk chocolate kisses, unwrapped

    In a large mixer bowl, stir flour, soda, and salt.  Add remaining ingredients except candy and beat at low speed of mixer until well combined, scraping bowl occasionally. chill dough 30 minutes.

    Preheat oven to 375 degrees F. Roll small amounts of dough into 1 inch balls.   Place on ungreased cookie sheet and bake 12 minutes or until light brown. Remove from oven and immediately press a chocolate kiss into each center. The cookie cracks around the edge. Repeat with remaining dough. Makes 4 dozen, about 70 calories each.

    Follow me at Facebook: http://www.facebook.com/urbanhomemaker

    Follow me at Twitter: http://www.twitter.com/TheUrbanHome

  • Don’t Throw Out Those Turkey Bones

    brothSeveral years ago, I was told by an older wiser mom, that the secret to her soup is in making homemade broth.  Years later, I learned that the chicken base/bouillon cubes I was buying were actually loaded with MSG, and not only unhealthy  but  a poor facsimile to the real broth in health and taste.

    Never Throw Out Turkey, Chicken, Fish, Lamb, or Beef Bones

    • Before MSG came into widespread use there were no commercially available chicken or beef broths available so it turns out Grandmother knew best when she used what she had and made delicious and nutritious homemade broths.

    • The homemade broth or stock contains minerals including calcium but also magnesium, but also phosphorus, silicon, sulphur and other trace minerals.

    • Homemade broth helps build the immune system.  We all know that chicken soup is also known as “Jewish Penicillin”.
    • Good stock contains gelatin that has been proved useful in the treatment of diseases and very nourishing to the gut. Examples of diseases that benefit from homemade broth  include peptic ulcers, infectious diseases, jaundice and cancer.

    • French studies showed that babies had fewer digestive problems when gelatin was added to their milk.

    • Ask any soup maker – homemade broth makes superior soups, is excellent to drink when sick, and perfect for Real Gravy.

    • For More information about homemade stock: Read “Broth is Beautiful” by Sally Fallon Morell

    • Here is our absolutely most favorite soup recipe using turkey or chicken stock.  So enjoy those turkey leftovers, creatively:

    TURKEY CHOWDER
    If you make homemade turkey stock from the leftover bones the flavor skyrockets to a perfect “10”! Even if you can’t try this recipe out this year, be sure to save the recipe for future use. I usually double the amounts to have some leftover soup for the freezer. If you let the soup sit a day, the flavor improves with age. We’ve eaten this in bread bowls that I’ve made. Fabulous!

    2 C. sliced carrots
    3 C. water, turkey broth or canned chicken broth (watch out for vitamin C)
    1 large floret of broccoli OR 1-10 oz box of broccoli
    1 C. onion, chopped finely
    1/2 C. celery, sliced
    1 tsp. salt
    1/2 C. ground oat flour (blend rolled oats in the blender to make flour)
    2 C. milk or allergy alternative
    6 oz. Swiss cheese, grated
    1-1/2 C. diced turkey

    Combine carrots, broth, onions, celery, broccoli, and salt. Bring to a boil over medium heat. Simmer 10 minutes. Bring to rolling boil again, and gradually stir in the oat flour, stirring constantly.   Let simmer another 10 minutes until lumps disappear. Reduce heat. Add milk, turkey. Remove from heat. Stir in cheese. Serves 4-6.

    Follow me at Facebook: http://www.facebook.com/urbanhomemaker

    Follow me at Twitter: http://www.twitter.com/TheUrbanHome
  • Will Wheat Prices Become Volatile?

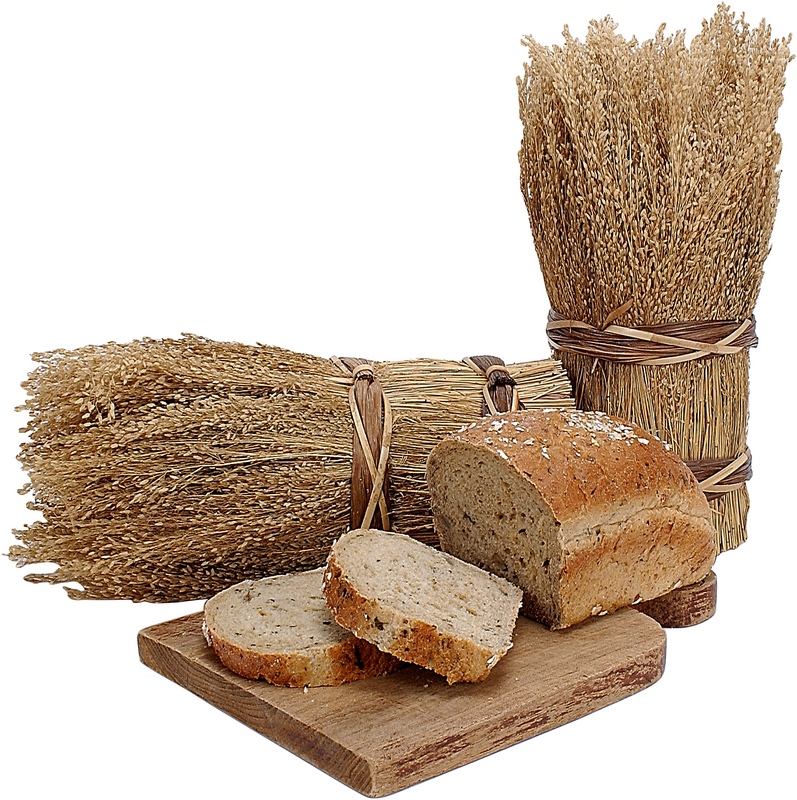
    multigrain2I just read this article on the New Harvest Homestead Discussion group that suggests that the wheat market may become volatile because Russia, a major wheat exporter, ceased exports this past summer because of  a poor crop harvest.  That means that the countries that depended upon Russia (including Iraq) will now be looking elsewhere for their wheat.

    It is always prudent, in my opinion to stock up on grain when the price is good and to protect you and your family from shortages.

    Fortunately, the United States had a superior harvest this past year and my grain supplier does not plan any major price changes for now.  Yet we do not know what the 2011 harvest will be like yet, and since Australia a major grain producer is being hit at this moment with the worst plague of locusts in 70 years that fact may effect world grain prices to become volatile.

    Read this link from an article from the Kansas Wheat Commission regarding the situation to get a more complete picture of the unknowns:

    http://www.kswheat.com/news.php?id=463

    Having a good supply of wheat for our family’s daily bread can be a huge blessing not only to our own families, but to others who may be struggling. Neighbors will always welcome a loaf of fresh bread from us regardless of their circumstances.

    Marilyn’s Famous Whole Wheat Bread Recipe

    Follow me at Facebook: http://www.facebook.com/urbanhomemaker

    Follow me at Twitter: http://www.twitter.com/TheUrbanHome
    Enjoy!

  • Gluten Free Baking Questions/Answers

    I’m going to try making Thursdays our question of the week day, where you teach me and other readers the answers to important cooking and health related topics.

    I received this question in my email last week and would love to get lots of reader feedback to help her out.

    Is it possible to make gluten-free bread with the Zojirushi breadmaker?   At the moment I am trying to decide between purchasing a Bosch blender/mixer combo or the Zo machine.  I only have a family of five, and one of them needs to eat gluten-free.  So, I would be making wheat bread for only four people.

    I personally have made a millet/egg batter yeast bread in my Zo that worked out OK, but I wasn’t crazy about it.  It uses eggs and xanthum gum to help hold it together but it has a completely different taste/texture than wheat or Kamut TM.  I also have made gluten free whole grain porridges and pancakes using millet and brown rice successfully.

    So I am turning to you all for your helpful testimonials, insights and resources to share with others.

    Please share your TNT (tried and true) gluten free bread recipes and ideas in the comments section below for a complimentary copy of my ebook Holiday Open House.

  • Roasted Tomato Marinara Sauce

    After I  finished the apple sauce Saturday, Belinda and I still had time to chop up the end-of-the season tomatoes to make roasted marinara sauce.

    TomatoesThe beauty of this recipe is that you use what you have including tomatoes that are going over the hill.  Oven roasted vegetables of any kind are extra flavorful and so is this sauce which can be used for spaghetti, pasta sauce, pizza sauce, tomato soup, anything you would use a marinara sauce for.

    Method

    Using a deep roasting pan, or two 9 X 13 pans, drizzle the bottom of the pan with olive oil – 1-2 Tbsp.  Fill with chopped tomatoes – any kind or combination of tomatoes is fine.

    Slice up 1-2 medium onions and arrange over the top of the tomatoes.  Add herbs such as basil, garlic, oregano, thyme, and rosemary to taste along with some hot red peppers if desired.  Sprinkle some salt over the pan. Roast the onions/tomatoes for 90 minutes at 375 degrees F.  Allow to cool.  Run through the blender, package in 2 – 4 cup portions and freeze.

    You can add tomato paste to make it thicker, or pour off some liquid if desired before pureeing in the blender.  Adjust seasonings.

    I enjoyed this sauce over spaghetti squash last year.  I also added some Parmesan cheese and pine nuts to the sauce in the blender before heating for an extra rich flavor.

    Roasted

  • Dehydrating – Food Preserving the Easy Way

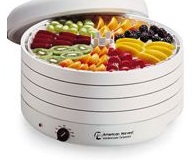
    Why Dehydrate?dehydratingWe’re hooked on dehydrating! Most foods can easily and successfully be dried with very little preparation time. What’s more, they are even easier to use!

    With all the surplus apples at a good price, Stephen and I are going to get busy dehydrating later this week before he leaves for his officer training.  He can take a little taste of home along with him and no worries about spoilage.

    I love the round dehydrators with a fan because you can adjust the number of trays as needed, there is a thermostat, and plenty of power.  But any dehydrator will work.  It’s quick and easy.

    Advantages of Dried Foods:

  • Easily Stored – Dried foods take one-tenth or less the storage space of canned foods.
  • Naturally Good and Nutritious – Flavor and nutrition are kept in dried foods without adding preservatives, sugar, or salt. Dried fruits and some vegetables (such as seasoned zucchini chips) are great natural snacks.
  • Economical – Bottles, jars, lids, sugar, etc. are just some of the items you won’t have to buy when you dry food. Processing energy will also be lowered considerably. Overripe fruit needn’t be thrown away but can be converted into tasty fruit leathers.
  • Completely Safe – Dried foods (even vegetables and meats) are completely safe when dried according to directions. There is no danger of botulism because the moisture that is a breeding ground for organisms has been removed.
  • Versatile – Dried foods are easily reconstituted for use in many recipes; from main dishes to breads and desserts. Leftovers and peelings can be dried for flavoring soup stock.
  • Easily Prepared – For people in a hurry, drying is the ideal way to preserve food. Very little preparation is needed – no hot jars, canners, or boiling water to tend.
  • Follow me at Facebook: http://www.facebook.com/urbanhomemaker

    Follow me at Twitter: http://www.twitter.com/TheUrbanHome

  • Moving to the Camp Kitchen

    I spent a large portion of my time last week moving kitchen essentials into my camp kitchen and boxing up the non-essentials from my “old” kitchen.  The picture below shows my kitchen table, working counter top with a hot plate, electric tea kettle,  and storage for silverware, mixing bowls, and pots and pans.

    IMG_0223.JPGThe right corner of the camp kitchen contains an old computer desk that I used for writing ebooks and newsletters when Duane was still living.  Now I have my bible,  laptop, home telephone and answering machine located here.  To the right of the main eating table (outside the picture) is a very old set of file drawers that are doubling as a counter to house my microwave/convection oven combo, an airpot being used as a faucet for cold drinking water, and my beloved Bosch.

    IMG_0222.JPGAlong the left side of my camp kitchen facing the window is my entire family library with a banquet table set up in front for my cutting board, utensil storage, and dish washing station.  The trash can is in front of the banquet table.

    IMG_0224.JPG

    IMG_0226.JPG

    I now have my dining room, family library, kitchen, and desk area tucked into about a 10 X 12 foot space.  It’s all very cozy but surprisingly functional.

  • Kitchen Remodeling Plans- Part Two

    mollkitpic1The above picture is a rendering of my proposed kitchen remodel floor plan with window seats.

    The most exciting development in the last week is that a Paonia, Colorado customer has asked if she could have my old cabinets and help with the demolition project.  She came over, made measurements, took pictures, went home and called back a little while later saying she thought everything would work in her kitchen and is very excited and so am I.

    I really am old-fashioned at heart, I believe in the old adage of “use it up, wear it out, make it do, or do without.”

    So why am I no longer making do with these serviceable cabinets, then?

    My kitchen remodeling project has several goals:

    1.  Replace/Update 35 year old appliances that are not repairable.

    2. Re-do the kitchen layout so the kitchen can accommodate more people and add an island to facilitate traffic flow.

    3. Expand the existing small kitchen space into the existing dining space to add a desk and get family paperwork off kitchen counters and move the dining room table into the existing sun room, a large space that is underutilized.

    4.) Most importantly, I intend this “new” kitchen to be my future studio for producing instructional DVD’s.

    In the last week I have been able to reduce the cabinet costs by choosing to use rustic alder (it’s on sale this month) instead of rustic cherry, making minor cabinet modifications that don’t take away from the original design, and identifying other cost saving options.

    mollkitpicMy plan is to order the new cabinets next week, and use the week-end to decide whether to keep the window seat cabinets (lots of extra storage and seating) or eliminate these cabinets from the project to cover other costs.  An elder in our church who I consult when facing big decisions has encouraged me to give myself permission to waffle back and forth in the next few days, – yes, I want the window cabinets, no – I can live without them.  So that is what I’m going to do.

    The above picture shows a representation of the kitchen without the window seat cabinets.  Whether I do with or without the window seat I will be putting a small bistro table in the space in front of the window for eating.  The funny looking beams at the ceiling line represent beams going up to a cathedral ceiling in the new kitchen area.  The existing kitchen area ceiling will have to stay the traditional 8 feet.

    I’d love to hear from you with your thoughts.

  • Hero Moms Incarnating Proverbs 31

    Ed Note:  Here is the recording of a recent phone interview with Kevin Swanson regarding the story of The Urban Homemaker.

    Hero Moms Incarnating the Proverbs 31 Vision

    The Urban Homemaker In a day of fragmented families and big-business oriented economies, one family’s vision took them on an amazing journey. The life of faith is not always pretty, but it is also not without its joys and triumphs! When Duane and Marilyn Moll took the trip all the way home in the early 1990s with home schooling and home businesses, they had no idea what would lie ahead of them. Marilyn Moll tells the inspiring story of Urban Homemaker on this edition of Generations.

    There are many different ways that Christian families are incarnating the biblical model for home life, integrated families, and Proverbs 31 home-managers. But in a world of egalitarianism, socialist-driven economies, family disintegration, and institutionalized, non-discipleship oriented education, it is a huge inspiration to see a few families embracing the biblical vision and trying out a few incarnations of that vision!

    listen now!
    http://generationswithvision.com/RadioShow.aspx?sid=1159

  • Winning the Credit Card Game

    When my husband was living, we made it our goal to live debt-free as much as possible except for our mortgage.  Unfortunately, when he died, that goal had not been achieved.   You can imagine the overwhelming sense of panic and fear that came over me when I was facing the entire debt load by myself.

    With God’s help and you my loyal customers, a significant reduction in our family debt has been achieved over the past year.  But I know that the burden of the economic downturn and the uncertain financial future everyone faces,  there are many families wanting to get very serious about paying off their debts and staying debt free.

    If you are one of those families, don’t miss this opportunity to get the Winning the Credit Card Game e-book for only $5 (reg. $19.95) today through Friday (March 16) only.

    Tawra and Mike Kellum of Living on a Dime paid off $20,000 in debt in 5 years on $22,000 a year income by taking advantage of low interest rate credit card offers.  In Winning the Credit Card Game, Tawra and Mike explain how they were able to do so and offer detailed advice on how you can get debt-free while saving thousands of dollars on interest charges. Here are some of the topics covered in Winning the Credit Card Game:

    • Are these deals for real?
    • Scripts to follow to ask for lower interest rates
    • What traps credit card companies set to keep you in debt
    • “What about those companies that can erase my bad credit?”
    • When to close extra cards
    • What to do if you are late on a payment

    Winning the Credit Card Game is available as an immediate download, so you can get started lowering your debt today.

    This is such a great value, I just had to share it with you! Check it out at:

    http://urbanhome.livingonad.hop.clickbank.net/

    VISIT MY BLOG:
    http://www.marilynmoll.com

    Copyright 2009 by Marilyn Moll.

     From the Heart of the Urban Homemaker is a complimentary newsletter published bi-weekly.  Sign up at http://www.urbanhomemaker.com/subscriptions and obtain a complimentary copy of my free report Soups and Stews for Busy Moms.