Category: Family

  • The “dog days” of Summer

    Summer night sky


    Avoid boiling seas, languid animals and madness…

    In the northern hemisphere, the dog days of summer are the sultry, hot, sticky days from July to mid August.

    We call them the dog days, thanks to the Greeks and Romans. Ancient cultures mapped and named the constellations long before we got here. They associated the dog days with the constellation Canis Major (large dog) and the brightest star in this constellation, Sirius. Sirius is the brightest star in the night sky. It’s so bright in fact that the Romans thought we received heat from it.

    Originally, the dog days were the time when Sirius rose just before sunrise and it was thought that the combined heat from the sun and Sirius produced the hottest of days when all sort of terrible things happened (languid animals, boiling seas, madness and hysteria caused by heat). In ancient Egypt, this time marked the flooding of the Nile.

    The dog days are in full swing around these parts and luckily for us we have a plan to beat the heat and return us to our senses. The solution? Ice cream, and lots of ideas how to make and top it!

    Get our favorite recipes here

    Join our newsletter


  • So What’s in Your Mattress?

    Did you know the typical mattress gains 10 –20 pounds over its life because your home contains millions of dust mites and their fecal matter live in mattresses, furniture, carpet, and children’s stuffed toys?  Not a very pleasant topic but there is an easy, safe solution to a nasty household problem.

    Here’s the scoop:

    Dust mites are microscopic. About 50 of them can fit on the head of a pin. They  feast on the fungus that grows from dead skin cells and animal dander.

    On average, one dust mite produces 20 fecal pellets daily. These droppings are the most  common cause of dust-related allergies and asthma.

    Dust mites product 200 times it’s body weight in excrement during their normal life span. They can live without food for up to a year.

    The average life cycle for a male house dust mite is 10 to 19  days and a female house dust mite can last up to 10 weeks, laying 60 to 100 eggs in the last 5 weeks of her life. In her average life span, she will produce approximately 2,000 fecal particles.

    Their favorite breeding spots are:
    • Beds
    • Vehicle seats
    • Pillows
    • Pet beds
    • Comforters
    • Sofas
    • Stuffed toys
    • Anywhere organic material collects
    • Upholstery

    Mattresses and upholstery  are warm, often moist, cozy, easy to burrow into environments filled with the dust mites  choice of food…dead skin cells.  Unfortunately dead skin cells do not readily vacuum away or launder well on upholstered furniture, mattresses, pillows etc.

    The fecal matter of dust mites is lighter than air and becomes airborne when disturbed by activity like fluffing pillows and tossing and turning during the night and especially disturb those prone to allergies and asthma.

    I think you will pleased to know that Norwex Mattress Cleaner is a natural product which contains non-pathogenic microorganisms that are the active ingredients.  These microorganisms do not cause disease but instead they are good bacteria and they work to “eat up” all the accumulated dander, dead dust mites, and dust mite fecal matter that has accumulated in the mattresses, pillows, upholstery, etc. and convert it into carbon dioxide and water

    This spray leaves no residue.  Some people who have used this product have reported the elimination of snoring, reduction in the severity and frequency of asthma, eczema, bronchitis, rhinitis, morning sneezes, itchy eyes and blocked nasal passages and even improved sleep!

    The Mattress Cleaner Spray only needs to be used quarterly (more often if you have severe allergies).  Use approximately 5 sprays for a twin mattress, 8 sprays for a double, 12 sprays for a queen/king size bed, 1-2 for a pillow, 2 sprays for stuffed animal and 5 sprays on fabric upholstered sofas.

    What a simple, healthy solution to a nasty topic.  Try it today!

  • Have You Ever Had Someone Bring Out That “Mama Bear” In You?

    You know, when some person or some situation ignites that primal protection instinct and your inner Mama Bear leaps into action ready to defend & destroy!

    Has it ever been a real Bear?

    An excerpt from Wikipedia explains the concept of the Mama Bear!

    “…however, when a mother feels her cubs are threatened, she will behave ferociously. It is recommended to give all bears a wide berth because they are behaviorally unpredictable.”

    Or perhaps it explains me?

    However, when Kathy feels her children are threatened, she will behave ferociously. It is recommended to give all Kathy’s a wide berth because they are behaviorally unpredictable.

    Urban Homemaker / Mama Bear: One in the Same….

    Beautiful East Fork of the Cimarron

    We recently went camping in the mountains. The Cimarron range encompasses so much beauty it makes you stop in your tracks, smell the great outdoors, and wish you never had to go back to civilization. This is our “cabin” escape that we love to come to year after year.

    Flashback to Saturday Evening

    3 kids, 2 parents, 2 dogs decide to take an evening walk and enjoy the mountains. Dad says, “Hey kids, run up to that stump and see who wins”. We are about 30 yard from the tree stump and the tree stump is about 30 yards from the tree line of the forest.

    As the kids reach the stump, mom and dad see a cow coming out of the tree line. Oh, wait that’s not a cow, it’s an Elk. Umm… that’s not an Elk. THAT’S A BEAR!

    The scene of the "encounter"

    Yes, our family walk ended with an unexpected meeting of a large, 375lb bear. This bear (probably on a mission to get water from the nearby stream and not really intending to eat my kids), came face to face with us.

    In a split second I went from Urban Homemaker Kathy: calm, cool, collected to a crazed Mama Bear Kathy! Yep, suffice it to say that I now fully understand the sow and her ways! I went behaviorally unpredictable and nothing was going to threaten my children even if the threat was perceived (or real).

    In an instant I was after that bear to save my children with a determined energy that made me too fierce and scary, cause that big ol’ Bear turned and burned right back into those woods! Now, I admit, Wayne was my wing man, or maybe I was his, but we scared that Bear away nonetheless.


    As the pendulum swings… so did Kathy


    Urban Homemaker Kathy to Crazed Mama Bear Kathy…. now “freaked out, let’s get outta here” Kathy… Best day ever! to WORST day, ever! Let’s GO!

    My digression lasted moments as we soon were faced with thankfulness and thrilled elation! We all realized we received a blessing. We were privileged. I had one of my wish list items (safely) checked (i.e. I wanted to see a bear in the wild). So I feel completely blessed to have that gift.  Truly, truly it was a gift. The wild complement their Creator. The bear simply made it plain!

    Just a bit of warning… I had no idea I could be a Mama Bear in that split second and not even have fear associated with getting after a bear to bring my kids to safety- all the while both Wayne and I were applying bear safety instructions to our kids (so they wouldn’t run and look like prey) and managing the best we knew how.  So if you’re a mama, the same can happen to you…

    Urban Homemaker / Fierce Mama Bear:

    “When a mother (insert your name) feels her cubs are threatened, she (insert your name) will behave ferociously. It is recommended to give all bears (insert your name) a wide berth because they are behaviorally unpredictable.”

    Shhh…Secret Camp Spot
  • Busy Mom Bread Making Solution #2

    It is 93 degrees in beautiful western Colorado and I have no bread to feed 3 hungry children. Did I say I was busy? Yes, adding work into my normally busy day has made me rethink a few things.  So, might I share a few solutions for such a time as this?

    • Solution #1- buy store bought. Ugh I feel like a failure to do so…. ( go with Solution #2)
    • Solution #2- make your own!
      • Use what you have! I have an old bread machine. Time to let it work while I work!
      • Get a new recipe and try it!
      • Utilize the Sun Oven– keep the kitchen cool! Keep Mama cool! Have Sun Oven pay for itself! – all pluses!


    Homemaker Help

    I have a dear friend Chris, who has a wonderful, delightful, young adult daughter, Heather. Heather shared a bread recipe that we devoured in less than a minute after it came out of the oven the last time I was at their ranch. I noticed they have their “old” bread maker work for them with the quick dough prep while they run their Rocky Mountain Christian Filmmaker’s Camp,  www.ChristianFilmmakersCamp.com.  So I followed suit since I didn’t want to go with solution #1. I went with using what I had and feeling good for doing so.

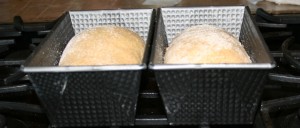
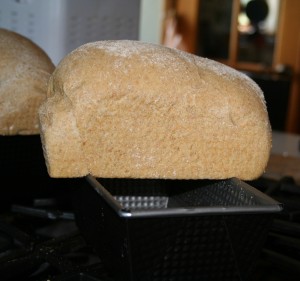
    I put the recipe into my bread machine as stated below and I ran errands. As I walked into the house with arms full of groceries, etc. the timer went off and I was able to take the dough, punch it down and put it into 2- 8″ bread pans. I proceeded to preheat the Sun Oven while I put groceries away and in 10 min or so the dough was at the height recommended by Sun Oven. I spritzed the bread tops with water ( to get a brown top), put the loaves into the Sun Oven and went back to fixing lunch, etc. 40ish minutes later- fresh bread! I made this recipe yesterday in a very hot kitchen (due to my oven being on)  on a 90 degree day and made a resolution right then and there to bake in the Sun Oven for the summer.

    Heather’s Bread Recipe

    by Heather Lawrence, Co-Chef, Main- Baker, Tasty Sweet Maker of the Rocky Mountain Christian Filmmaker’s Camp.  Thank you !!!

    • 3/4 c warm milk, buttermilk, kefir (Kathy used powdered milk : see note of being busy above!)
    • 1/2 c warm water
    • 2 eggs
    • 4 c wheat flour  (can use part white, part wheat flour) (Kathy used our Hard White Wheat)
    • 2 Tbsp olive oil
    • 2 Tbsp honey (approximately – I don’t measure this, but I don’t use all that much)
    • 2 tsp salt
    • 2 Tbsp Vital Wheat Gluten
    • 2 tsp yeast
    For the Sun Oven: Dough must be up to 1/2″ from top of bread pan.

    Put ingredients in bread maker in order listed on dough cycle. At the end of the 90 minutes, shape into two 1 lb loaves, let rise until double (approximately 45 minutes), then bake at 350 for 25-30 minutes.

    If you are using a Sun Oven.. Allow only to rise to 1/2″ of the top of the bread pan- @10 min. Then into the Sun Oven for roughly 40-60min. My Sun Oven today ran at 300 degrees. Other days I would just watch it as it can be 375 degrees and of course would bake that bread ASAP! So adjust to where you are! Nice thing is Sun Ovens don’t burn!

    I bet this recipe will do well in a mixer too! Give it a try!- but if you have an old bread maker, make it work while you work when you need a little extra help! For the record- This bread is so YUMMY! Perfect for sandwiches.

    Optional Helpers: Dough Enhancer, Bread Bags, Bosch Mixer , Grain Mills

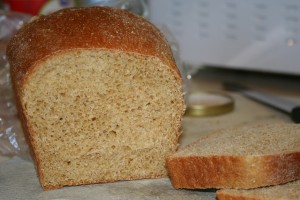
    Breads will have a lighter color in the Sun Oven.
    Same recipe, same pan, baked in kitchen oven.


  • Solar Cooking Tips from a Pro

    Written by Marilyn

    My friends Tara Miller and Sam Brown have compiled numerous practical tips including a Five-Day Kitchen Diary to make cooking in the Global Sun Oven successful and fun.  Sun Ovens are the perfect way to keep a kitchen cool while reducing energy consumption during the hottest days of summer.

    Ed Note: They have been cooking most of their food in their Global Sun Oven year- around for 20 years even here in the coldest part of a Colorado winter.  They enthusiastically recommend Solar Cooking to everyone and practice what they preach as they own four sun ovens and have traveled to Peru to teach natives how to cook in it.

    What can you cook in a solar oven?
    A solar oven allows you to prepare a wide variety of high quality foods including vegetables, soups, stews, beans, desserts, breads, cakes, meats and more.

    Getting Started Basics:

    • Use black or dark cooking pots or cast iron.
    • Brush oil on fresh meat to assist with browning.
    • Soak dried beans, lentils, or grains in water overnight.
    • When cooking dry foods such as rice, use slightly less water than usual.
    • To cook vegetables: Preheat your dark pot that has a cover and use a small amount of water, about 1/3 cup. This accelerates the cooking process and also preserves vitamins. A covered pot keeps the moisture and heat in the pot.
    • For soups and stews:  Don’t put too much in one pot. It’s better to use two smaller pots.
    • Plan on a little more time to cook than for conventional stove top or oven baking.
    • Use a sunny, south facing location. Plan for a convenient shelter nearby such as a deck.
    • Prop the oven toward the sun so the sunlight strikes the glass at 90 degrees and adjust the oven toward the sun every 30 to 45 minutes for maximum temperature.
    • Best cooking hours are 10:00 am to 3:00 pm. but longer in the summer.
    • A folded towel placed over the glass when the food is done will hold food warm for a couple of hours.

    Baking Tips:  Baking normally will take longer than baking in a conventional oven.  For cornbread, preheat a cast iron skillet or baking pan for a crispy crust. For cakes, yeast breads or baked potatoes, wait for a clear day so you can keep the heat high and consistent.  Quick breads have been most reliable for me.  Yeast breads baked in smaller, darker colored baking pans bake best in the Sun Oven. These are a favorite bread pan.

    Stove Top Cooking Tips: Start the liquids heating up in the cooker ahead of time, or bring water or other liquids to a boil on a conventional stove top and then put the pot in the cooker. Also, preheat the cooking pot; the lid, and the rocks to keep the heat up.

    Lower temperature or simmering Tips: Adjust the Sun Oven slightly away from the direct sun. Simmering can happen even if the day is slightly overcast.


    Cooking while you’re away from home: Put your food (say a pot of seasoned, pre-soaked beans) in the well-propped cooker, adjusted for noon. Enjoy the satisfaction of coming home to a solar cooked meal ready to serve.

    Quick and Easy Ideas for a busy day:  Bake extra potatoes for frying later, cook chunks of squash, whole chicken, burritos, frozen foods, and precooked entrees.

    Diary From a Northern Hemisphere Kitchen by Tara Miller

    WEDNESDAY:

    Roast chicken in solar cooker. Dust a little paprika on top so the chicken isn’t so white. This will enhance the color to the surface of the meat. Place potatoes and carrots or other vegetables alongside the chicken for the last 20 minutes or so.  Refrigerate or freeze select meat (such as the breast meat). We ate with our fingers and feasted on the chicken, saving the bones and skin for soup stock.

    THURSDAY:

    Boil leftover chicken bones several hours or more to make stock. Adjust cooker regularly to keep it simmering.

    Lunch: Cold, diced chicken breast salad or sandwiches from yesterday’s leftovers.

    Supper: Chicken Soup: In the late afternoon,: strain and discard the bones, skim fat (Refrigerate or freeze part of broth for future use). Return about a quart of the broth to the cooker and add 1/4 cup barley, cook at least an hour. About 45 minutes before supper time add other vegetables: onion, garlic, carrots, green beans; later, add chopped chard. Season at the last minute with garden sage, thyme, salt.

    FRIDAY:

    Lunch: leftover soup, either cold or warmed in cooker.

    Midafternoon: Start the rice: bring 4 cups salted water to a boil in an oversized kettle  (the extra space will serve as a steamer later) in the solar cooker, add 2 cups brown rice. Position in slightly advanced to sun perfect position* and rice will cook with no further attention.

    Supper: When the rice is nearly done place quick cooking vegetables such as edible pea pods and chopped greens to steam on top of the rice and cover. To serve: Skim vegetables off the top of the rice and season creatively: Try garlic, olive oil and basil, or chutney, or plum sauce or whatever you have on hand.

    SATURDAY (This is a busy day diary and presumes the use of more than one cooker.)

    Early:     Set cookers in position facing where the sun will first strike.  Place an empty cast iron kettle with cover in one cooker to preheat for potatoes later.

    Breakfast: Leftover rice from the bottom of yesterday’s kettle. Fix it the way you eat your breakfast oatmeal or cold cereal with cream or yogurt, butter, maple syrup, brown sugar, nuts, dried fruits etc.

    Midmorning: Scrub potatoes and place in hot, preheated kettle or cast iron pot. Position in slightly advanced to sun perfect position* and potatoes will cook with no further attention.


    Lunch: Remove the hot baked potatoes. Leave kettle in cooker, readjust the solar cooker for full sun power. Eat baked potato bar with your favorite toppings such as bacon bits, shredded cheese, butter, chives, etc. Cool the rest of the potatoes and refrigerate. Leftover potatoes will be used either grated for breakfast hashbrowns and eggs, or made into potato salad later in the week.

    Throw corn on the cob in the kettle. This was tough corn, so I husked it and left the cooker at sun perfect position* so it would cook for about 45 minutes. Other options for afternoon cooking in that preheated kettle: whole beets, or  soup.

    * Sun-perfect position has the glass tilted exactly perpendicular to the angle of incoming sun light and with the shadow symmetrical behind the cooker. “Advanced” to sun perfect position has that shadow set so that “sun-perfect position” will come in about 20 minutes. My Sun Oven will bake at peak temperatures for 45 minutes to an hour with no further adjustments starting from this advanced position.

    SUNDAY

    Our little cherry tree has one final picking of sour red pie cherries. We preserved some of them by canning in the solar cooker.   Canning in a solar cooker is considered an advanced skill recommended for experienced solar oven enthusiasts only.  So I have not included the instructions.  If you want more information, please email me at marilyn@urbanhomemaker.com

    Cherry Cobbler

    Place four cups of juicy cherries in the bottom of black enamel 8 x 12 baking pan. For a festive touch, save out a handful to decorate the top.

    Stir into cherries either 2 tablespoons corn starch or 2 tablespoons quick cooking tapioca. If using tapioca, let it sit for at least 15 minutes.

    Mix crispy crust by:

    Cream together 1/2 cup butter with 3/4 cup brown sugar

    Sift together in a small bowl:

    1 cup flour

    1/4 teaspoon baking soda

    1/4 teaspoon baking powder

    1/4 teaspoon salt

    Mix flour mixtures with the butter/sugar mixture, then add:

    1 cup oatmeal


    Stir well and spread over the top of the cherries. Just for fun make a little drawing on top of the crust with the saved cherries. Consider that the dark color of the cherries may encourage more efficient absorption of solar radiation.

    Optional version is to put the entire crust UNDER the cherries. Be sure to soak the tapioca in the cherry juice at least 15 minutes:  Use 1 1/2 Tablespoons quick-cooking tapioca for each 1/2 cup juice.

    Best of all, Have Fun with your Global Sun Oven!

  • Father’s Day Family Favorite Recipes

    Dad’s are so easy! The way to a man’s heart really is through his stomach. Make these fantastic and oh so simple meals for dad on “his” day and watch the grin spread from ear to ear… throw in a little back rub and a few words of encouragement and his ‘tank’ will be filled.

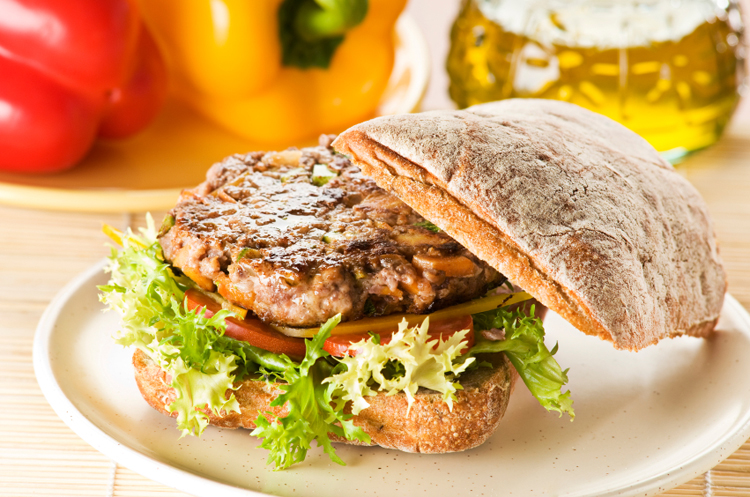
    Dad's Favorite Burger

    Dad’s Favorite Hamburgers with Herbs

    I have been using this easy recipe for over 30 years. After you try these tasty seasoned hamburgers, you will never go back to plain old hamburgers. I make lots and freeze the patties individually on cookie sheets and then place into zip lock baggies. If you don’t have all the herbs, use whatever you have.  Double, triple, or quadruple amounts for extra hamburgers for a crowd or for the freezer!


    2 lbs. hamburger

    1 Tbsp chopped chives

    1/2 tsp. crumbled tarragon, optional

    2 tsp. salt

    1/4 tsp. pepper

    1/4 c. chopped parsley

    1/4 c. chopped green onion

    1 egg


    Mix all ingredients in a mixing bowl by hand. Shape into 6-8 large patties. Grill or broil until done.


    Even dad likes this!

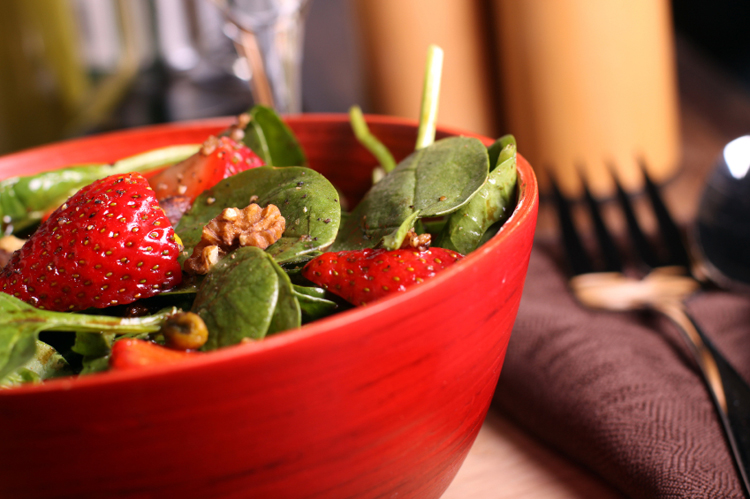
    Strawberry Spinach Salad

    I like this recipe for Father’s Day because it takes advantage of what’s in season and is delicious.  Use whatever other ingredients you like and have on hand.


    6 or more Cups spinach or other mixed greens, torn up

    1 Cup strawberries, sliced

    2 green onions, sliced

    1 small red onion, cut into thin rings

    1 garlic clove, minced

    2 Tbsp sunflower seeds (raw or toasted), optional

    1/2 Cup bacon pieces, crumbled

    1/2 Cup chopped walnuts or slivered almonds (toasted if desired)

    1/2 Cup grated Parmesan cheese OR1/4  Cup Feta Cheese, crumbled

    Cucumbers,  sliced, optional

    Avocado slices, optional


    Assemble the greens in a large salad bowl and add additional ingredients in layers as attractively as possible.  Let the children help and get creative.  Be sure to take pictures!


    Balsamic Dressing:

    1/4 cup honey

    2 Tbsp sesame seeds, toasted if desired

    1/4 Cup Balsamic vinegar (wine vinegar is fine)

    1/4 Cup olive oil

    Salt and pepper to taste

    Combine ingredients in a jar with tight fitting lid and shake well.  Dress the salad when ready to serve, or use salad dressings of choice.


    Marilyn’s Potato Salad

    My late husband loved any kind of potato salad.  This recipe is the way I like to make it, but many ingredients are optional, so use what you have.


    2 1/2 lbs Red Potatoes, cooked and cubed (I use the Duromatic Pressure Cooker to save time)

    3/4 Cup French dressing or Marilyn’s French Dressing

    2-4 Tbsp Fresh Dill to taste, snipped

    1/2 Cup bacon, crumbled

    1/2 cup finely diced red onion OR

    1/2 cup finely chopped fresh chives, optional

    4 hard boiled eggs, chopped or sliced

    1/2-1 Cup celery, chopped

    1/2 cup diced dill pickle, optional

    1/2 cup diced red pepper, optional

    1/2 -1 Cup mayonnaise or to taste

    Salt and pepper to taste

    Paprika

    Snipped fresh or dried parsley, optional

    Marinate the cooked, cubed potatoes in French dressing in a refrigerator container overnight.

    Combine the rest of the ingredients, except for the eggs and paprika with the marinated potatoes in a medium bowl.  Adjust seasonings.  Pour into an attractive serving bowl.  Garnish the salad with parsley, sliced eggs, and paprika.


    Marilyn’s French Salad Dressing

    This recipe, courtesy of a chef, has been my family’s favorite salad dressing recipe for nearly 25 years. I use this versatile dressing to marinate veggies, and potato salad as well. Double or triple the recipe as it goes fast!


    1/4 Cup vinegar, Balsamic, Red wine, or Apple-Cider Vinegar
    1 TB Dijon mustard, prepared
    2 or more cloves garlic, minced
    1 tsp. salt
    1/4 tsp. pepper, fresh ground if possible
    1/2 tsp. paprika
    2/3 Cup quality oil such as olive oil,
    coconut oil, sesame oil, or combination of oils. Be sure to use pure pressed or expeller pressed oils which contain the anti-oxidants and vitamin E.


    Combine these ingredients in a carafe, glass jar, or whisk together with a fork in a small mixing bowl.


    Are you on our newsletter? You can join it here


  • Summer Tradition- Granola Bars

    “What’s that recipe for granola bars?” – my hair stylist asked me. (She’s the best!) 

    Ok I’ll share! Enjoy…. I make these for most camping trips (whether camper camping or backpacking.) We eat them during the summer and it has become a summer tradition of sorts. I love that my family expects them and I am pleased to make them.

    Kathy’s Granola Bars– for 1- 9×13 (Pyrex is preferable)

    Ingredients:

    1/3 C oil- Coconut or olive is yummy

    ¾ C Brown Sugar

    2 T Honey

    1 tsp. vanilla

    2 Eggs

    1 C Flour (mill it fresh if you can! whole wheat, 6 grain works!)

    1 tsp. Cinnamon

    ½ tsp. Baking Powder

    ¼ tsp. salt

    1 ½ C 9 grain rolled (oats work well too!)

    2 C Crisp Rice Cereal

    1 C Chocolate Chips, chopped nuts, dried fruit, or seeds (or any combination you like) *pumpkin seeds and chocolate chips are YUM!


    In a large mixing bowl, combine the oil, brown sugar, honey, vanilla and eggs. Add flour, cinnamon, baking powder and salt. Mix well. Stir in rolled grain or oats, cereal, and nuts, fruits, or chocolate chips. Spray treat or wipe oil into a 9×13 glass pan. Press mixture evenly into the bottom of pan.

    For Chewy bars: Bake 350 for 25 min.. THEN TAKE OUT!

    For Crunchy Bars: Bake at 300 for 40-50 min and top is brown.

    Cool bars completely. Cut bars into 16 pieces.  These may be frozen.

    Nutritional Info: roughly 230 calories, 10g fat, 29g Carbohydrates.. I am a Diabetic so carbs are important to know!

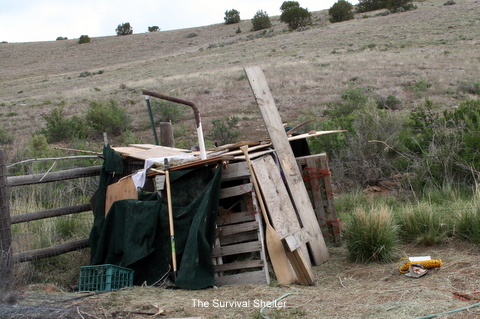
  • Shanty? Fort? Survival shelter?- Complete Brilliance!!!

    This last Monday my kids were free! Yes, our homeschool year is complete and I, Kathy, am working hard on the Urban Homemaker! So freedom abounds for the Marsh Trio who are full fledged 2nd grade graduates!

    This week has been full of rain, but that is not a deterrent for the kids. They set out and asked if they could build a fort. My response was “Yes!” A few days go by and the kids present their creation to us, but as I walk up to it I ask myself, “Is it a shanty? A fort? A survival shelter?” and then it dawns on me!

    It is complete and utter brilliance!

    One might want me to explain my definition of brilliance…… I am thrilled to!

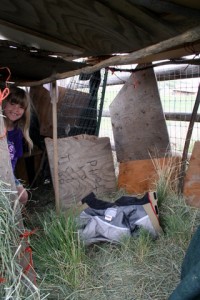
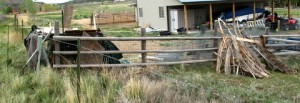
    • This shelter was built by 2 brothers and 1 sister in full team work compliance from morning till night. It was their creation. This is where you would have found our children all this week, all day long.
    • Jamie used some of her strengths for decorating the interior. Yes, the brothers did help!

    • They picked up and used every scrap piece of wood, hay baling string, scrap hay, horse toys to make it.
    • They used what was in their minds and built it. They could articulate all the whys and the why nots. They used survival strategies, science, math, history and plain old life skills to make this plan a reality.
    • The structure has a name and a theme: survival. The kids are reading, bird watching, and realized what is around them is a blessing and it was made plain to them.
    • They formed an outreach. The neighbor boys meet them after they are done with school and their fort was started a few days ago.  The relationship building, imagination and thrill are so fun for all.

    • Lastly, these 8 yr olds showed daily faith! They were determined, mindful, and weren’t in a rush. The fort is still not complete and I hope this whole summer it never is.

    I am so blessed and amazed by my children and their actions. They are such a help and a blessing to both their Dad and me. When Wayne and I walked out to have the first tour of the survival fort- I was blown away. I had no idea that what we taught them all through the year was fully regurgitated with a simple building structure. This freedom experienced will be a true memory maker for them- again a privilege and a blessing. This is one memory we will treasure from our rocking chairs!

    So may you be amazed at what freedom can ignite! It may look like a shanty, but upon a closer look it just might be BRILLIANCE!!

  • Cleaning Without Chemicals – 8 Key Considerations

    I just received this testimonial about the all-purpose Norwex Enviro Cleaning Cloth:

    The other day my grandson was making “pancakes” out of  silly putty at the kitchen counter. The moment I turned my back I found him making pancakes on the Living Room carpet! I was horrified at the mess on my new rug, but I didn’t panic.

    His poor little eyes almost popped out when he couldn’t get the putty up from the carpet!  I tried to remove the putty with a paper towel and another cloth towel with no success.  It just ground in more.

    Then, I got my Norwex Microfiber Enviro cloth and rubbed it across the  putty and instantly the putty came up out of the carpet and into the cloth!!  Joan H.  (reprinted by permission)

    Don’t you love happy, simple endings to potential cleaning disasters?

    Recently, I was in Florida to take care of my 89 year old father who was suffering from a life threatening and potentially contagious ailment and I was very concerned about hygiene and sanitation for his apartment and to protect me from getting sick.

    Fortunately, when I got there, I had my Norwex Enviro Cloth with me so I could start cleaning his apartment, bathroom, and kitchen.  I have to say it gave me a lot of peace of mind to know I could clean effectively without a lot of bleach while I was waiting to see if he was going to recover.  (He is now doing much better.)

    Considerations:
    • There have been over 80,000 new chemicals introduced into our environment since 1950 and only about one third of them have been tested to be safe.
    • The medical field has been seeing an increase in medical problems especially asthma and other respiratory problems which are thought to be caused by chemicals in our homes, homes that are built tighter, and hence, chemical residues are being breathed. Asthma diagnoses have increased 600 % since 1980.
    • The three top toxic products in our homes are fabric softeners/dryer sheets, oven cleaner, and drain cleaner.
    • Kathy Marsh (the new owner of The Urban Homemaker) and I were talking about this and she mentioned to me that her son was released from his pulmonologist and nebulizing treatments after she went to chemical free cleaning six years ago.
    • Homemaker Sammye Wright wrote:  ““I never felt my floors were really clean until I used the Norwex Mop System. I have found it is faster, and my floors stay cleaner, for longer times. Honestly, mopping is more fun and a lot easier and I have four little boys and a husband and clay soil surrounding my home! Mopping is no longer a chore for me.”
    • About 15-20 years ago, researchers in Norway found that microfiber products were an effective alternative to traditional chemical antibacterial products because they removed 99.9% of the surface bacteria.
    • Norwex Microfiber products were originally used exclusively in hospitals because they didn’t contribute to an ever escalating set of resistant bacteria.
    • Commercial floor care products, no matter how safe or non-toxic they may be, all leave sticky residues on the floor that work like a magnet to attract dirt. A product that doesn’t leave these residues will naturally make it easier to care for your floors.

    Norwex Microfiber products do not disinfect surfaces but REMOVE bacteria from smooth surfaces (including floors) and prevent the transfer of germs to your hands while cleaning and eliminate cross contamination.

    Norwex microfiber products contain a patented silver agent that prevents and kills bacteria growth, is safe to use, inhibits odor development and does not affect the  performance of the microfiber.

    My favorite Norwex chemical–free cleaning products are the Enviro Cloth, Window Cloth, and the Superior Mop System.  These three items will clean your whole house including the bathroom, toilet, shower, sinks, windows, refrigerator, counters, computer screens, flooring, and much, much more.

    All Norwex orders placed between now and May 31, 2011 will qualify for FREE SHIPPING!

  • Rhubarb Cream Pie

    Rhubarb is now in season!   Here is a delicious, unusual twist on the traditional rhubarb pie since it contains eggs.

    Now is the time to harvest rhubarb and freeze 1″ slices in 2 cup portions for quick and easy fruit desserts this summer or later in the winter. Try the no-fail pie crust – it is exceptional.

    Rhubarb Cream Pie

    1  1/2 Cups sugar

    3/4 tsp nutmeg

    4 cups rhubarb (1” slice)

    2 Tbsp butter

    1/4 cup flour

    3 eggs, slightly beaten

    Mix the sugar, flour and nutmeg by hand or in a mixer.  Beat in eggs.  Add the rhubarb.  Let the mixture sit while preparing the crust.  Line a 9” pie pan with the pie crust, fill the pie pan with the rhubarb mixture, dot with the butter.  Top with a lattice crust.  Bake at 400 degrees for 50-60 minutes.  Cover crust, if necessary to protect from excessive browning and make sure egg mixture is thoroughly set.

    No Fail Pie Dough

    This recipe is higher in fat than most pie dough recipes which discourages gluten development and makes for a very flaky,  delicious pie crust.  I got this recipe from my friend Jodie, who is an expert pie maker.

    2  1/2 cups unbleached all purpose flour (I use one cup freshly milled pastry flour packed into the measuring cup)

    1 tsp Real salt

    2 Tbsp sugar

    12 Tbsp very cold unsalted butter, cut into 1/4 inch slices

    1/2 cup chilled Spectrum’s natural shortening or regular shortening

    1/4 cup vodka, cold ( or equivalent amount of water)

    1/4 cup cold water (total of 1/2 cup liquid if not using Vodka)

    Process 1 1/2 cups of the flour, all of the salt, the sugar in  Bosch mixer using short Pulses. (This is the  momentary feature.).  Add the butter and shortening and process until the dough is homogeneous or starts to make uneven clumps, about 15 seconds.  The dough will be similar to the curds of cottage cheese in consistency and all the flour will be absorbed.

    Add the remaining one cup of flour and pulse until the mixture is evenly distributed and broken up – about 4-6 quick pulses.  Empty the mixture into a medium sized mixing bowl.

    Sprinkle with vodka and water, or just water if not using the vodka.  The purpose of the vodka is to reduce the water content which promotes gluten formation.  (Any 80-proof liquor will work and the alcohol burns off during baking along with any liquor flavor.)  Remember this is an optional ingredient.

    Using a rubber spatula you can use a folding motion to mix the dough until it is slightly tacky or sticks together.  Don’t over mix pie dough or it becomes tough.

    Divide the pie dough into 2 even pieces and flatten each into a 4 inch round.  Wrap each round in plastic wrap and refrigerate at least 45 minutes or up to 24 hours.