Category: Recipes

  • Bread Baking Problems and Solutions

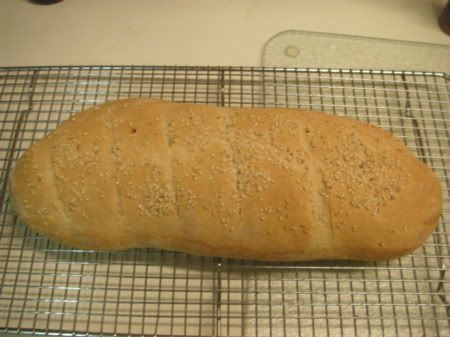
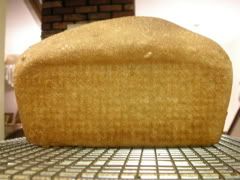
    Bread Baking Problems and Solutions – Here are pictures of bread baked by me in our 8″ bread pans. It makes excellent sandwiches that hold together. I used Marilyn’s Famous Whole Wheat Bread Recipe.
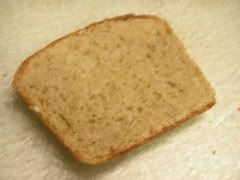
    Q. How do I get my bread to be suitable for making sandwiches?

    A. There are three basic principles for making bread good enough for sandwiches.

    1. Add 1/3 to ½ cup vital wheat gluten to a 2 loaf batch of bread. Make sure the gluten is fully developed. Vital gluten makes the bread softer, moister and it rises better.

    2. Make sure you don’t add too much flour – this leads to dry, crumbly bread when it cools. The dough should be smooth and elastic and a tiny bit tacky, not dry when shaping your loaves.

    3.Don’t over rise the bread – coarse texture leads to crumbly bread.

    Q. Is it really cheaper to make homemade bread?

    A. Cost isn’t the only factor to consider when determining if bread baking is a good thing for your family. Consider the wonderful aroma in your home from home baking, and the superior nutritional value. I am glad that my homemade bread contains ingredients that I recogzine and I know how to pronounce them. Home baked bread has superior taste, and the fact that home made bread is very easy to incorporate into my routine is an added bonus. It is an added benefit to bless friends and neighbors with home baked bread.

    Q. What is sponging and is it necessary?

    A. Sponging is the process of allowing the yeast, water and a portion of the flour to be mixed together for about 15 minutes to activate the yeast. You could consider sponging a short, first rising. All yeast bread baking is flexible, however, and you can skip sponging and allow the bread to rise once or twice before baking. Be sure to get all the air bubbles out of the dough before shaping the loaves. Bread can rise just once in the pans before baking if you are running out of time. Conversely, bread can rise multiple times before shaping, rising, and the baking. Each rising period will improve flavor and texture. Be flexible and allow baking to fit around your schedule.

    Q. I have some yeast bread recipes that do not call for fresh milled flour. How do I adjust the recipe?

    A. I substitute cup for cup, whole grain hard wheat flour for all purpose flour in yeast bread recipes that appeal to me. The only adjustment I make is adding some vital gluten so the bread will not be too dense or heavy or dry.

    Q. Can I use my fresh ground flour for cookies, pancakes and muffins?

    A. Use freshly milled soft wheat flour or pastry wheat for any baked goods that do not contain yeast.
    Remember freshly milled pastry flour must be packed like brown sugar for accurate measurements. You can obtain more information about ingredients and how to use them.

    Q. My bread doesn’t rise very well.

    A. Whole grain bread will not rise as well as white bread, but if you have waited several hours and the bread hasn’t doubled in size, the problem most likely is the use of low protein wheat. Low protein means low gluten content. All wheat is not created equal, and premium wheat will have a higher protein content than less expensive wheat.

    Use 1 Tbsp. vital gluten per cup of flour as a starting place.

    Q. I have some older yeast and I don’t know if it is still good. What do I do?

    A. Proofing the yeast is a way to determine if your yeast is still good. If it isn’t, your bread may not rise well. If you suspect your yeast is out of date or old, here is how to proof (test) the yeast:

    Add 1 tsp. yeast, with 1/2 cup warm water (85°F) and 1 tsp. sugar. If the yeast isn’t bubbling up to the top of the cup within 10 minutes, replace the yeast.

    Be sure to store yeast cool and dry. Use moisture/vapor proof containers.

    The above information has been excerpted from A Beginner’s Guide to Baking Bread ebook by Marilyn Moll.
    Click Here to purchase this ebook for $9.95. You may also obtain this book complimentary with any purchase of $75.00 or more by request.

    This ebook Includes:

    * How to Select Ingredients
    * Selecting a Grain Mill
    * Selecting A Mixer

    * Step-by-Step Mixing Instructions
    * How to Develop the Gluten

    * Tips for the Best Bread
    * Lots of Bread and Roll Recipes
    * Troubleshooting Guide
    * The Two-Stage Process
    Item #6059 $9.95

    Step by step cinnamon Roll tutorial

  • Cold and Flu Remedies

    When we get sick around here with the latest cold or flu we drink peppermint tea, ginger tea, and eat Mommy’s Homemade Chicken Soup for colds and flus. The chicken soup recipe is basically my very popular, Chicken Barley Soup recipe with extra garlic, cayenne, and ginger to get the lymph glands flowing! I use fresh ginger and lemon juice for ginger tea and the soup. Here is how I make the teas and soup:

    Ginger Tea

    Chop up coarsely about 3-4 inch piece of fresh, peeled ginger. Simmer for 10-15 minutes in 3 cups of pure water or bring up to full pressure in a pressure cooker for 3-5 minutes and allow the pressure to come down naturally. Take 1/4 – 1/2 cup “ginger concentrate”, add hot water, honey, and a squeeze of lemon to taste. Drink lots!

    Peppermint Tea

    We make peppermint tea using the cut leaves, about 1-2 tsp leaves infused with each cup of water. Add lemon and honey to taste, if desired . Drink Lots. We also make lots of hot boiling water in our air pot so we can keep making hot fresh cups of tea all day without reheating the tea kettle. You can also buy peppermint tea in bag form, but when we are sick we go through so much peppermint tea that purchasing the leaves in bulk is much more cost effective. I store loose peppermint in canning jars. One quart jar of bulk peppermint leaves costs about $3.00 in a health food store and makes lots of tea.

    Chicken Soup for Colds and Flus
    An effective traditional home remedy for colds and flus. I make a large pot of this chicken soup when we get sick. Garlic, ginger, and cayenne stimulate the immune system. Use as many of the ingredients as you have.

    6 cup chicken stock (homemade bone broth is best)
    2 cup diced chicken or turkey pieces, (optional)
    5 or more gloves garlic, crushed
    1/2 – 1 cup chopped onion
    1″ piece or larger of fresh ginger, peeled and minced
    2 cup carrot rounds
    1 cup celery, chopped
    1 cup rice or noodles, cooked
    1/3 cup flour
    1/8 – 1/4 tsp. cayenne (optional)
    1 tsp. thyme (optional)
    1 tsp. savory (optional)
    1 C. peas
    salt and pepper to taste

    Saute the onion and celery in 2 Tbsp olive oil until softened, add the garlic and ginger and saute another 1-2 minutes. Add the stock or broth, and the carrots and simmer until the carrots are tender – 15 to 20 minutes or 2- 3 minutes in a Duromatic at full pressure. Add salt and herbs. Mix 1/3 Cup flour with 1 cup cold water thoroughly so there are no lumps. Bring the soup to a boil, slowly add the water flour mixture while stirring constantly to lightly thicken the soup. Add cooked rice or noodles, and peas, adjust seasonings to taste. This soup is the perfect thing for helping to recover from colds and flus.

  • Cream of Chicken Soup

    I had several requests for this soup recipe mentioned in last week’s newsletter. This recipe is courtesy of my friend Belinda who said use some of this and some of that. I have done my best to write down what I actually did. It turned out great. My husband said, “You can make this again!”

    Cream of Chicken Soup

    1 cup finely chopped carrot – 2 medium
    1 cup finely chopped celery – 2 medium
    1 cup finely chopped onion
    ¼ Cup butter
    1-2 tsp fines herbs
    2 large chicken breasts or 4 small cut in bite sized pieces
    6 cups chicken broth (real if possible)

    2 cups heavy cream
    ½ cup butter

    2/3 cup flour
    1 can artichoke hearts, water packed

    salt and pepper to taste

    Saute carrots, celery, and onion (mira poix) in butter in a large stock pot for a couple minutes and add cut up chicken breast.


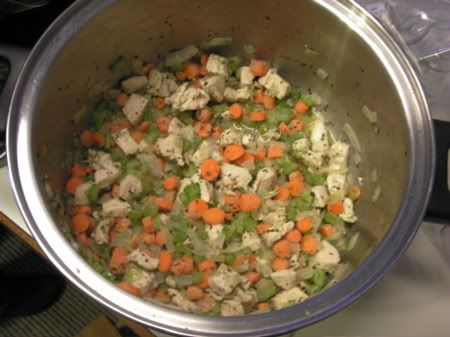
    Stir over medium high heat and add fine herbes and continue sauteing the veggies and chicken mixture for several minutes until chicken is no longer pink. Add broth. (The above pictures is when it is time to add the broth.) Simmer about 10 minutes or until veggies are soft. While veggies and chicken are simmering, melt ½ cup butter and stir in the flour in a separate small saucepan and stir for about one minute. Set aside.

    Add the cream to the soup, bring soup mixture to boiling, and while soup is boiling rapidly, gradually stir in the butter/flour mixture while whisking very quickly to thicken the soup. Drain artichoke hearts, dice the hearts into fourths or smaller pieces as desired, add to soup. Adjust seasonings by adding salt and pepper to taste. Add more milk or chicken broth if a thinner soup is desired. Enjoy with French Bread.

  • Fantastic Whole Wheat Rolls – Pictorial

    You might like to try this recipe for Fantastic Whole Wheat Rolls with a step-by-step pictorial tutorial. The recipe comes from my book Fast and Healthy Menus for Busy Moms.

    The roll-making tutorial was posted by Melody who says “I also want to add- this was only the second time I made rolls in my whole life- it is EASY anyone can do it!”

    Here is the recipe:
    Fantastic Whole Wheat Rolls

    2 1/2 cups warm water

    1/3 cup honey

    1/2 cup dry powdered milk

    2 Tbsp yeast

    2 eggs

    1 cup unbleached bread flour (optional- can use all whole wheat)

    1/4 cup gluten

    6-7 cups whole wheat flour

    2 tsp. salt

    1/4 cup melted butter or olive oil

    Fast and Healthy Menus for Busy Moms is also available as an instantly downloadable ebook.

  • Organic or Frozen, Which Turkey is Best?

    My state newspaper, The Denver Post, published an article about Organic, natural birds versus the standard frozen turkeys found in our local grocery stores including the famed Butterball. Which turkey won the judges vote? Is it a no-brainer?

    “The big surprise”, writes food editor Kristen Browning-Blas, “is that the organic and natural birds fared so poorly against the rest of the frozen flock.” I guess enhanced frozen turkey with salt, stock and other flavorings also known as a pre-brined bird, impressed the panel of judges including a food editor and her family, food writers, Denver Post Dining critic, students, business writers and a few others.

    The turkeys tested included Butterball, Jennie-O Oven Ready, King Sopers Private Selection, Honeysuckle White, and Heidi’s Hens and Diestel. They had culinary students at Johnson and Wales University cook all the birds to 170 °F. The turkeys were rated for looks, flavor, texture, and moistness of meat by the esteemed panel of judges.

    Butterball won first place followed by Honeysuckle White, and third place went to King Soopers Private Selection. The judges said the natural and Organic turkeys were dry and stringy.

    So if you haven’t already bought a bird, you can save a bundle, by purchasing an $8.00 bird rather than a $50 -60 Organic/Natural bird. Or you can brine your own natural bird yourself to get moisture and flavor inside the meat. Note, Butterball has a 7 percent solution of salt and “natural flavors”. I believe natural flavors is another word for MSG. According to the article, Honeysuckle White has no MSG.

    I am cooking two huge birds this week end to get a head start on Thanksgiving. We have our all-church Thanksgiving Dinner on Sunday, and I’m bringing turkey and gravy. I’m cooking my other turkey ahead so all I have to do is reheat on Thursday.

    My turkeys are King Soopers Private Selection. I’ll let you know how these $8.00 birds fare next week.

  • Pumpkin Pie Cake Dessert

    Our church has an annual Thanksgiving Dinner Potluck the Sunday before Thanksgiving. One year we catered a more elegant dinner for the whole church instead. This elegant, memorable Pumpkin Cake Dessert was served and I never forgot it. I finally obtained the recipe this year and discovered it is very easy. I hope you will try it!

    PUMPKIN PIE CAKE DESSERT
    This is a very easy and delicious dessert for a crowd

    1 – 2 9 oz can pumpkin
    1 cup sugar
    1 tsp salt
    3 tsp cinnamon
    3 large eggs
    1 large can Evaporated milk (Not sweetened condensed)
    1 Yellow Cake Mix
    1 cup pecans, chopped
    1 cup butter, melted

    Combine the above ingredients and place in a 9 X 13 – inch baking dish. Sprinkle one box dry yellow cake mix over the pumpkin mixture. Sprinkle the chopped pecans over the top of the pumpkin mixture and dribble the melted butter over the top.

    Bake for 50-60 minutes. Serve with real whipped cream.

    Click Here For lots more Pumpkin Recipes!

  • Whole Wheat Bread Recipe

    “I love baking and bread is a favorite. I happened upon your recipe one day and have been hooked ever since. It is fabulous! There is no other bread that can even come close. Wow! My kids are in heaven every time I make it. As well as being delicious, it is the easiest yeast bread that I have ever made!

    My mother-in-law told me that it was the best bread she had ever tasted. My Dad tells everyone that I make the best bread in the world. I am thrilled that it is healthy: whole grain and no powdered or evaporated milk. Thank you for sharing such a wonderful recipe.” Lisa Reeves

    Lisa’s Favorite recipe is Marilyn’s Famous Whole Wheat Bread

    If you have never tried my recipe before, and you try baking it this week and send me a comment of how your family enjoyed this bread recipe, I will send you a complimentary copy of my new ebook A Beginner’s Guide to Baking Bread.
    This offer expires October 29, 2007. Email your comments to marilyn@urbanhomemaker.com.

  • A Food Foundation for Healthy Families

    Last week my 14 year-old daughter, Mary, and I did some market research for boxed cereals. Our project entailed checking price per serving and reading the ingredients lists.

    Surprisingly, the Instant Oatmeal package that claimed to be heart healthy and caught the eye of my daughter, had the longest list of unrecognizeable ingredients. It seems our modern convenience foods are often pricey, and not as healthy as the box and labeling imply. Wise moms must learn to be nutritionists.

    In the 1930’s a doctor by the name of Weston A. Price traveled the world to study the effects of the “modern” diet on dental health compared to more traditional diets. In doing so he found that modern diets played havoc with teeth. But he also found many more benefits to traditional diets other than healthy teeth. The differences between people who had eaten their ancestral diet from birth and people who had feasted on sugar, white flour products, and soft drinks were mind-boggling.

    Dr. Price found that the traditional wholesome diets produced wide faces with jaws wide enough to accommodate all the teeth with proper spacing, few or no cavities, and wide heads to house their brains. They had happy demeanors and vibrant health. The more “civilized” diet contributed to narrow jaws with crowded teeth, cavities, and narrow foreheads.

    Disease set in at early ages, and mental dysfunction was common. Dr Price wrote his research findings with hundreds of pictures in a classic 500 page book called Nutrition and Physical Degeneration.
    Dr Price’s book is highly readable and designed to preserve Dr. Price’s worldwide investigation of the deleterious effects of processed foods and synthetic farming methods on human health, and the promise of regeneration through sound nutrition.

    This bestseller contains guidelines for approaching optimum health and reproduction, now and through future generations. Dr. Price has been widely accepted as one of the foremost authorities in the development of degenerative illnesses as a result of the addition of processed foods to our diet. According to Dr. Price’s research there are common factors found in traditional diets.

    Traditional diets include:

    Nutrient-rich proteins from meats and organ meats from pastured animals
    Raw dairy products from pastured animals.
    Eggs from pastured hens
    Traditional fats – butter, olive oil, lard, coconut oil
    Chemical-free produce – fruits, vegetables and grains
    Properly prepared grains, legumes, nuts and seeds
    Bone broths
    Lacto-fermented condiments and beverages

    If all this information about traditional diets and sound health intrigues you, I hope you will join our seminar on Thursday.

    Jen Albritton, CN, a very busy mom who has been researching, writing, and presenting on all topics of nutrition since 1996, is author of the Growing Wise Kids series for the Weston A. Price Foundation quarterly journal, and most importantly has a passion to teach moms the best way to feed their children and families, starting with the basics.

    She has also agreed to be my guest this Thursday afternoon for a naptime Continuing Education For Moms Seminar at 3 pm EDT, and she will help us sort out the why’s and how’s of traditional diets. Jen will be explaining more about how to lay a foundation of health for your family economically. She will be available to answer questions, or you may email me at marilyn@urbanhomemaker.com ahead of time.

    JOIN OUR FREE MINI-MOMMY Seminar:

    Date: Thursday, October 25, 2007

    Scheduled Start Time: 3:00 PM EDT, 2:00 CDT, 1:00 PM MDT, 12:00 PDT (Adjust for your time zone, please.

    Dial-in Number: 1-605-475-4150

    Participant Access Code: 754074

    If you have never participated in a phone seminar before, here is how it works:

    1. You dial in the phone number below to the seminar. (You pay only for the phone call.)
    2. Key in the seminar access code.
    3. Introduce yourself, it you wish.
    4. Bring a notebook to take notes, a cup of tea, and have your questions ready.
    5. Don’t worry about background noise, we will mute that out!

    If you would like to listen to the seminar with Jen but the timing of the seminar does not fit into your schedule you may listen to an MP3 recording of this seminar by CLICKING HERE. The recording should be available by Monday October, 29, 2007.

  • Applesauce Making Marathon

    The weather has turned a bit like Fall. Blustery, windy, and colorful leaves blowing around the yard. Most of the leaves on the walnut tree dropped in a couple days and are awaiting being racked up. That means it must be a good time to get busy in the kitchen preserving the harvest and preparing for the winter ahead.

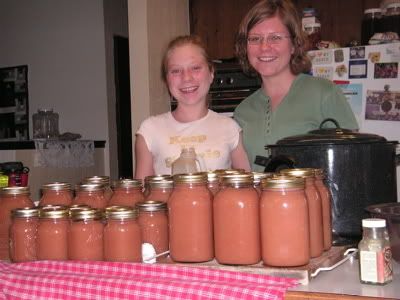
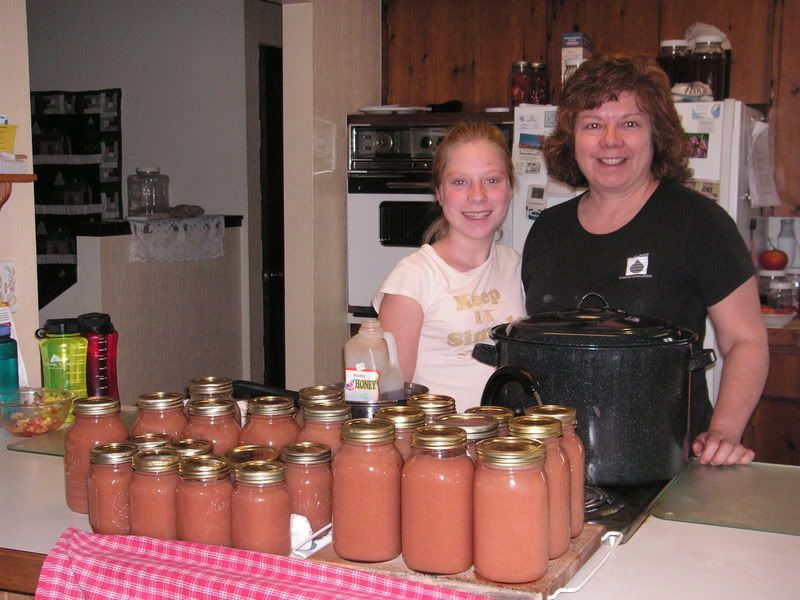
    My older daughter came home from college this week-end just so we could do an applesauce making marathon. We loaded up the stock pots and the Nutri-Steamer with chopped apples, steamed them until they were soft, ran them through the food mill, added a bit of sugar and cinnamon and into the canner they go!

    Sounds easy, but it is a bit of work! We have 14 quarts and 8 pints for a half day’s work. The smells are heavenly, the memories priceless and the work is worth it. Here is Laura with my younger daughter Mary.