Category: Recipes

  • Roasted Tomato Sauce

    Do you need a really easy way to use up a bunch of tomatoes?  My friend Jodie just told me how to make up some tomato sauce that I think is delicious and easy.

    All you need to do is slice end-of-the-season-very ripe-tomatoes that need to be used up, into 1/2″ thick slices.  Place them into a large roasting pan that has a light coating of olive oil.  Stack up the tomato slices, sprinkle with chopped onion, peppers, basil, salt, pepper, garlic, red pepper if desired.  Bake in a 350 degree oven for 90 minutes.  Blend, pour into freezer containers in 2 cup portions.  Freeze.  Is that simple or what?  I blended in some pine nuts to add a little extra richness, but they are optional.

    How easy is that?  You won’t believe how great your house will smell or how tasty this sauce is.  No more Prego, No more Ragu for me.

    VOILA!  You have just made use of tomatoes and other produce you might otherwise have put into the compost.
    Why didn’t I know how to do this a long time ago?

    Try it, you’ll really like it.  I did this while the dinner soup was heating up, we ate dinner, and  dishes were being washed up.  I even get to go to bed at a reasonable hour and I’m not exhausted.

  • Pesto Pasta Power

    A few weeks ago, I introduced my latest ebook, Value Meals for Busy Moms.  Getting that book published inspired me to start making simpler meals, meals concocted by using what is in my hand.  What I mean, I am using whatever is in my cupboard, leftover in my refrigerator, ripe in the garden garden, or sitting in my freezer and improvising.

    Yesterday I made Pesto with what basil was left from my garden.

    Pesto is so easy.  Whirl in your blender, pine nuts or walnuts, Parmesan cheese, at least one cup of packed basil leaves, a clove or so of garlic, dash of salt.  When that is all nice and finely chopped, add a pinch of salt and some olive oil for a smooth paste.

    I like to freeze pesto in small portions for that garden fresh taste in the winter time.  I thaw frozen pesto and add several Tablespoons of it to spaghetti sauce to make me remember the summer harvest.  I also use it instead of mayonnaise in a BLT sandwich.  YUMMY!

    I discovered that if I add a tiny pinch of Vitamin C powder to the pesto, it doesn’t darken or oxidize.

    So is spent yesterday thinking about what I could add to pesto and pasto and make a decent dinner.   While the bowtie pasta was cooking,  I found leftover roasted chicken to chop up and several garden ripe tomatoes.  Chopped up the tomato, combined the pasta, the pesto, and chicken, VOILA!  This dinner was a winner and oh so easy.

    I even had time to saute a little bit of garden Swiss chard with garlic and we had greens for a side dish, just like spinach.

    My dinner tasted so garden fresh.  Our Colorado growing season is just too short.  I am actually thinking about next year’s garden already.

    If you love Pesto, try out my Pesto Lasagne recipe, it is fantastic!

  • Turkey Leftover Recipes

    TURKEY LEFTOVER RECIPES

    With all those delicious turkey leftovers, here are a few recipes we look forward to each year after Thanksgiving!!! This is absolutely the best part of Thanksgiving.

    TURKEY CHOWDER

    My friend, Debi Nancarrow, shared this recipe with me in 1985 that had become not only a family favorite of theirs but also part of their “Twelfth Night Party” Celebration tradition. The recipe has been published in a coffee table book celebrating Colorado Christmas traditions and it is probably in other books as well. I guarantee this recipe is a winner for those leftover bits of turkey.

    If you make homemade turkey stock from the leftover bones the flavor skyrockets to a perfect “10”! Even if you can’t try this recipe out this year, be sure to save the recipe for future use. I usually double the amounts to have some soup for the freezer. If you let the soup sit a day, the flavor improves with age. We’ve eaten this in bread bowls that I’ve made. Fabulous!

    2 C. sliced carrots
    3 C. water, turkey broth or canned chicken broth
    1 large floret of broccoli OR 1-10 oz box of broccoli
    1 C. onion, chopped finely
    1/2 C. celery, sliced
    1 tsp. salt
    1/2 C. ground oat flour (blend rolled oats in the blender to make flour)
    2 C. milk or allergy alternative soy product
    6 oz. Swiss cheese, grated
    1-1/2 C. diced turkey

    Combine carrots, broth, onions, celery, broccoli, and salt. Bring to a boil over medium heat. Simmer 10 minutes. Bring to rolling boil again, and gradually stir in the oat flour, stirring constantly.
    Let simmer another 10 minutes until lumps disappear. Reduce heat. Add milk, turkey. Remove from heat. Stir in cheese. Serves 4-6.

    TURKEY TETRAZZINI

    Serves: 6-8 servings (2-1/2 qt casserole)

    3 cups diced turkey pieces
    10 oz whole grain pasta of choice or use spaghetti
    1/2 cup melted butter
    1/2 cup whole wheat pastry flour or 6 TB unbleached white flour
    1-3/4 cups hot milk, low fat if desired
    1 cup Turkey or Chicken broth (homemade is tastiest)
    1/4 cup cooking sherry or white grape juice
    1/2 tsp. salt
    1/4 tsp. pepper
    1/8 tsp nutmeg
    1 Cup fresh mushroom slices, sauteed in oil or butter OR 4 oz can mushroom stems and pieces, drained
    1/3 Cup Parmesan Cheese

    1. Cook pasta according to package directions until just barely tender or use leftover spaghetti or other pasta. Rinse, and drain.
    2. Make the sauce by blending flour into melted butter and cook and stir over medium heat about 1 minute; remove from heat. Blend in milk and chicken broth. Return to heat; cook and stir until thickened.
    3. Blend in sherry, salt, pepper, nutmeg, and mushrooms. Combine pasta, turkey, and sauce and place in casserole dish. Top with Parmesan Cheese. Bake in 350 degree oven for 20-30 minutes or until bubbly. Make two casseroles, one for the freezer and one to serve.

    GOURMET TURKEY SANDWICH

    Sourdough bread, French bread or whole grain equivalent
    Jellied cranberry sauce
    Cream cheese
    Leftover turkey meat (white meat, preferably)

    Spread cranberry sauce and cream cheese on opposite
    sides of bread, and then simply layer on some cold left-
    over turkey meat.

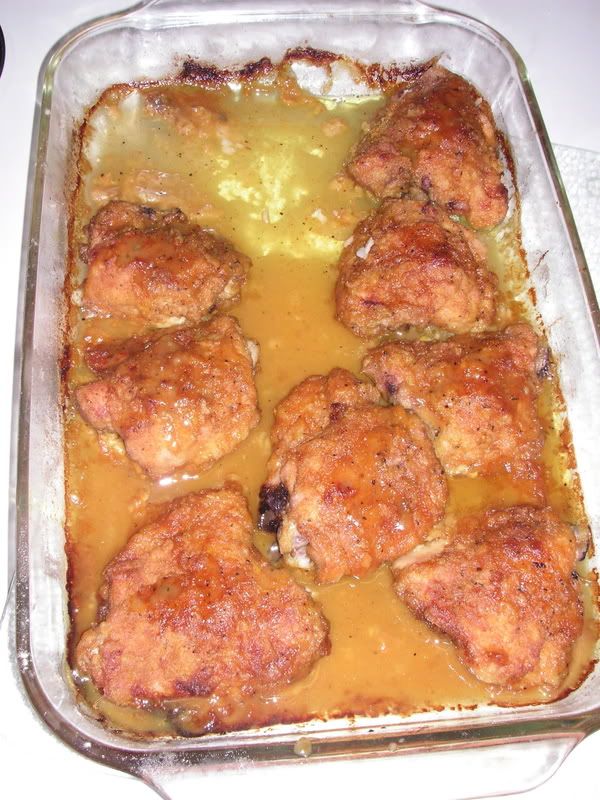
  • Honey Glazed Chicken, a family favorite

    Ed Note:  It turns out that one of our family favorite recipes, Honey Glazed Chicken, was a hit in Iraq.  Here is an update from my oldest daughter Laura, who is currently serving in a Christian School in the Kurdish area of Iraq.   Read on:

    Dear Mommy,

    Oh, I forgot to tell you- I made Honey Glazed Chicken for our whole team on Monday and they LOVED it!  It was definately a hit:-)

    It is a great recipe too because we actually have all those ingredients here!  We didn’t have to scratch our heads and say “Well, we could subsitiute this for this since we don’t have this and this and this ingredient…!”

    We also made dinner for the guys tonight (they were having some of the male teachers over this evening and asked us to make dinner, but we can’t stay for it… but we are happy to serve!  Anyway, we need to go deliver their dinner.

    Jeremiah requested the Honey Glazed Chicken so we are serving it to the Kurdish men- I will let you know how they like it!

    Laura in Iraq

  • Baking Testimonials, comments, questions.

    Today I sent out an email entitled, “Is baking bread and storing grain economical?”

    I received many interesting responses you might enjoy reading through:

    <<<By the way, I share your bread recipe(Marilyn’s Famous Whole Wheat Bread Recipe) with everyone that I know that buys a Zojirushi bread machine. It’s far better than the one in the Zoj recipe book and even better than Bread Beckers. Everyone I know loves your recipe, so thanks for sharing it with us! Bunnie C

    Zojirushi Bakery Supreme (Auto Baker Method)

    2 TB honey
    2 TB oil
    1 1/2 C water (90 – 100F)
    1 1/2 tsp Real Salt
    3 1/2 C fresh whole wheat flour
    2 tsp Dough Enhancer
    3 TB Vital Gluten
    1 1/2 tsp Saf Instant Yeast>>>

    Another:

    <<<Marilyn,

    I understand Connie’s concerns! I would be interested in seeing the cost break-down of how you price your bread; when I’ve done mine, it comes in closer to $3 a loaf to make it myself. Still cheaper than buying it, and of course it’s healthier, and I get the satisfaction of doing it and my children help so we like it 🙂

    Regarding storage, the buckets are wonderful but expensive. I had some grain in buckets in our basement, but for everyday use I had 25lb each of quite a few varities in non-airtight Sterilite stacking bins in my kitchen. They were fine for years (rotating the grains as I used them), but in the last few months I lost 2 bins to maggots (spread from an infestation in my bin of dried fruit I’d harvested and dried myself) and the remaining 3 to flour moths. Now I have everything in buckets. Less convenient access but I hope we’re through our pest problems. For those who do buy in bulk, please urge them to store in airtight containers! I had never heard of flour moths and had no idea maggots could get into grain (or dried fruit — and they ate right through ziplock freezer bags!). At least the buckets only need to be bought once. Tyrie W>>>

    Tyrie and others,

    his is how I calculate (estimate) the cost of bread per loaf:

    My grain costs me about $30.00 per 50 lb bag. It takes roughly one
    pound of flour per loaf (1.5 lb loaf).The whole wheat flour cost is 60 cents.

    Water is free, but I do use filtered water so there is no chlorine or other chemical contaminants in my bread.

    Saf Yeast costs me $5.99 per pkg (I use SAF Instant yeast). I would use about 1 tsp per loaf. I calculate that cost at 5 cents, that is an estimate.

    Salt is 1 tsp. I don’t calculate that cost, but call it 1 cent. (I use Real Salt)

    Honey and oil are my most expensive ingredients. I would use 2 TB honey per loaf and 2 TB oil per loaf, so depending on the costs of the oil and honey you purchase (bulk purchases are cheaper per cup). I calculate the honey cost at 25 cents (1 cup of honey costs me $2.00 because I buy it in bulk).

    The oil is 2 TB per loaf and I use olive oil which costs me about $13.00 for 2 qts. so that is 20 cents for 2 TB.

    Total estimated expense is $1.11.

    So even if your ingredient costs are more because you don’t buy in bulk, we are talking in the neighborhood of $1.00 to $1.25 a loaf. You could add in electrical costs if you were really wanting an accurate cost, but I think the point is homemade bread is significantly less expensive and better quality than most store bought equivalents.

    Depending on the size of your family and how many loaves of bread you use a week, you can calculate annual savings. Large families will save a bundle!

    Here was a reply from Tamara, a homemaker, who’s husband has had some significant health improvements since she started baking bread. Read her story in her words.

    <<<Dear Marilyn,

    About 1.5-2 years ago I began grinding my grains an making all my doughs. I’d made bread in a machine for years, but have since given the machine away. Let me simply say that my husband has struggled with high blood pressure for years and has worn glasses since his school days. The only changes in his diet over the 1.5-2 years was that I varied our meats/fish consumption and the whole grains.

    In the last year he came home from a eye appt. to find that he was no longer required to wear glasses, now 20/20. The doctor said this was very rare and wanted to know if his diet had changed. We were in awe. Then a few months later he went to the doctor for a check up, and giggled when she congratulated him on his completely low/normal range BP.

    She wanted to know what was so funny, and he said he’d been pretty stressed the past week and figured it would be sky high. In 11.5 years of marriage, that was the lowest his BP had ever been. We truly believe it is a direct result of the grains. I make everything else too (i.e. detergents, yogurt, sauces, etc.). He travels every other week and cannot eat as well those days, due to his occupation. Look at the changes have done for him! Tamara E.>>>

    Thanks Tamara for sharing. Do you have a testimonial or question to share with others? Please post here at my blog.

    One more health testimonial:

    <<<Dear Marilyn,

    Your bread recipes and milling grain is helping me to survive a horrible Auto Immune Disease I was just diagnosed with & my daughter more than likely has as well. It is the only thing some days I feel like eating and has staved off anemia & helps the ulcers in my throat stomach & soft tissue. I am grateful for your recipes I believe 6 months ago I bought your ebook, what a blessing you are!

    Your bread & milling grains have helped us tremendously with energy & getting healthier. Thank you again & God bless you. Many Blessings, Larisa G>>>

    This is a common question about how to keep bread from drying out so quickly:

    <<<Dear Marilyn,

    I enjoy making my own bread.   My bread seems to get dried out a day or two after it’s been baked.  I’m wondering if there is a secret to getting bread to stay moist.  Thank you, Loretta >>>

    Answer:  If your bread is dry, use less flour during the kneading process.  If it stales quickly, always use honey, honey is the secret to keeping bread from drying out.  Marilyn

    Remember:

    Marilyn’s Famous Bread Recipe is VERSATILE! Use it to make cinnamon rolls, pizza, bread sticks, and more. Click this link for Whole Wheat Bread Dough Variations. If you use this bread dough to make your own rolls, cinnamon rolls, pizza, etc.the savings continues to grow.

  • Fresh and Wyld Farmhouse Inn & Gardens

    AKA The Farmhouse, Paonia, Colorado

    Great recipes for using seasonal veggies like Chard, Kale, Corn, and Zucchini follow:


    The following recipes are courtesy of renowned Aspen Chef Dava Parr (Paonia, resident). Chef Dava was pleased to share her delicious recipes with us and The Rocket (also known as Arugula) Salad was totally awesome! I learned that I can roast zucchini in the oven instead of saute it, and I must say I love it this way! Learn something new everyday!

    Rocket and Roasted Summer Squash Salad
    This is also a great way to use up leftover corn on the cob. Although I don’t have any arugula growing in my garden today, I think it isn’t too late to plant for a Fall harvest.

    Roasted Summer Squash

    Preheat oven to 425

    1 yellow summer squash

    1 Zucchini

    ¼ onion, chopped

    ½ clove garlic, crushed

    3 T olive oil

    Salt & Pepper

    1/2 tsp Paprika

    Combine all the ingredients above and roast for 25-30 minutes.

    Arugula Salad

    5 oz baby Rocket (arugula), chopped a couple times

    3 ears of corn, shucked off the cob

    2 oz Goat cheese

    Salt & Black pepper

    Dressing

    1 tsp Lemon juice

    2 tsp Nama Shoyu or other good soy sauce

    1 tsp Balsamic Vinegar

    2 tsp Extra Virgin Olive Oil

    Whisk everything together in a little bowl or shake up in a pint jar. Lay arugula on platter, sprinkle corn and goat cheese over the top. Spoon roasted squash over Rocket, (arugula) and pour dressing over the top. Serve.

    Chorizo & Chard Omelet

    ¼ # chorizo, crumbled

    ¼ cup thinly sliced onion

    ½ clove garlic, crushed

    2 cups chard, chopped in small pieces

    1 cup grated zucchini

    3 eggs beaten w/ 1 T Cream

    ½ cup grated Jarlsberg

    Sauté Chorizo with onion, garlic, chard and Zucchini over med-high heat. Spoon into a bowl and set to the side.


    Raw Kale Salad

    1 bunch of Kale cut in chiffonade (Strips as thin as your knife can cut, think shredded paper)

    1 tsp garlic, crushed

    ½ cup raw pine nuts

    ½ cup raisins

    ½ cup grated Parmesan

    Sea Salt & Black Pepper

    3 T olive oil

    Juice of 1 lemon squeezed

    Blend everything together with your fingers until it is well mixed. Let sit for 20 minutes at room temperature.

    Stewed Tomatoes and Green Beans

    1 pound green beans, steamed until almost done

    1 T olive oil

    1 clove of garlic, crushed

    1 cup of chopped tomatoes

    1 tsp fresh oregano or ½ tsp dried oregano

    ½ cup nicoise olives, optional

    1 tsp capers, optional

    Pinch of crushed red pepper

    Juice of half a lemon

    Sauté garlic and steamed grean beans in olive oil for a couple of minutes. Add tomatoes, oregano, red pepper flakes and lemon juice. Let stew for a few minutes over low heat.

    Serve with a little Parmesan over the top if you like.

    Fresh and Wyld Farmhouse Inn and Gardens Tucked into a serene corner of Colorado’s North Fork Valley, near charming little Paonia—and —our lovingly restored 1908 farmhouse inn and gardens is a great way to caress, de-stress, and decompress yourself while enjoying a rural lifestyle in total comfort.

    Innkeeper Dava Parr (a renowned Aspen chef) prepares cutting edge comfort food for breakfast and weekend dinners from fresh, local, organic meats and produce grown right on our own four acres or from one of the many farms in Colorado’s most active natural farming region.

    Call us for reservations room types vary in price and range from $90 to $135 per night. 970-527-4389 We look forward to hosting you!

  • Easy Economical Vegetarian Main Dishes

    Last week I printed the testimonial about a “poor” woman raised in a large family of 12 children who were fed beans, cornbread, and greens two meals a day most of the year. In her adult life, the doctors, and particularly the dentist, pronounced her extremely healthy.

    I’ll admit it; at times I hesitate to serve beans and legumes as often as I could for fear I’m serving poor man’s food, and not pleasing the family. I need to remember, I’m the mom and I do know what’s best for the family’s nourishment and finances.

    I hope you were encouraged to learn that this “poor” woman enjoyed vibrant health as an adult. I thought we could all be inspired if we shared with one another family favorite, tried and true recipes for beans and legumes.

    New Blog Contest:
    To get started I will publish one of my tastiest lentil recipes, Curried Lentils. It goes together quickly and easily, especially if you pressure cook the lentils first, which takes just 15 minutes.

    Several months ago I asked readers to share their family friendly recipes that rely mostly on beans or legumes to encourage struggling homemakers who are trying to stretch their paychecks while adopting a healthier lifestyle.

    My husband Duane passed away shortly thereafter and I am now, just geting to award  the best recipes/creative/versatile recipes with a complimentary bottle of safe and effective Norwex Fresh Wash for cleaning fruits and veggies ($26.99 value), or Norwex Carpet Stain Buster ($26.99), a complete carpet cleaning solution used for shampooing, spot cleaning, and deodorizing effectively without harmful residues.

    The winners  have been notified by email and will receive their prizes shortly.  The winners are:

    Jenny, Amy, Jackie, and Hope.  I hope you will read their winning recipes and try them out soon.
    I liked Jenny’s idea for adapting basic bean recipes to Italian, Chinese, Indian, and Mexican seasonings.  I loved Amy’s recipe for snack sprouts made with lentils dried in a dehydrator -this is a very unique idea.  Hope gets  the award for the most complete and extensive recipe collection of main dish legume recipes, and Jackie posted a recipe for Lebanese Vegetable Salad

  • Hot Cross Buns

    Remember the children’s nursery rhyme that goes as follows?

    Hot cross buns! Hot cross buns!
    One a penny two a penny – Hot cross buns
    If you have no daughters, give them to your sons
    One a penny two a penny – Hot cross buns

    Hot cross buns were sold in the street to the cry of “Hot cross buns!” around the period in English history dating back to the seventeenth and eighteenth century.

    A hot cross bun is a type of sweet spiced bun made with currants and leavened with yeast. It has a cross on the top which might be made in a variety of ways. Using confectioner’s frosting, is the most common way.

    According to one source, hot cross buns are traditionally eaten on Good Friday, with the cross standing as a symbol of Christ and the resurrection. Have fun with the children and enjoy the process of being together in the kitchen. Here’s my recipe for the buns:

    Hot Cross Buns

    2/3 cup dried currants
    3-1/2 to 4 cups whole wheat flour (or half bread flour and half whole wheat
    2 TB yeast
    1/2 to 1 tsp cinnamon
    3/4 cup milk
    1/2 cup cooking oil
    1/3 cup sugar or honey
    1 tsp salt
    3 eggs
    1 slightly beaten egg white
    Frosting (recipe follows)

    Cover currants with very hot water. Let stand about 10 minutes or up to one hour at room temperature. Drain well. In a large mixing bowl combine 2 cups flour, yeast, and cinnamon. Heat milk, oil, sugar or honey, and salt until warm (115 to 120�). Add to the dry mixture. Allow to sponge for about 15 minutes if time allows. Add eggs, one at a time. By hand or mixer, stir in currants and enough remaining flour to make a soft dough. Knead until the gluten is developed by mixer or on a lightly floured surface until smooth and elastic, about 6-10 minutes.

    Shape into ball. Place in greased bowl. Turn once to grease top. Cover with plastic wrap and let rise in warm place until doubled in bulk, about 1-1/2 hours. Punch down. Cover and let rest 10 minutes.

    Divide into 18 pieces. Form smooth balls. Place on greased baking sheet 1-1/2 inches apart. Cover; let rise until double, 30 to 45 minutes. Cut shallow cross in each. Brush tops with egg white. Bake in preheated 375� oven 12 -15 minutes. Remove from baking sheet. Use confectioner’s Frosting to make a “cross” on the bun.

    Confectioner’s Frosting:

    2 TB milk
    1 cup sifted powdered sugar
    1/2 tsp. vanilla

    Combine these ingredients together and add milk or water as needed to get a good pouring consistency for the frosting. Place the frosting in a small zip-lock sandwich baggie, clip the corner and use the baggie to squeeze the frosting over the cooled buns in a cross shape. Small children will enjoy this process even if it gets a little messy!

    More Easter Themed Activities:

    1. To learn to dye Easter eggs with natural colors, CLICK HERE.

    2. Another fun Resurrection project is Resurrection Cookies.

    A Beginner’s Guide to Baking Bread ebook by Marilyn Moll offers step-by-step instructions for getting started with baking yeast breads.

    Click Here to purchase this instantly downloadable ebook for $9.95.

    Learn how to:

    * How to Select Ingredients
    * Selecting a Grain Mill
    * Selecting A Mixer

    * Step-by-Step Mixing Instructions
    * How to Develop the Gluten

    * Tips for the Best Bread
    * Lots of Bread and Roll Recipes
    * Troubleshooting Guide
    * The Two-Stage Process

    Item #6059 $9.95

    Click Here to purchase this ebook for $9.95.


  • Snowmen

    I mentioned that we had Mentoring Moms on Monday. It was my turn to teach so I talked about freezer meals and different ways to get your freezer stocked without spending from morning till night and getting exhausted.

    As a group we made a giant batch of Chicken Pot Pie. Everyone got a small casserole dish to take home for that night’s dinner or for their freezer. We actually ended up with extra meals for new mommies and for my freezer!

    We always decorate the tables with a seasonal centerpiece using what’s on hand. My friend Sandy, is an expert at coming up with attractive and creative centerpieces.

    I’m sorry I didn’t think to take pictures of our tables, our cooking time. Sandy has a collection of snowmen, one of each she has made over the years for her craft shows. So snowmen decorated our tables for centerpieces. No expenses. I arranged the snowmen at my house on my table to give you the ideas.


    I would love to see what you all are doing to create attractive, seasonal centerpieces from what you have around your home?

  • Chili Chasing Chili Recipes

    It’s not expected to get above freezing for about a week. We need something to warm up with, so I gathered my Chili Recipe collection to share with you.


    Colorado White Chili
    A healthy, mouth-watering meal sure to bring raves; a great alternative to traditional chili from Don’t Panic Dinner’s in the Freezer by my friends Suzie Martinez, Vanda Howell, and Bonnie Garcia

    1 Tbsp cooking oil
    1 medium onion (1/2 cup), chopped
    4 large cloves garlic, minced
    1-4.5 oz. can diced green chilis (mild or hot)
    1 Tbsp cumin (powder or seed)
    2 tsp oregano
    1/2 tsp ground red pepper

    1/4 tsp ground cloves
    1-15.5 oz. can great northern beans (don’t drain)
    1-15.5 oz. can sweet corn (or frozen)
    2 cups cooked chicken
    5 cups chicken broth

    Serving day ingredients
    shredded Monterey Jack cheese
    sour cream
    tortilla chips
    Cooking day instructions:
    In a large pan or Dutch Oven, combine oil, onion, garlic, and green chilis. Saute until tender, but do not brown. Stir in spices, beans, corn, chopped chicken, and chicken broth. Cook and stir until heated through. Adjust seasonings to taste. Cool chili completely. Freeze, using freezer bag method.
    Serving day instructions
    Thaw completely. Simmer until heated through. Serve in bowls with cheese, sour cream, and tortilla chips. For extra “kick”, garnish with jalapeno slices.
    (yields 6-8 servings)

    From Don’t Panic – Dinner’s In The Freezer
    by Martinez, Howell, Garcia used by permission Fleming H. Revell, a division of Baker House Books,
    Copyright 2005

    Chili Chasing Chili
    This is my thirty year old, reliable Chili Recipe

    1 pound ground turkey or beef
    1 – 16 0z can whole tomatoes, chopped
    1 – pkg dry onion soup mix
    1 1/2 Tbsp Chili powder

    1 1/2 tsp cumin powder
    1/2 tsp salt or to taste
    2 – 15 oz cans kidney beans, drained (save reserved liquid)
    or 2 cups dry kidney beans, soaked and cooked
    1 cup finely sliced celery
    1/2 cup diced green pepper, optional
    1 TB olive oil

    Saute pepper and celery in oil until limp. Set aside. Brown meat in skillet, drain grease. Combine all ingredients into stockpot and simmer for 15-30 minutes. We serve the chili over brown rice or with corn bread.

    Garnishes:
    grated cheddar cheese
    sour cream
    cilantro

    MAMA KIM’S AWARD-WINNING WHITE & GREEN CHILI
    My friend Kim won the contest she entered this Chili recipe into.  I haven’t tasted it yet, but I know it is a winner!  Give it a try.

    3-4 pounds pork roast, cooked and shredded, with broth

    8+ c. chicken broth

    1 large onion, diced in 1/2″ pieces

    4 cloves garlic, minced

    3 small cans chopped green chiles

    4-6 potatoes, peeled and diced

    1/2 # diced baby carrots

    1 pkg. taco seasoning

    1-2 T. chili powder

    1-2 t. cumin

    1/2 t. oregano

    Salt and pepper to taste

    2 cans white beans, drained and rinsed

    3 limes

    1/2 bunch cilantro leaves, chopped fine


    In a large pot, heat 1 c. chicken broth.  Add all veggies, cook till tender.  Add chicken and pork broths, and shredded pork. Bring to a boil, then turn down to simmer, add the seasonings and beans.  Simmer 30 min. – 1 hour, till tender.  Add the juice of the limes and cilantro leaves.  Can be cooked all day on low in a slow cooker.    Enjoy with sour cream, salsa and chips!  This chile is especially good cooked the day before, to let the flavors blend.


    CHICKEN CHILI CORN CHOWDER
    6-8 servings

    This soup is a great variation to chili, very elegant, and delicious! Serve with hot “good earth” rolls.

    3-4 Cups cooked, diced chicken (1 1/2 lbs. boneless)*
    1/2 C. finely chopped onion
    3 TB flour, whole grain preferred
    2 TB olive oil
    2 cloves garlic, minced
    2 C. chicken broth ( I use Frontier chicken broth powder and water to equal 2 C)
    2 C. hot water
    1 tsp. cumin, ground
    2 C. half and half
    2 C. Monterey Jack
    1- 16 oz can creamstyle corn
    1 – 4 oz can green chili, chopped
    1/4 tsp. hot pepper sauce – (optional)
    salt and pepper to taste

    Saute onion, and garlic in olive oil until transluscent in a stock pot. Stir in flour over low heat and slowly stir in chicken broth, and water. Heat until thickened slightly. Add cumin, half and half, creamstyle corn, green chilis, and hot pepper sauce (opt) to the soup base and simmer together for 15-60 minutes. Add chopped chicken, stir in shredded cheese until melted, adjust seasonings to taste. (Don’t boil the soup once the cheese is added or it will become stringy.) To serve: garnish with chopped medium tomato and 1/2 C. fresh minced cilantro.

    *A quick way to cook up 1 1/2 lbs. of boneless chicken breasts is to pressure cook them in a Duromatic Pressure Cooker for 8 minutes at the 2nd red ring and allow the pressure to come down naturally. While soup base is simmering, For more information about recipes and products contact marilyn@urbanhomemaker.com or call at 1-800-552-7323. cook and dice the chicken.

    Silver Palate Chili For a Crowd
    When choosing chopped meat for chili, you’ll find that beef chuck adds great flavor. And you never can have too many spices. Look for dark-red kidney beans. Lemon juice brightens all the tastes! I found this recipe in Parade Magazine a couple years ago around Super Bowl Time.
    2 tablespoons extra-virgin olive oil
    1 pound yellow onions, coarsely chopped
    1 pound sweet Italian sausage, removed from casings
    4 pounds beef chuck, ground
    1 can (12 ounces) tomato paste
    1 1/2 tablespoons minced garlic
    1/3 cup ground cumin
    1/2 cup chili powder

    1/4 cup Dijon mustard
    2 tablespoons dried basil
    2 tablespoons dried oregano
    1 1/2 tablespoons salt,
    or to taste
    1 1/2 tablespoons freshly ground black pepper
    3 cans (28 ounces each) Italian plum tomatoes, drained
    1/4 cup dry red wine
    2 tablespoons fresh lemon juice
    1/4 cup chopped fresh dill

    1/4 cup chopped parsley
    2 cans (16 ounces each) dark-red kidney beans, drained
    2 cans (5 1/2 ounces each) pitted black olives, drained, optional

    1. Heat the olive oil in a very large pot. Add the onions and cook over low heat, stirring occasionally, until wilted, about 15 minutes. Add the sausage meat and ground chuck; cook over medium-high heat, stirring, until the meats are well browned. Spoon off any excess fat and discard.
    2. Stir in the tomato paste, garlic, cumin, chili powder, mustard, basil, oregano, salt and pepper. Add the tomatoes, wine, lemon juice, dill, parsley and kidney beans. Stir well and simmer, uncovered, for another 15 minutes.
    3. Taste and adjust seasonings. Add olives; simmer for 5 minutes more to heat through. Serve immediately.

    Serves 20.
    Vegetarian Chili

    This Vegetarian Chili recipe is adapted from the Silver Palate Good Times Cookbook. Even if you are not a vegetarian, I think you will really enjoy this yummy chili. Don’t be afraid of the ingredient list, it goes together easily.

    1 medium-size eggplant, unpeeled, cut into 1/2 inch cubes
    1 tbsp coarse salt or regular salt
    3/4 cup (or as needed) best-quality olive oil

    2 medium-size yellow onions, cut into dices
    4 cloves garlic, finely chopped
    2 large green bell peppers, cored, seeded, and cut into 1/4 inch dice
    1 35 oz can Italian plum tomatoes
    1-1/2 lbs fresh ripe Roma tomatoes, cut into 1 inch cubes

    2 tbsp chili powder
    1 tbsp ground cumin
    1 tbsp dried oregano
    1 tbsp dried basil
    2 tsp freshly ground black pepper

    1 tsp salt
    1 tsp fennel seeds
    1/2 cup chopped fresh Italian parsley
    1 cup canned dark red kidney beans, drained
    1 cup canned chick-peas (garbanzos) drained
    1/2 cup chopped fresh dill, or 2 Tbsp dried
    2 tbsp fresh lemon juice
    cooked brown rice

    shredded cheddar cheese

    Place the eggplant in a colander and sprinkle with the salt. Let stand for 1 hour. Pat dry with paper towels. Heat 1/2 cup of the oil in a large skillet over medium heat. Add the eggplant and saute until almost tender, adding a bit more oil if necessary. Remove the eggplant to a casserole or Dutch oven.
    Heat the remaining 1/4 cup (60 ml) oil in the same skillet over low heat. Add the onions, garlic and green peppers and saute just until softened, about 10 minutes. Add onions to the casserole with any oil.

    Place the casserole over low heat and add the canned tomatoes with their liquid, fresh tomatoes, chili powder, cumin, oregano, basil, pepper, salt, fennel, and parsley. Cook uncovered, stirring frequently, for 30 minutes. Stir in the kidney beans, chick-peas, dill and lemon juice and cook for another 15 minutes. The eggplant peel should be tender. Stir well and taste and adjust seasonings. Serve immediately with brown rice and lots of shredded cheddar cheese.

    This recipe is adapted from the Silver Palate Good Times Cookbook which says, “This vegetable chili is just as lush and spicy as those with lots of beef and pork.”