Author: The Urban Homemaker

  • Trying to Burn the House Down

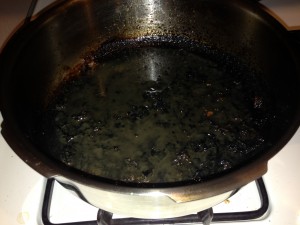
    When’s the last time you forgot about something cooking on the stove?  It happened to me just the other night.  I was expecting my husband home for dinner soon and was reheating some chicken tenderloins (from the night before) on the stove.   I’m not sure why I had the heat up so high, but I thought I’d sit down in the office a bit to quickly send an email, and actually forgot about that chicken, until the smell of something burning assaulted my nostrils!  Unfortunately, the chicken was very done, almost beyond recognition, and my lovely heavy-duty Kuhn Rikon pan was charred black and smoking.  A lesser quality pan may very well have been on fire at this point!  The kitchen was smoky, and although it was a very cool evening, I had to open the doors and windows to get some relief from the smell and smoke.  After the pan cooled, which took awhile, I used some simple tools, and with about 5 minutes of work I had that favorite pan of mine shining again.

    I can imagine I am not the only person this happens to, and I’d just like to share some useful “clean-up” tips I’ve learned over the years.

    burnt pan 002

    Depressing!

    2015-06-02 16.37.14

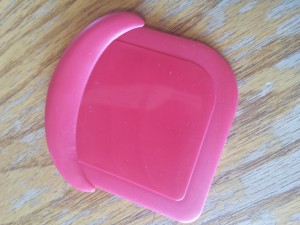
    An inexpensive little plastic scraper is my #1 tool for the job!  Use it to scrape off the majority of the thick, black “gunk”.

    burnt pan 006

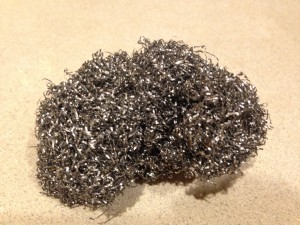
    My well-loved and well-used Norwex Spirinett is what I used next.

    burnt pan 004

    And then a sprinkle of this cleanser and a little more scrubbing with the Spirinett.

    One of the very few cleaners I keep in the house!  Brings that shine back to stainless steel cookware!

    burnt pan 007

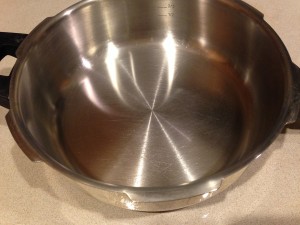
    My beloved Kuhn Rikon pan looking good as new!
  • My Review of the NEW Harvest Mill

    My Review of the NEW Harvest Mill

    black-featured

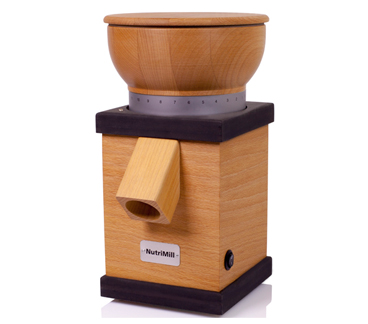
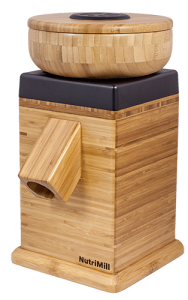
    Just last fall, NutriMill introduced their newest edition, a beautiful electric grain mill called the Harvest Mill.  I brought one home to use several weeks ago.  I’ve owned a NutriMill (what they now call the Classic) for around 10 years and have been very satisfied with the quantity and quality of flour it mills.  However, it does NOT simply crack grains, nor does it make a very coarse meal (such as cornmeal).  So, when I wanted to make fresh cornmeal, I would run a couple cups of dried corn through my Wonder Junior Deluxe (a manual mill).  NOW, with the NutriMill Harvest Grain Mill, I can make fine flour AND cracked grains and coarse meal – in short order!

    I love that this mill looks good enough to grace my countertop all the time, takes up very little room, and because of its accessiblilty encourages me to use it more frequently!

    Milling a few cups of fresh flour for a recipe, whether it be wheat, spelt, rye, rice, or even garbanzo bean is quick and easy!  I set a timer when milling wheat and it made 3 cups of fine flour in just 1.5 minutes.  Times will vary of course depending on the grain.  For those who are eating a gluten-free diet and wanting to eat healthier and save some money too, I highly recommend this mill for easily making alternative flours such as brown rice, corn, or garbanzo.

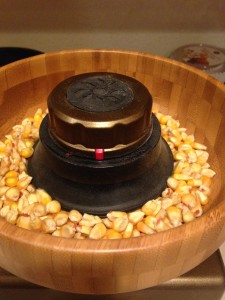
    Here’s a close-up view of the hopper with corn in it.  Turning the knob with the red marker clockwise grinds more finely and turning it counter-clockwise makes it more coarse. I found it produced lovely cornmeal by having the red marker right in the front and center!


    harvestmill 005

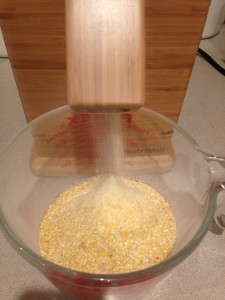
    Set a bowl or glass measuring cup under the spout (tall and narrow is best for less dust) .  There’s a simple power switch on the side of the unit.

    harvestmill 009


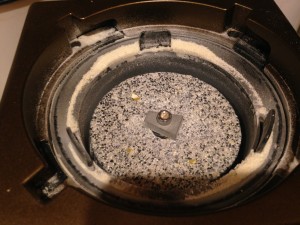
    With an easy twist to the right, the hopper is removed and the stones are exposed.  They can be brushed clean with a soft brush and are also easily removed for cleaning, if necessary.


    more harvest mill 002

     Here’s an easy recipe for delicious fresh Corn Bread!

    Corn Bread

    3/4 C. freshly ground cornmeal

    1 C. flour

    1 t. cream of tartar

    1 egg, well beaten

    1 C. sour cream or buttermilk

    1 t. each baking soda and salt

    1/2 C. sugar

    2 T. melted butter

    1/4 C. milk

    Mix all dry ingredients well.  Add remaining ingredients and beat thoroughly.  Pour into greased 9 inch square pan and bake at 425* for 20-25 minutes.

  • Of Homemade Tortillas and Chicken Fajitas

    Of Homemade Tortillas and Chicken Fajitas


     4-29-14 003

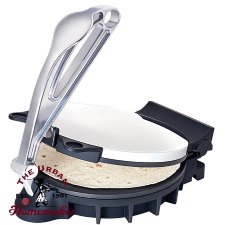
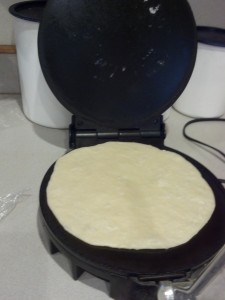
    My family considers homemade tortillas a real treat!  After numerous attempts at making round flour tortillas (I could make every shape but round!), we finally invested in an electric tortilla/flatbread maker.  With the simple, inexpensive ingredients that comprise tortillas, I’m sure we’ve more than made up the original price of the tortilla maker in savings.  PLUS – homemade tortillas are delicious, and you know what you’re eating!  The Cucina Pro Flatbread Maker makes the task so easy!  The appliance comes with an instruction book and great recipes. 


    One of our favorite ways to eat tortillas is with Fajitas.  I’ve used this Chicken Fajita recipe for years, and it is a winner!

    4-29-14 001

    CHICKEN FAJITAS

    1 1/2 lbs. boneless chicken, cut in thin strips

    2 T. oil

    2 T. lemon juice

    1 1/2 teaspoons each:  season salt, oregano, and cumin

    1 teaspoon garlic powder

    1/2 teaspoon each:  chili powder and paprika

    1 onion, sliced thin

    1 each red and green bell pepper, sliced thin

    Marinate chicken 1-4 hours in oil, lemon juice, and spices.  Pour into large, hot skillet and cook, stirring frequently, until chicken is tender, approximately 10 minutes.  Add sliced onion and peppers and stir-fry until vegetables are crisp-tender.  Serve with flour tortillas.

    Makes 6 fajitas


  • Add Some Sparkle to Easter Brunch/Dinner

    ORANGE JUBILEE

    This recipe is very similar to that popular cold drink you can buy at the mall.  It’s been a family favorite for many years and gets lots of requests!  Add a banana for extra flavor!

    orange julius

    6 oz. frozen orange juice

    1/2 cup sugar, optional

    1 cup milk

    1 cup water

    16-18 ice cubes

    1 teaspoon vanilla

    Put all ingredients into Bosch blender and blend well.  Serve immediately.  Makes 4 – 8oz servings.

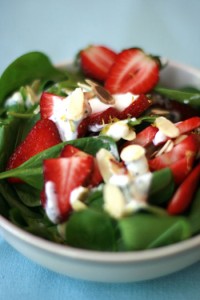
    Spring Salad

     Delicious! Our favorite salad!

    spinach-strawberry-salad4 cups spinach/lettuce or other mixed greens

    1 cup fresh strawberries, sliced

    1/2 cup toasted pecans, walnuts, or sliced almonds, or use sunflower seeds

    1/2 cup Feta cheese crumbles

    Dressing:  Mix 1/3 cup olive oil, 1 tablespoon lemon juice, 1 tablespoon Dijon mustard, 1 tablespoon sugar or honey, 1/2 teaspoon sea salt, and 1/4 teaspoon black pepper

    Add dressing to salad right before serving.  Serves 4.

  • Chase Away that Cold and Flu with Garlic Tea!

    Chase Away that Cold and Flu with Garlic Tea!

    1-27-14 013Easy to make garlic tea!

    There seems to be a lot of sickness going around this winter, so I thought I’d share our family’s easy “go-to” formula for feeling better quick!  As you probably already know, garlic has healing and antibiotic properties.  We grow lots of garlic on our small farm, so it’s only natural that we reach for what’s usually close at hand and plentiful!  Even if you’re not sick, this time of the year is a good time to take preventative measures and drink a hot cup of garlic tea each evening.  And, if you feel something coming on, or are already in the throes of a full-blown cold or flu, now is the time to give this old-time remedy a try! Start with a bulb of organic garlic – buy from a local farmer if possible, or try growing your own sometime (see our farm’s website www.strawhatfarms.com for growing instructions).  Bring a small kettle of water to a boil and then drop in cloves of garlic which have been peeled and lightly smashed with the back of a spoon just before using.  To two cups of water I generally use at least 4 cloves of garlic- more if I feel very sick!  Turn off the heat, cover the pan, and steep for 20 minutes.  Pour the tea into a cup and drink it while it’s quite hot, as it’s much more palatable this way!  You can almost imagine you’re drinking chicken broth, as it is quite savory.  Drink a cup two or three times a day if you are already sick. I have found this form of garlic consumption very easy on the stomach and easy on your friends, family, and coworkers, as the odor does not linger with you very long. Let me know how this works for you, and feel free to share your natural remedies as well…

  • How To Cook The Perfect Egg… or, being thankful for the simple things in life

    How To Cook The Perfect Egg… or, being thankful for the simple things in life

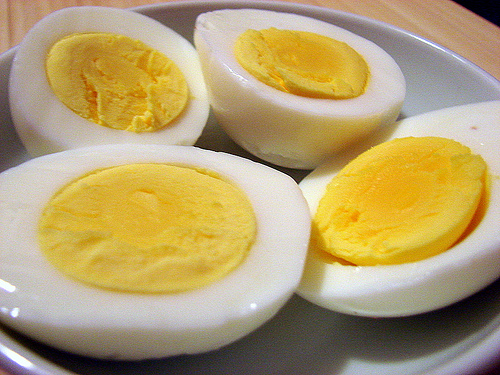
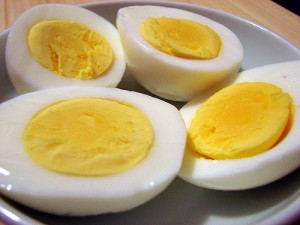
    tumblr_lm110yHDTw1qdcvmcIf you’ve ever tried peeling a “farm-fresh” hard-boiled egg you can probably relate to my frustration over what seems like an impossible task!  We have had chickens for 16 years, and until just a few weeks ago I struggled with removing the shell from a hard-boiled egg!  I’ve read, and been told many tips and tricks to getting it done, but none of those provided a consistent smooth outcome!
    Recently, I came across a brief article in Mother Earth Living that gave simple instructions, which I followed, and got great results!  And not just once – it’s worked perfectly for me several times now!

    Here are my “slightly revised” easy-to-follow steps:

    • Bring eggs to room temperature
    • Bring a pot of water to a rapid boil
    • Carefully lower eggs into water with a spoon
    • Cover pot and boil hard for 14 minutes
    • Drain and put eggs immediately into cold water
    • Lightly crack each shell all over and then gently roll it between your hands and remove shell

    It is amazing what emotions overwhelm us in the process of just the simple things in life!  I can honestly admit to sheer frustration (anger?) in trying to get the shells off eggs for those Deviled Eggs I was taking to the church potluck!  And then – the happiness and thankfulness I felt when I used this method and the shells just slipped off easily!

    Maybe it’s “the simple things in life” that are our true tests.


  • Homestyle Gluten-free Bread

    glutenfree

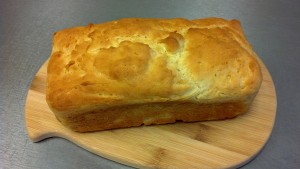
    If you’ve been looking for a dependable recipe for a gluten-free sandwich bread- look no further!

    Once you’ve compiled all the ingredients for this bread, the recipe comes together easily and quickly, with family-pleasing results!

    Or, see the Urban Homemaker’s Baking Supplies category for the Urban Homemaker’s NEW Gluten-free Bread Mix* – and make it even easier!

    This recipe was developed for my Bosch kitchen mixer – you could do it by hand, but the Bosch Universal Plus makes it a piece of cake!

    HOMESTYLE GLUTEN-FREE BREAD

    This recipe can be made using one package of the Urban Homemaker’s Gluten-free Bread Mix.

    Makes 3 (1 1/2 pound) loaves.

    2 cups brown rice flour

    2 cups white rice flour

    1  cup tapioca flour

    1/2 cup millet flour

    1/2 cup garbanzo bean flour

    2 tablespoons xanthan gum

    2 tablespoons SAF instant  yeast

    2 teaspoons sea salt

    4 eggs, slightly beaten

    1/2 cup canola oil

    1/2 cup honey

    2 tablespoons apple cider vinegar

    3 cups warm water

    Mix all the dry ingredients well in your Bosch mixer bowl using the dough hook.  In another bowl, mix the eggs, oil, honey, and vinegar.  Add the warm water and the egg mixture to the dry ingredients and mix on speed 1 for five minutes, cleaning the sides with a spatula after a minute or so.

    Remove the bowl from the mixer and the dough hook from the bowl.  Using a rubber scraper, spoon the dough evenly between 3 standard size loaf pans, smoothing the tops to improve the appearance and remove air bubbles.

    Set aside to rise approximately 30-45 minutes.  When the loaves have risen nicely, bake in a 350* oven for 35 – 40 minutes, until golden brown.  Remove from oven and cool on wire rack for 5 minutes before removing from pans.

    PLEASE NOTE:  The Urban Homemaker’s Gluten-Free Bread Mix is a compilation of gluten-free ingredients, but these ingredients are not packaged in a gluten-free facility.

  • Tribute to Mom

    Tribute to Mom

    The Urban Homemaker is epitomized in my own mother.  I took it for granted, as a child, and foolishly thought most homes were like mine, with a mother who cooked supper every night, baked the best cookies and cinnamon rolls, and actually said she liked doing laundry and ironing!  I did wonder at times why some of my elementary classmates hounded me to trade my lunch for theirs.  🙂

    Mom became an urban homemaker when she and Dad married and settled in a big city out West (where her asthma was supposed to be better), far from their families, and the rural lifestyle in the East where they were both born and raised.  Despite being raised in a large family, in the country, my mom says she wasn’t much of a cook when she got married.  By the time my sisters and I came along though, as far back as my memory serves me, Mom’s food was wonderful!  My dad would take us all out “for dinner” (39 cent hamburgers and French fries) once every two weeks when he got his paycheck, so Mom had ample time and experience to hone her cooking skills.  She made food from “scratch” as it was less expensive than the boxed variety.  She did not own fancy cooking tools, or even a dishwasher (my dad said he had four dishwashers and didn’t need any more)!    After our outing at the burger joint, we would go to the grocery store – Dad would hand Mom $40 cash, and she would buy two weeks worth of groceries while the rest of us waited in the station wagon, listening to the radio and enjoying our time with Dad.

    So… times have changed, yes.  We have been liberated and don’t have to do the mundane cooking and cleaning that was once a natural, necessary task for us.  It’s become easy, acceptable, and excusable to let the restaurant chains feed us more often than we cook.  Losing the art and skills of homemaking has cost us more than just monetarily; it has deprived us of our innate ability to nurture our families, and it has led to a nation of many unhealthy people.

    In a review in Eating Well magazine of Michael Pollan’s latest book, Cooked:A Natural History of Transformation, Pollan says, “Cooking is key to changing our health and the environment.”  When asked about a person who just doesn’t have time to cook, Pollan replies, “Well, that same person has an hour for yoga or surfing the Web.  We put pressure on the kitchen to save 10 minutes to do something else.  I’m just arguing that it’s important – for your health, your family life and your sanity”.

    I am truly grateful for my mother and for her beautiful portrayal of homemaking.  We don’t all have a mother like mine, but we can all be inspired to learn and grow, and transform the way we look at the task before us of raising a healthy family.

    So…what’s for dinner?  🙂

  • Brunch Egg Casserole

    BRUNCH EGG CASSEROLE

    Serves 12

    Here’s a hearty,” assemble the night before” dish

    which includes tasty, basic ingredients!

    1 pound bacon, cut into small pieces

    2 cups cooked ham, chopped

    1 small onion, chopped

    10 slices bread (a French loaf works great), cubed

    1 cup cooked potatoes, cubed

    1 cup cooked asparagus, cut into small pieces (optional)

    3 cups of your favorite shredded cheese

    8 eggs

    3 cups milk

    1 tablespoon Worcestershire sauce

    1 teaspoon ground mustard

    1/2 teaspoon each salt & pepper

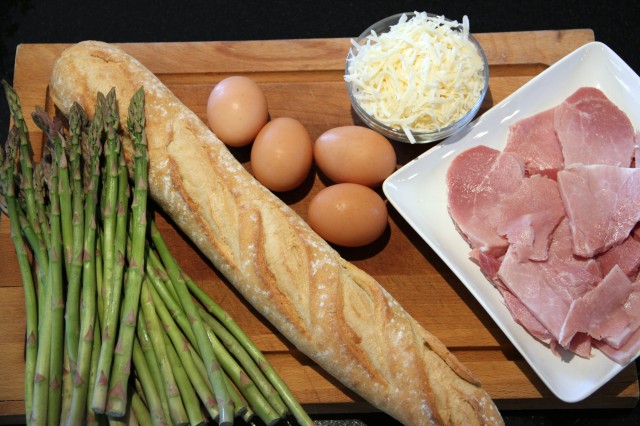
    Cook bacon pieces in a skillet until crisp ; add ham and onion and cook until onion is tender; drain. In a greased 9×13 pan, layer half the bread cubes, potatoes, asparagus, and cheese. Top with all the bacon mixture. Add remaining layers of bread, vegetables, and cheese. In a bowl, beat the eggs; add milk and seasonings. Pour egg mixture over pan ingredients. Cover and chill overnight. Remove from refrigerator 30 minutes before baking. Bake uncovered at 325* for 70 minutes, or until a knife stuck in the middle comes out clean.


  • Quick Homemade Apple Fritters


    1 cup unbleached flour

    1 1/2 teaspoons baking powder

    1/2 teaspoon sea salt

    2 tablespoons sugar

    1 egg

    1/3 cup milk

    1 1/2 cups chopped apples

    canola oil for frying

    Sugar/cinnamon to roll fritters in

    Heat an inch, or so, of canola oil, over medium heat, in a small skillet until approximately 400*.  Prepare recipe while oil is heating.   Mix dry ingredients.  In separate bowl, beat egg and milk; stir into dry ingredients and mix well.  Add chopped apples.  Drop small spoonfuls into 400* oil and fry until golden brown, turning once.  Remove from oil, and drain on paper towels.  Roll in sugar/cinnamon mixture.

    Makes approximately 20 small fritters