Category: Continuing Ed for Moms

  • Tribute to Mom

    Tribute to Mom

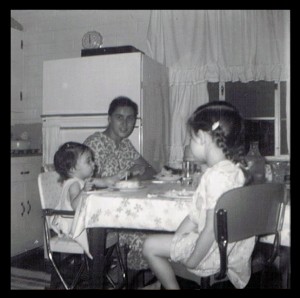
    The Urban Homemaker is epitomized in my own mother.  I took it for granted, as a child, and foolishly thought most homes were like mine, with a mother who cooked supper every night, baked the best cookies and cinnamon rolls, and actually said she liked doing laundry and ironing!  I did wonder at times why some of my elementary classmates hounded me to trade my lunch for theirs.  🙂

    Mom became an urban homemaker when she and Dad married and settled in a big city out West (where her asthma was supposed to be better), far from their families, and the rural lifestyle in the East where they were both born and raised.  Despite being raised in a large family, in the country, my mom says she wasn’t much of a cook when she got married.  By the time my sisters and I came along though, as far back as my memory serves me, Mom’s food was wonderful!  My dad would take us all out “for dinner” (39 cent hamburgers and French fries) once every two weeks when he got his paycheck, so Mom had ample time and experience to hone her cooking skills.  She made food from “scratch” as it was less expensive than the boxed variety.  She did not own fancy cooking tools, or even a dishwasher (my dad said he had four dishwashers and didn’t need any more)!    After our outing at the burger joint, we would go to the grocery store – Dad would hand Mom $40 cash, and she would buy two weeks worth of groceries while the rest of us waited in the station wagon, listening to the radio and enjoying our time with Dad.

    So… times have changed, yes.  We have been liberated and don’t have to do the mundane cooking and cleaning that was once a natural, necessary task for us.  It’s become easy, acceptable, and excusable to let the restaurant chains feed us more often than we cook.  Losing the art and skills of homemaking has cost us more than just monetarily; it has deprived us of our innate ability to nurture our families, and it has led to a nation of many unhealthy people.

    In a review in Eating Well magazine of Michael Pollan’s latest book, Cooked:A Natural History of Transformation, Pollan says, “Cooking is key to changing our health and the environment.”  When asked about a person who just doesn’t have time to cook, Pollan replies, “Well, that same person has an hour for yoga or surfing the Web.  We put pressure on the kitchen to save 10 minutes to do something else.  I’m just arguing that it’s important – for your health, your family life and your sanity”.

    I am truly grateful for my mother and for her beautiful portrayal of homemaking.  We don’t all have a mother like mine, but we can all be inspired to learn and grow, and transform the way we look at the task before us of raising a healthy family.

    So…what’s for dinner?  🙂

  • Healthy Blender Pancakes


    We were hungry for pancakes this morning, and I’ve been wanting to try Marilyn’s Blender Pancake recipe in her wonderful cookbook, Breakfasts for Busy Moms. We were not disappointed!  If you haven’t put your Bosch blender to the test yet, try it out with this recipe!  It’s AMAZING!  Put the ingredients into the blender (all except the baking powder and baking soda) and blend on high speed for 4 minutes.  Add the baking powder and soda and blend briefly.  Pour batter right from the blender onto a hot, lightly oiled griddle.  One recipe makes enough for 4 people, and it got “thumbs up” from the whole family!  I used 1 1/2 cups of a cracked 9-grain blend that I’ve had awhile, but a whole 7-grain blend would work great, as well as the combinations Marilyn suggests in the cookbook.  Even using just one whole or cracked grain, such as wheat, spelt, etc., would work just fine!   Wouldn’t it be interesting to try buckwheat as a gluten-free alternative?  I used buttermilk, but for those of you who are dairy-free, fruit juice would work as the liquid.   These healthy, hearty, yummy pancakes are a wonderful way to start the day.

    MARILYN’S FAMILY FAVORITE BLENDER PANCAKES

    1 3/4 cup buttermilk (or fruit juice)

    1 egg

    2 T. olive oil

    1 t. vanilla

    2 T. honey

    1 t. salt

    1/2 cup raw brown rice

    1/2 cup pastry wheat or Kamut

    1/2 cup rolled oats

    1/2 t. baking soda

    2 t. baking powder

    Blend at high speed for 3-5 minutes, until smooth.  Then add

    baking powder and soda and blend in briefly.

    Pour batter onto hot, greased griddle and cook until bubbles on unbaked side

    begin to break; turn once and cook on second side until done.

  • So What’s in Your Mattress?

    Did you know the typical mattress gains 10 –20 pounds over its life because your home contains millions of dust mites and their fecal matter live in mattresses, furniture, carpet, and children’s stuffed toys?  Not a very pleasant topic but there is an easy, safe solution to a nasty household problem.

    Here’s the scoop:

    Dust mites are microscopic. About 50 of them can fit on the head of a pin. They  feast on the fungus that grows from dead skin cells and animal dander.

    On average, one dust mite produces 20 fecal pellets daily. These droppings are the most  common cause of dust-related allergies and asthma.

    Dust mites product 200 times it’s body weight in excrement during their normal life span. They can live without food for up to a year.

    The average life cycle for a male house dust mite is 10 to 19  days and a female house dust mite can last up to 10 weeks, laying 60 to 100 eggs in the last 5 weeks of her life. In her average life span, she will produce approximately 2,000 fecal particles.

    Their favorite breeding spots are:
    • Beds
    • Vehicle seats
    • Pillows
    • Pet beds
    • Comforters
    • Sofas
    • Stuffed toys
    • Anywhere organic material collects
    • Upholstery

    Mattresses and upholstery  are warm, often moist, cozy, easy to burrow into environments filled with the dust mites  choice of food…dead skin cells.  Unfortunately dead skin cells do not readily vacuum away or launder well on upholstered furniture, mattresses, pillows etc.

    The fecal matter of dust mites is lighter than air and becomes airborne when disturbed by activity like fluffing pillows and tossing and turning during the night and especially disturb those prone to allergies and asthma.

    I think you will pleased to know that Norwex Mattress Cleaner is a natural product which contains non-pathogenic microorganisms that are the active ingredients.  These microorganisms do not cause disease but instead they are good bacteria and they work to “eat up” all the accumulated dander, dead dust mites, and dust mite fecal matter that has accumulated in the mattresses, pillows, upholstery, etc. and convert it into carbon dioxide and water

    This spray leaves no residue.  Some people who have used this product have reported the elimination of snoring, reduction in the severity and frequency of asthma, eczema, bronchitis, rhinitis, morning sneezes, itchy eyes and blocked nasal passages and even improved sleep!

    The Mattress Cleaner Spray only needs to be used quarterly (more often if you have severe allergies).  Use approximately 5 sprays for a twin mattress, 8 sprays for a double, 12 sprays for a queen/king size bed, 1-2 for a pillow, 2 sprays for stuffed animal and 5 sprays on fabric upholstered sofas.

    What a simple, healthy solution to a nasty topic.  Try it today!

  • Solar Cooking Tips from a Pro

    Written by Marilyn

    My friends Tara Miller and Sam Brown have compiled numerous practical tips including a Five-Day Kitchen Diary to make cooking in the Global Sun Oven successful and fun.  Sun Ovens are the perfect way to keep a kitchen cool while reducing energy consumption during the hottest days of summer.

    Ed Note: They have been cooking most of their food in their Global Sun Oven year- around for 20 years even here in the coldest part of a Colorado winter.  They enthusiastically recommend Solar Cooking to everyone and practice what they preach as they own four sun ovens and have traveled to Peru to teach natives how to cook in it.

    What can you cook in a solar oven?
    A solar oven allows you to prepare a wide variety of high quality foods including vegetables, soups, stews, beans, desserts, breads, cakes, meats and more.

    Getting Started Basics:

    • Use black or dark cooking pots or cast iron.
    • Brush oil on fresh meat to assist with browning.
    • Soak dried beans, lentils, or grains in water overnight.
    • When cooking dry foods such as rice, use slightly less water than usual.
    • To cook vegetables: Preheat your dark pot that has a cover and use a small amount of water, about 1/3 cup. This accelerates the cooking process and also preserves vitamins. A covered pot keeps the moisture and heat in the pot.
    • For soups and stews:  Don’t put too much in one pot. It’s better to use two smaller pots.
    • Plan on a little more time to cook than for conventional stove top or oven baking.
    • Use a sunny, south facing location. Plan for a convenient shelter nearby such as a deck.
    • Prop the oven toward the sun so the sunlight strikes the glass at 90 degrees and adjust the oven toward the sun every 30 to 45 minutes for maximum temperature.
    • Best cooking hours are 10:00 am to 3:00 pm. but longer in the summer.
    • A folded towel placed over the glass when the food is done will hold food warm for a couple of hours.

    Baking Tips:  Baking normally will take longer than baking in a conventional oven.  For cornbread, preheat a cast iron skillet or baking pan for a crispy crust. For cakes, yeast breads or baked potatoes, wait for a clear day so you can keep the heat high and consistent.  Quick breads have been most reliable for me.  Yeast breads baked in smaller, darker colored baking pans bake best in the Sun Oven. These are a favorite bread pan.

    Stove Top Cooking Tips: Start the liquids heating up in the cooker ahead of time, or bring water or other liquids to a boil on a conventional stove top and then put the pot in the cooker. Also, preheat the cooking pot; the lid, and the rocks to keep the heat up.

    Lower temperature or simmering Tips: Adjust the Sun Oven slightly away from the direct sun. Simmering can happen even if the day is slightly overcast.


    Cooking while you’re away from home: Put your food (say a pot of seasoned, pre-soaked beans) in the well-propped cooker, adjusted for noon. Enjoy the satisfaction of coming home to a solar cooked meal ready to serve.

    Quick and Easy Ideas for a busy day:  Bake extra potatoes for frying later, cook chunks of squash, whole chicken, burritos, frozen foods, and precooked entrees.

    Diary From a Northern Hemisphere Kitchen by Tara Miller

    WEDNESDAY:

    Roast chicken in solar cooker. Dust a little paprika on top so the chicken isn’t so white. This will enhance the color to the surface of the meat. Place potatoes and carrots or other vegetables alongside the chicken for the last 20 minutes or so.  Refrigerate or freeze select meat (such as the breast meat). We ate with our fingers and feasted on the chicken, saving the bones and skin for soup stock.

    THURSDAY:

    Boil leftover chicken bones several hours or more to make stock. Adjust cooker regularly to keep it simmering.

    Lunch: Cold, diced chicken breast salad or sandwiches from yesterday’s leftovers.

    Supper: Chicken Soup: In the late afternoon,: strain and discard the bones, skim fat (Refrigerate or freeze part of broth for future use). Return about a quart of the broth to the cooker and add 1/4 cup barley, cook at least an hour. About 45 minutes before supper time add other vegetables: onion, garlic, carrots, green beans; later, add chopped chard. Season at the last minute with garden sage, thyme, salt.

    FRIDAY:

    Lunch: leftover soup, either cold or warmed in cooker.

    Midafternoon: Start the rice: bring 4 cups salted water to a boil in an oversized kettle  (the extra space will serve as a steamer later) in the solar cooker, add 2 cups brown rice. Position in slightly advanced to sun perfect position* and rice will cook with no further attention.

    Supper: When the rice is nearly done place quick cooking vegetables such as edible pea pods and chopped greens to steam on top of the rice and cover. To serve: Skim vegetables off the top of the rice and season creatively: Try garlic, olive oil and basil, or chutney, or plum sauce or whatever you have on hand.

    SATURDAY (This is a busy day diary and presumes the use of more than one cooker.)

    Early:     Set cookers in position facing where the sun will first strike.  Place an empty cast iron kettle with cover in one cooker to preheat for potatoes later.

    Breakfast: Leftover rice from the bottom of yesterday’s kettle. Fix it the way you eat your breakfast oatmeal or cold cereal with cream or yogurt, butter, maple syrup, brown sugar, nuts, dried fruits etc.

    Midmorning: Scrub potatoes and place in hot, preheated kettle or cast iron pot. Position in slightly advanced to sun perfect position* and potatoes will cook with no further attention.


    Lunch: Remove the hot baked potatoes. Leave kettle in cooker, readjust the solar cooker for full sun power. Eat baked potato bar with your favorite toppings such as bacon bits, shredded cheese, butter, chives, etc. Cool the rest of the potatoes and refrigerate. Leftover potatoes will be used either grated for breakfast hashbrowns and eggs, or made into potato salad later in the week.

    Throw corn on the cob in the kettle. This was tough corn, so I husked it and left the cooker at sun perfect position* so it would cook for about 45 minutes. Other options for afternoon cooking in that preheated kettle: whole beets, or  soup.

    * Sun-perfect position has the glass tilted exactly perpendicular to the angle of incoming sun light and with the shadow symmetrical behind the cooker. “Advanced” to sun perfect position has that shadow set so that “sun-perfect position” will come in about 20 minutes. My Sun Oven will bake at peak temperatures for 45 minutes to an hour with no further adjustments starting from this advanced position.

    SUNDAY

    Our little cherry tree has one final picking of sour red pie cherries. We preserved some of them by canning in the solar cooker.   Canning in a solar cooker is considered an advanced skill recommended for experienced solar oven enthusiasts only.  So I have not included the instructions.  If you want more information, please email me at marilyn@urbanhomemaker.com

    Cherry Cobbler

    Place four cups of juicy cherries in the bottom of black enamel 8 x 12 baking pan. For a festive touch, save out a handful to decorate the top.

    Stir into cherries either 2 tablespoons corn starch or 2 tablespoons quick cooking tapioca. If using tapioca, let it sit for at least 15 minutes.

    Mix crispy crust by:

    Cream together 1/2 cup butter with 3/4 cup brown sugar

    Sift together in a small bowl:

    1 cup flour

    1/4 teaspoon baking soda

    1/4 teaspoon baking powder

    1/4 teaspoon salt

    Mix flour mixtures with the butter/sugar mixture, then add:

    1 cup oatmeal


    Stir well and spread over the top of the cherries. Just for fun make a little drawing on top of the crust with the saved cherries. Consider that the dark color of the cherries may encourage more efficient absorption of solar radiation.

    Optional version is to put the entire crust UNDER the cherries. Be sure to soak the tapioca in the cherry juice at least 15 minutes:  Use 1 1/2 Tablespoons quick-cooking tapioca for each 1/2 cup juice.

    Best of all, Have Fun with your Global Sun Oven!

  • Local Foods to Local Markets

    Do you LOVE Farmer’s Markets and participate in your local market as a producer or a consumer?

    Today I want to talk about ways you can help promote and support your local agricultural economy especially in Colorado.  If passed, Colorado would join nearly 20 other states (plus 5 pending!) who already support cottage industry food production.

    A bill recently introduced in the Colorado Senate would increase consumer access to local fresh and value-added agricultural products by permitting home and community kitchens to easily register to legally produce and sell low-risk foods.

    The goal is to encourage local farmers and small producers as entrepreneurs to spur economic development in Colorado communities.

    Provisions in the bill include:
    • It will allow consumers to purchase these products made with quality ingredients grown by their neighbors and other local farmers.
    • It will benefit our communities by keeping money circulating close to home.
    • It will encourage Coloradans to purchase nutritious food in their communities
    • It will allow local growers to be more profitable by utilizing products left over after market day, seconds, and surplus production
    • It will help local communities achieve self-sufficiency and sustainability
    • It will reduce the number of miles food is transported from farm to fork
    In Colorado and in other states it is now it’s up to us.  We must contact our Senators and Congressman  by phone or email—letters will not arrive in time.
    I would love to hear from those of you in other states who have successfully passed or benefited from similar legislation.
    In Colorado:

    1)  Contact all members of the Senate Agriculture Committee  to voice your support.  Please thank Senator Schwartz in Colorado, the Ag Committee Chair, for crafting/sponsoring this bill.

    2)  The Senate Ag Committee will hear this bill in Denver Thursday, April 28th at 1:30 PM.  If you can testify let Senator Schwartz know.  (Contact info in her email attached below.)  If you want to carpool from the Western Slope, please let me know as well.

  • Making Bone Broth Video Demonstration


    Today I’m going to talk about the time-tested process of making bone broths in your  kitchen to restore your health.

    Today’s busy lifestyles, wide use of antibiotics and nutrient deficient foods have pre-disposed many children and young adults to unhealthy gut health resulting in sinus problems, gluten intolerance, chronic fatigue, arthritis,  allergies, and other degenerative conditions.  Having said that, I remind you I’m not a doctor but I speak based on my own experience and that of others.

    You can easily master the art of making your own bone broths or stocks from leftover chicken, beef, or fish bones.  Add chopped carrot, celery, and onion.  Simmer for 24–72 hours.

    Bone broths are very nourishing to the intestines because they are full of natural gelatin that coats and soothes the gut and contain high amounts of calcium, magnesium, and other  trace minerals.  View the video for details.  The broths can be made into gravy, soups and stews, or even used as a tonic – type drink.  They are delicious, and thick when properly made.

    For free information, including an emailed list of things you can do to get started with better health, as well as tips, recipes and resources,  click on the
    Reversing Food Allergies On -Line Cooking Class Link .

    The 12 week class includes over 50 video demonstrations, and over 200 recipes.  Class registration goes through April 4 at the discounted price, classes start April 6.  Save $20 with coupon Code HEAL which is good through April 1.  Remember, registration is for life-time access to the materials.  Class schedule is as follows:

    • Lesson 1: Overview & Basics
    • Lesson 2: Detoxifying
    • Lesson 3: Making Stock
    • Lesson 4: Fermented Foods
    • Lesson 5: Soups & Stews
    • Lesson 6: Breakfasts
    • Lesson 7: Lunches
    • Lesson 8: Dinners – Poultry & Pork
    • Lesson 9: Dinners – Beef & Lamb
    • Lesson 10: Dinners – Seafood
    • Lesson 11: Appetizers, Snacks & Side Dishes
    • Lesson 12: Desserts

    Bonus Video:  How to Make Ghee – Free of allergens such as milk solids and lactose and safe for dairy intolerant individuals.

    Register for the 12 Week Reversing Food Allergies Class Here.

    Disclaimer: While I can’t guarantee your food allergies will be reversed by mastering the art of traditional cooking methods, I do believe your health will be improved.

    Disclosure: http://cmp.ly/5

  • Prepared or Paranoid? – Eyewitness report from Japan

    Ed Note I received the following eyewitness perspective from  Navy wife Tanya, living about 240 miles from the nuclear site.  I found Tanya’s perspective refreshing and encouraging as she and her family are learning to live with drastically less power and water in the aftermath of the earthquake.  I hope you will glean perspective and helpful tips as you consider what preparing for the future with an Almighty God still firmly in control will look like for your family.  Marilyn Moll

    Dear Marilyn,

    The Wisdom to Prepare.  I think sometimes it’s a fine line between prepared and paranoia. Both are reigning at the moment.
    We are in Misawa, Japan. We are 232 miles from the nuclear facility that’s on the verge of meltdown. Yet we’re not panicking (well, some people are, we’re not) while folks in the states are going ballistic buying iodine pills, which can actually harm you if you take too much, and really only protects your thyroid from radiation poisoning (other organs are still at risk).

    Some people are arming themselves not with wisdom and information, but fear and paranoia.

    There is also only so much you can prepare for, and if you try to “prepare” for the future by thinking of every possibility, you start to leave the realm of the first P (Prepared) and enter the realm of the second P (Paranoid), because once you start thinking of all the “But what ifs” it becomes overwhelming.

    We have, for months now, been starting to practice meal planning, freezer cooking, grinding our own grain and baking our own bread, etc. But even that has it’s drawbacks. We are military, but live off base in a house out in town. Our stove is propane gas. So when we lost power for 2 days following the earthquake, we could use the stove by manually lighting the burners. But the stove electronically controls the oven, so we couldn’t bake.

    Most freezer meals require an oven to cook, so we were considering creative options, like dumping the lasagna in an aluminum pan and firing up the charcoal grill. Not only that, since we had no power, the freezer was no longer any use. My husband bought me a water bath canner but I haven’t had an opportunity to use it yet.

    That’s what I  mean: prepare for the future how?  What if I HAD a rack of canned goods that then got knocked over and broken in a huge earthquake? What good is that then? I don’t often see pictures of home canned goods with padding or bungee cords protecting them, so are those people really “prepared”?  You simply can’t predict/prepare for every possibility. (emphasis mine.)

    As far as grinding our own grain, I fortunately had just baked 6 loaves of bread. But if we lose power again, I’ll have to resort to store bought flour, and have to knead it by hand. Fortunately, I’ve done that in the past, before I got the Bosch mixer, so I’m not a stranger to that method. I think that’s the most important thing people can do to prepare for a disaster: learn these skills. (Ed Note:  The Urban Homemaker has always used the tagline:   “old-fashioned skills for contemporary people.”)

    That doesn’t mean, become a homesteader and live off the grid. That’s not for everyone–heck, it’s not even for ME! I’ve been watching “Homesteading for Beginners”, and while there are great tips and helps, just watching it makes me realize I could never do that as a lifestyle. But I want to at least try my hand at some things so I KNOW I can carry my family through anything.

    Right now our town has for the most part escaped any serious damage–no deaths or injuries, that I’m aware of. The harbor was hit by a small tsunami, and the fishery was wiped out, but no lives. But the base is running on limited power (for the record, the Fukushima power plant is NOT the only one, though the media seems to be implying that, there are over 50, and only that one was damaged; however, they all shut off when the earthquake hit as precaution, and  now they have to refire them up slowly), we are being asked out in town to conserve as much as possible.

    Fuel is scarce and being rationed (but my husband has an extracycle, so he’s OK; I have 4 kids, but we’ll just have to limit van trips to absolute emergency).  Propane is running out (that’s how our stove runs). The kerosene distribution center–that’s how, off base, we get heat (for the house, water, dryer, etc)–is in Hachinohe, which was hit by tsunami (you can youtube video of it), and the tanks got water in them, and it’s anyone’s guess when we’ll get more. In other words, whatever little kerosene is in our home tank is all we have until who knows when. So we keep all heat off, boil water for dishes (but that uses propane), one bath a week for the kids, etc. I’m considering line drying clothes inside, but we just had another huge snowfall so it’s cold even inside.


    Anyway, I think this was a very timely article you wrote, and so true–only the wisdom of God can prepare us in the way that is most important for any disaster.

    Our kids have been pretty upset by the non-stop aftershocks, but they are getting better every day. Because every day we remind them that nothing has happened to them yet, and that’s because God protected us, and God will continue to look after us. He’s the only real preparation, because He gives us the peace to calmly make the decisions that will get us through. Thank you again for your work.


    God Bless,


    Tanya Stone
    Navy Spouse
    Misawa-shi, Aomori, Japan
    PS–I made a batch of your pancake/waffle mix recipe. We’ve used it twice already, and I think I’ll make more today since we can use our electric griddle. Thanks!

    Ed Note: There you have it dear readers – read, glean, learn, and pray for the people in Japan to have the wisdom of God to do the next thing.

  • How do I salvage buggy grain?


    Have you ever experienced the sinking feeling of opening a bag of grain to bug invested grain?

    It’s a bit of a sinking feeling.  But here are the tried and true remedies to save the grain!

    A customer writes: ” I just opened the bag & found many many little black bugs roaming about in the bag with some webbing also.” My supplier said that I could salvage the 50 pounds of grain by washing off the grain & letting it dry out.” Another option is to freeze the grain 48 hours to kill the bugs. What have you done to salvage grain?  Here are reader responses:

    • I just saw this today: Preventing and getting rid of weevils in the pantry http://bit.ly/g5iUUo
    • I keep mine in the freezer in airtight buckets for at least a week then store it someplace dry and cool. If I leave it in bags it goes bad, but I live in the gulf South so that makes a difference.
    • I have had this happen before. I now use a variety of strategies including freezing, diatomaceous earth, and oxygen absorbers. I don’t wash the grain – just take it out of the bag (outside) and “sift” it with my hands to get the webbing off. Then (wearing a dust mask) I add in diatomaceous earth and freeze it. I DO NOT tell my kids the grain had bugs!
    • I always recommend grain be stored cool and dry so bugs don’t come alive, or use an oxygen absorber inside a sealed pail.
    • If you don’t want to salvage it for yourself, you can feed it to the chickens as is. they don’t care about bugs 🙂
    • Always transfer grain in bags to plastic storage containers that are food quality with tight fitting lids.
    • Place an Oxygen absorber in the grain pail and then seal it tightly.

    If you are new to food storage and storing grain take mental note or print out these tips.

    Follow me at Facebook: http://www.facebook.com/urbanhomemaker

    Follow me at Twitter: http://www.twitter.com/TheUrbanHome

  • Continuing Ed for Moms Today at Noon – Mountain Time

    You are Invited to Join Me for Continuing Ed for Moms  or Urbanhomemaker Live Talk Radio Today and it’s Free

    Date: Friday, February 18, 2011 at 12:00 Noon MT

    Time:  12:00 Noon MT ( 2:00 ET, 1:00 CT, 11:00 PT)

    Dial In: 724-444-7444 CAll ID 83314

    Listen InClick on this Link to listen in to UrbanHomemaker Live Talk Radio

    http://www.urbanhomemaker.com/productcart/pc/viewContent.asp?idpage=33

    Subject: How to Ferment Anything?  Who, What, Why, Where, and How!  We will be talking about what  fermented foods are, what the many health benefits are, and some tips to getting started.

    Guest: Jenny McGruther of Nourished Kitchen. com

    The purpose of Continuing Education for Moms is to encourage mothers and homemakers in their high callings with useful, practical, and best of all FREE information and resources.

    Please join me LIVE or watch for a posting of a free MP3 recording later today.

    Don’t forget to:   Enter the Contest to Win a Free Registration to Get Cultured!  How to Ferment Anything. ($150 retail value)

    Lesson Details Page – Check out what each lesson offers – there is a total of 13 lessons.  They can be taken individually or in a complete package.

  • Tips for Avoiding and Overcoming the Flu, Naturally!

    Aunt Missy

    Mary came down with a sore throat on Sunday, right after I thought we had missed the cold and flu season.  After applying some of the below tips, she said her throat was almost better a day later.

    Here are some of my best tips for Avoiding and Overcoming the Flu Naturally that have worked for our family:

    1. First of all, drink AT LEAST two quarts of filtered water a day. Moist mucous membranes are less likely to allow those little flu bugs to get a foothold. May I suggest that you consider investing in a drinking water purifier as low cost “health insurance”? The Multipure system costs eight cents per gallon of purified water and produces much higher quality of purifie water and is much more convenient than bottled water.

    2. Frequent Hand washing for AT LEAST 20 seconds to get your hands really clean and germ free. Since hand washing is always important in avoiding colds and flus, be sure to wash and rinse for at least 20 seconds to be effective, and teach your children to do the same.

    3. Consider using the Neti Pot type of apparatus that rinses the nasal passages with a saline solution.  I did this last winter twice a day routinely and avoided colds.  I forgot about it this year, and just started in again.

    4. Did you know that many herbalists are now recommending a maintenance dose of Elderberry to gently stimulate the immune system from catching those nasty bugs instead of echinacea?

    5.  In addition, I always start taking extra Vitamin C or Emergen-C – the fizzy flavored Vitamin C/mineral packets mixed in water.

    6. If you find yourself coming down with the flu symptoms, such as achiness or overwhelming fatigue, increase your choice of Echinacea/Elderberry combination product to at least 6 times a day or as often as every two hours since the immune system stimulation lasts for about 2 hours, plus the hot baths, and drinking extra water and tea.

    7. If you try all of the above strategies and still find yourself or children coming down with a full case of a cold or flu I have found eating very lightly, or fasting from solid foods (not liquids) and using a combination of Ginger, Capsicum, Echinacea,Peppermint, Lemon, Garlic or Golden Seal in a tea form coupled with extra rest is very effective.  The herbs can also be encapsulated, but I like to make a tea of fresh ginger and or peppermint and a little cayenne, plus lemon and honey and drink lots of it.

    8. Spicy foods like jalapeno’s, salsa, or homemade Chicken Soup with a little cayenne are great natural remedies often known as Jewish Penicillin but it works! My recipe for Chicken Soup for Colds and flus contains homemade chicken stock loaded with trace minerals, plus ginger, garlic, and  cayenne.

    9.  Try the wet sock home remedy. I learned this from my neighbor Linda who has been using this method to avoid illness for years.  So I tried it last night when I thought I was getting a sore throat.  This morning I don’t have a sore throat!  Simply put cotton socks in warm water and wring them out thoroughly and put the damp socks on your feet, and then put a pair of wool socks over the damp cotton socks.  Go to bed.  Your feet will feel cool for awhile but the wetness/coolness draws blood and toxins to the feet while you sleep and you will wake up with dry socks and possibly avoid that cold altogether.  I love home remedies that are virtually free and work!

    10. For more information about how to ferment any type of foods and how they benefit our immune system, join our phone seminar on Friday, February 18, 2011 at 12:00 noon Mountain Time. Jenny McGruther, of Nourished Kitchen will be my guest.